How Can I Schedule Social Network Posts With Statusbrew?
Create and customize posts for multiple social networks in one place. With Compose, you can tailor your text, mentions, hashtags, and media to fit each platform’s unique requirements.
As you build your post, you’ll see a preview of how it will appear on every selected network, ensuring it looks perfect before publishing.
Compose helps you draft, edit, and schedule posts to the social profiles connected to Statusbrew, whether you’re working from desktop or mobile.
Note: Certain content types have a unique Compose window in Statusbrew. See the following articles:
This guide will walk you through creating and scheduling posts in Statusbrew’s Compose, which is optimized for every network you manage.
Scheduling Social Network Posts In Statusbrew
Statusbrew makes it easy to schedule your social media posts across multiple networks from one place. Here’s how you can create and schedule a post in Statusbrew’s Compose.
Select Profiles
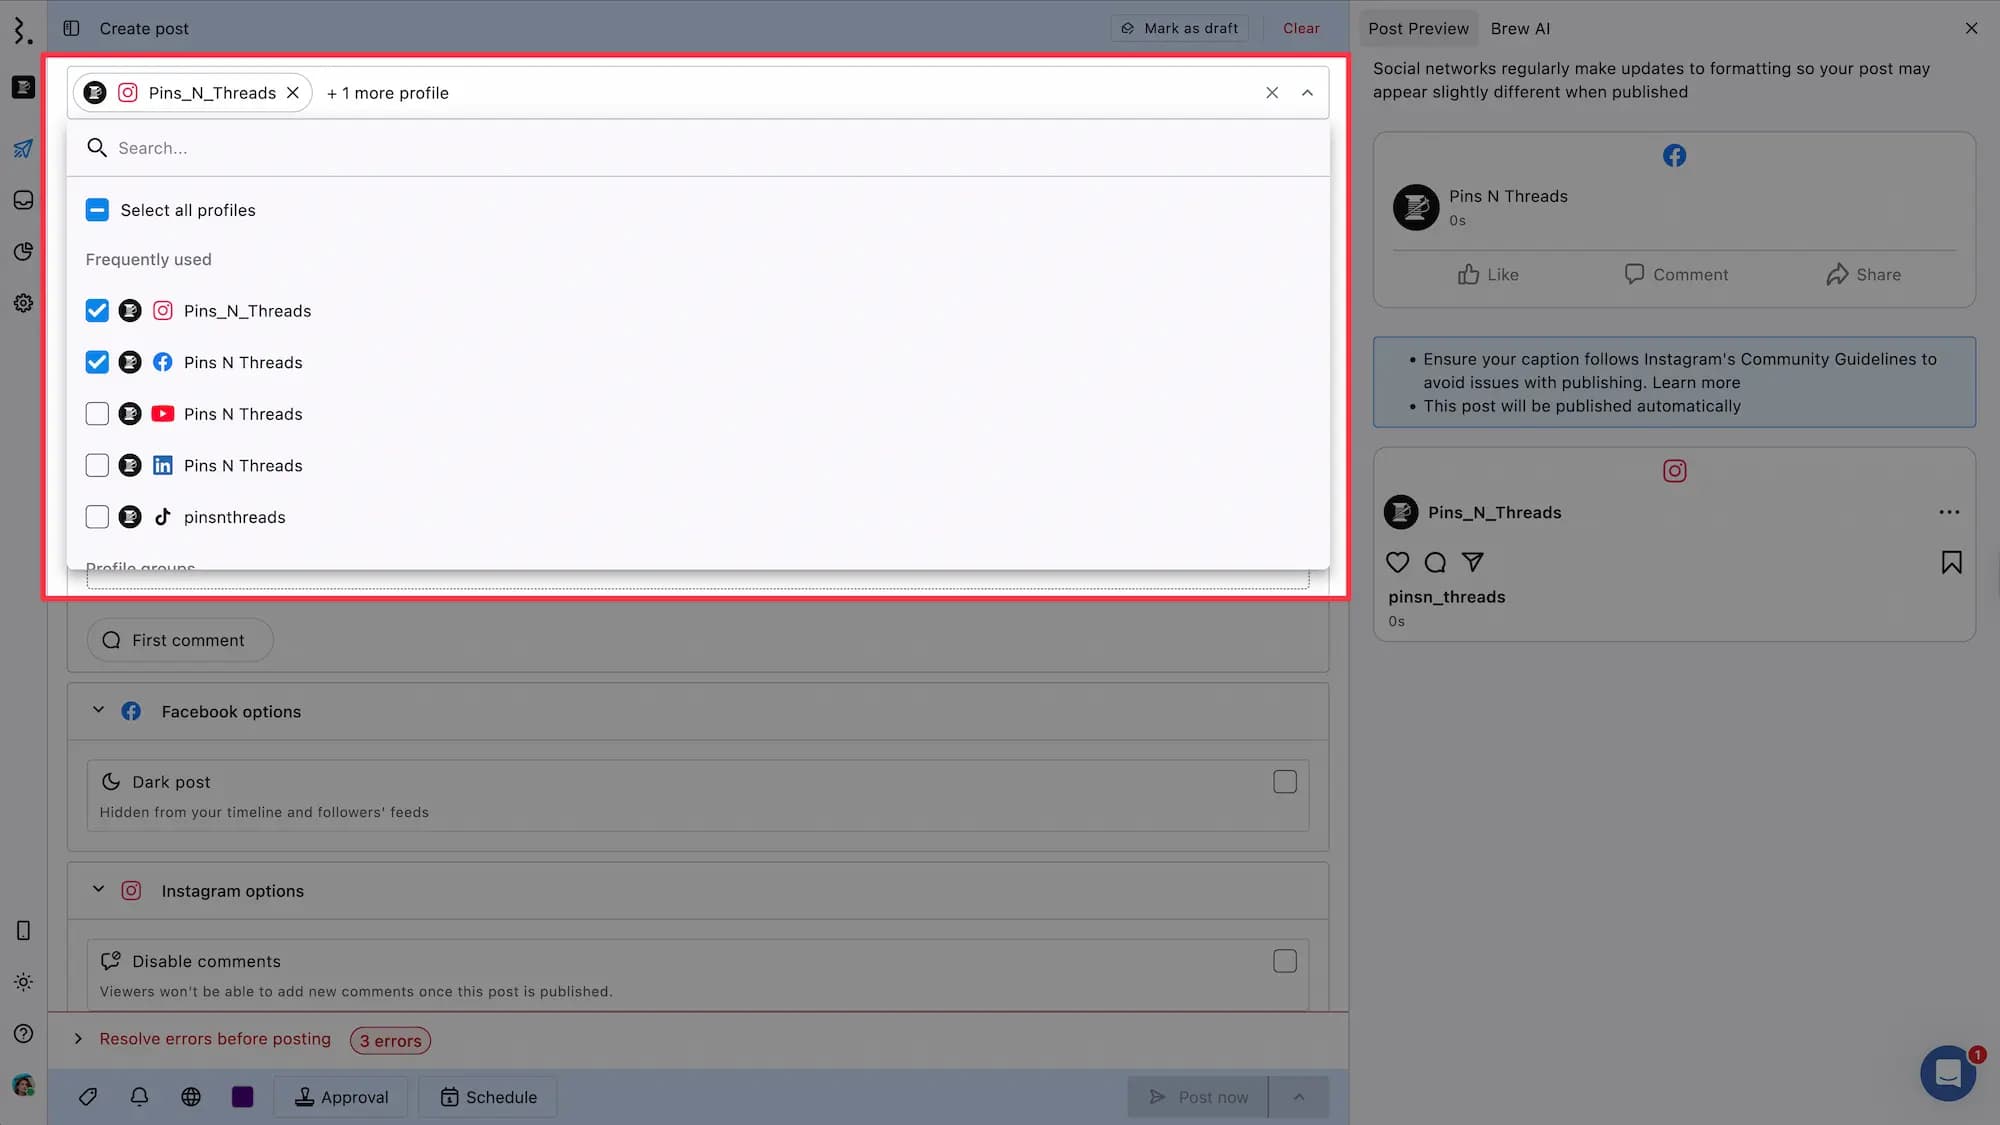
From the Profile Picker, select one or more connected profiles or profile groups to schedule posts for.
In the Profile Picker, you will see:
Frequently used profiles for quick selection.
The profile groups you’ve created
Individual profiles listed and organized according to their social networks
You can also:
Select all profiles at once using the checkbox at the top.
Search for a specific profile using the search bar.
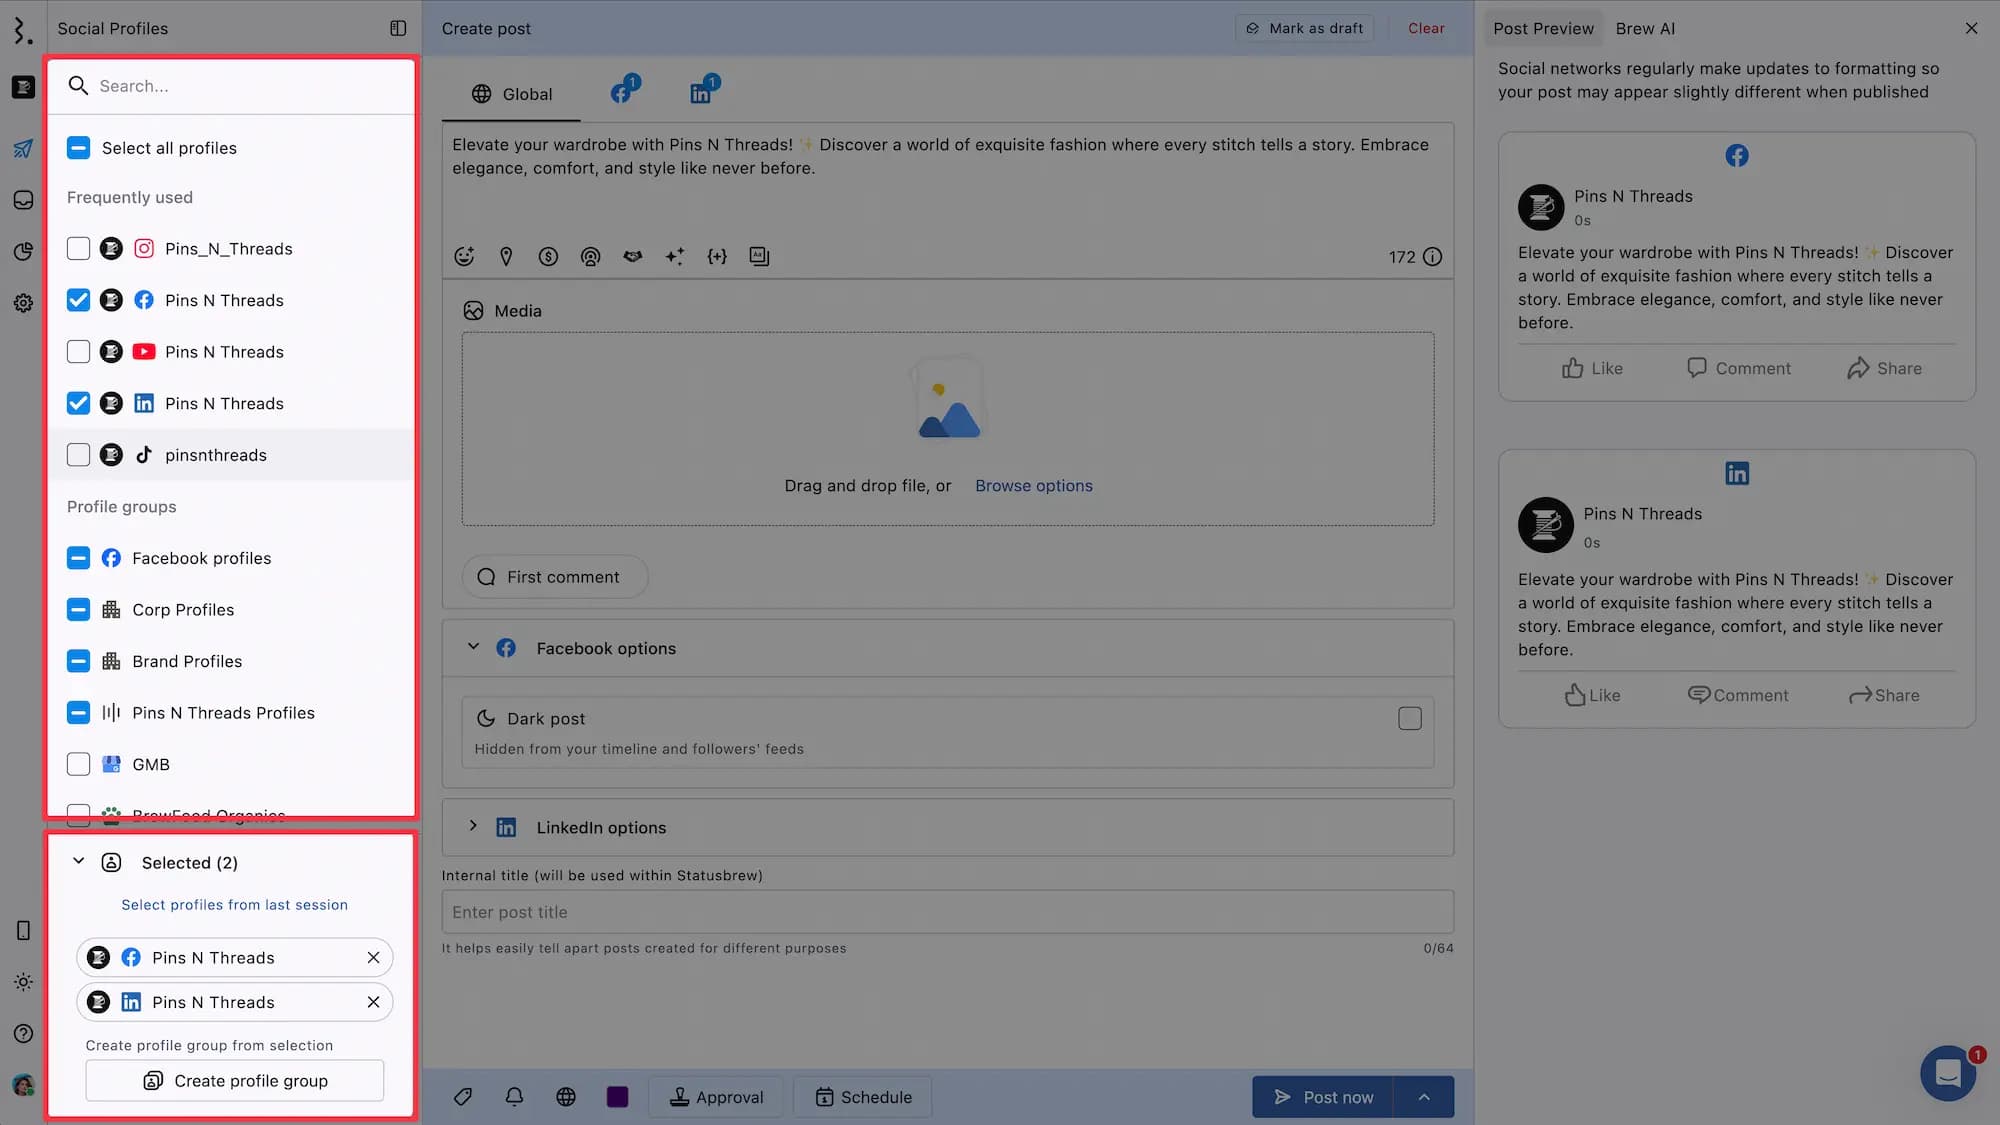
Click Toggle sidenav to open the Profile Picker in sidenav. This will also collapse the Profile Picker at the top.
The Profile Picker is divided into two main sections here:
The top section is where you can search for and select the profiles you want to post to.
The lower section displays details about your current selection. You’ll see the total number of profiles you’ve selected. Hovering over Selected will reveal a Clear button to remove all selections in one click.
There’s also an option to Select profiles from last session, making it easy to reuse your previous setup.
Below this, you’ll find a list of all the profiles you’ve chosen. Each selected profile has a Remove icon next to it to remove it individually if needed.
There’s the Create profile group option, click on which will open the Create profile group dialog to create one.
Create Content
In the Global tab, type your post content in the caption box. The Global tab lets you create content for multiple social networks once. You can then switch to each network-specific tab to fine-tune the content for that platform’s unique style or requirements.
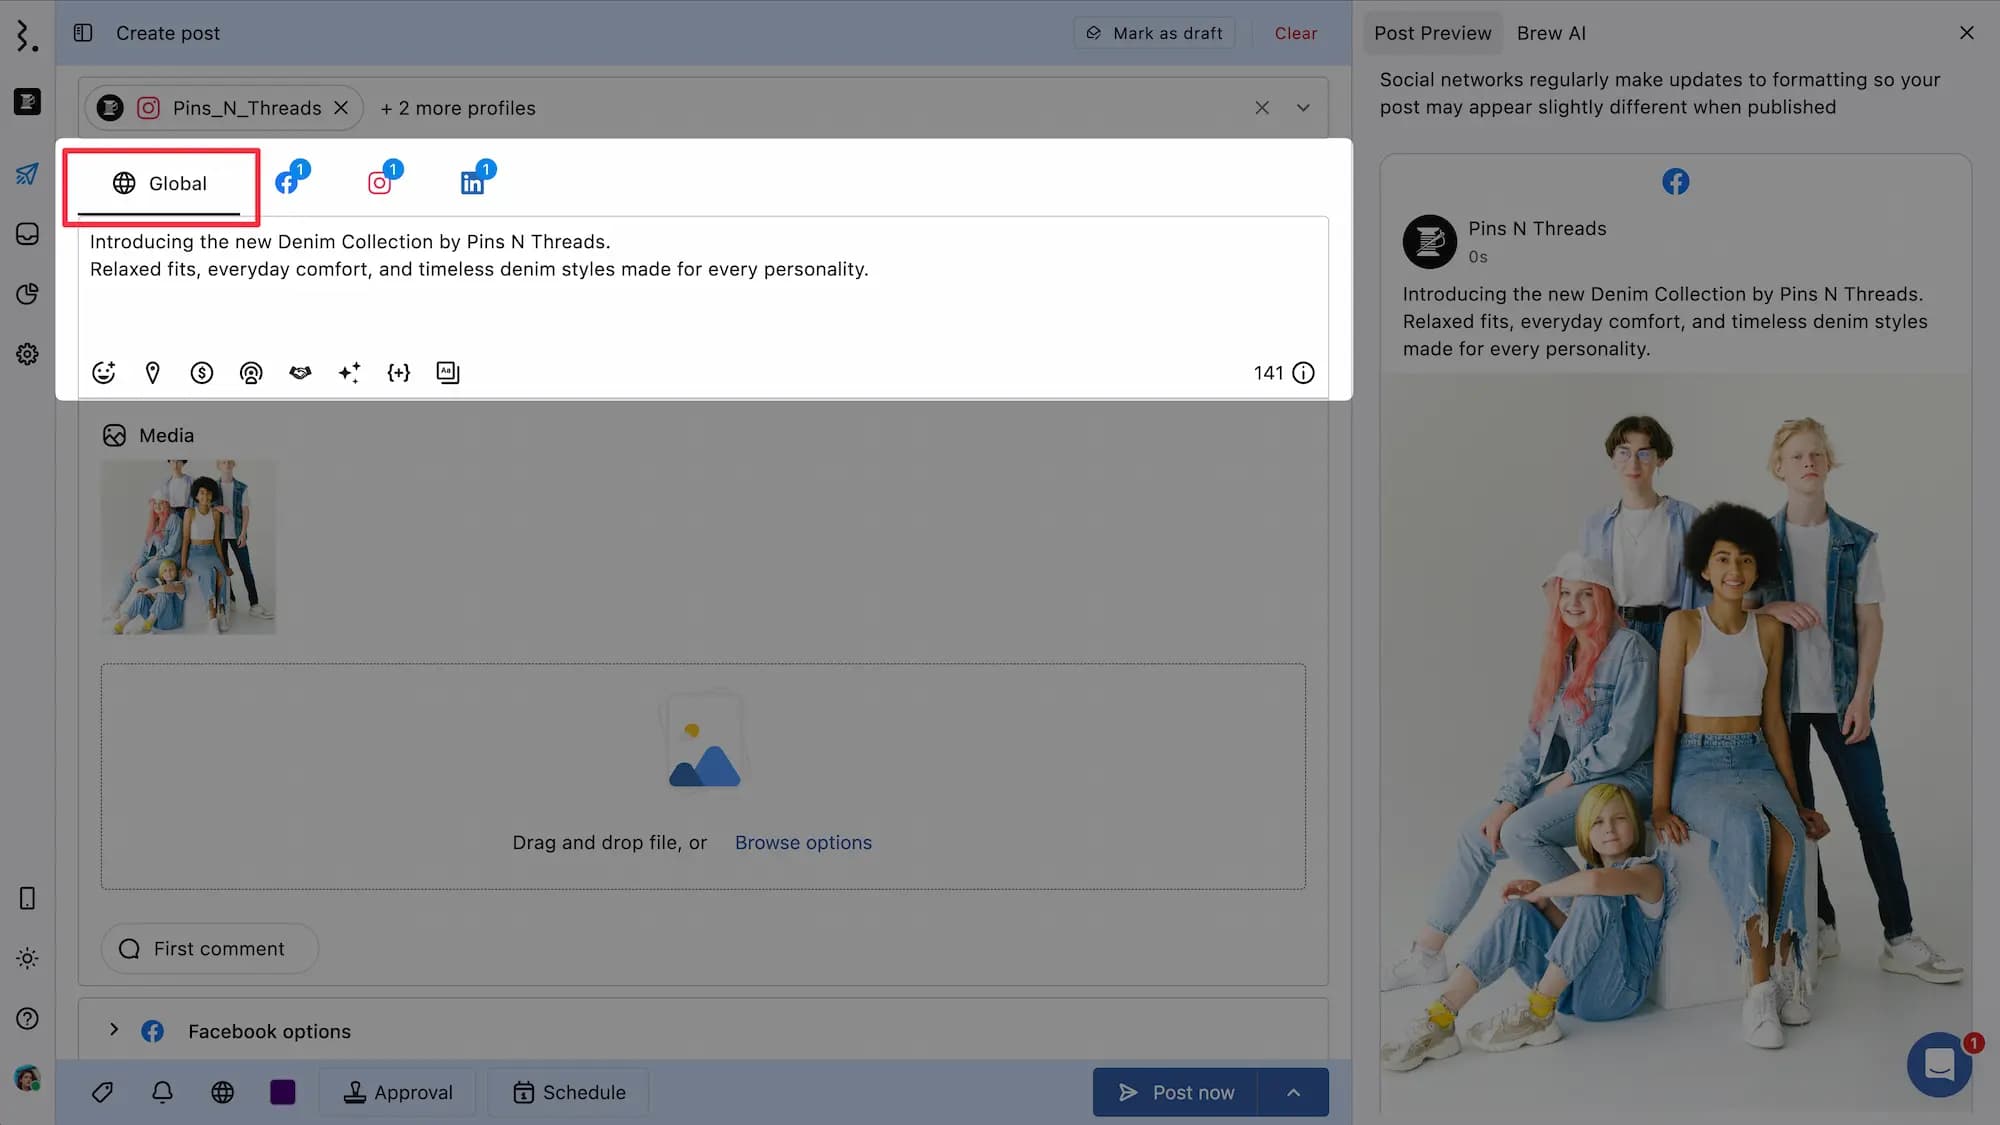
For example, make it shorter on X, or remove the link on Instagram. If your post includes mentions, you'll have to customize them for each social network.
Changes you make in the Global tab will apply to all of your social networks until you start customizing them. To customize your post for a social network, select the tab of that social network from the top of the caption box.
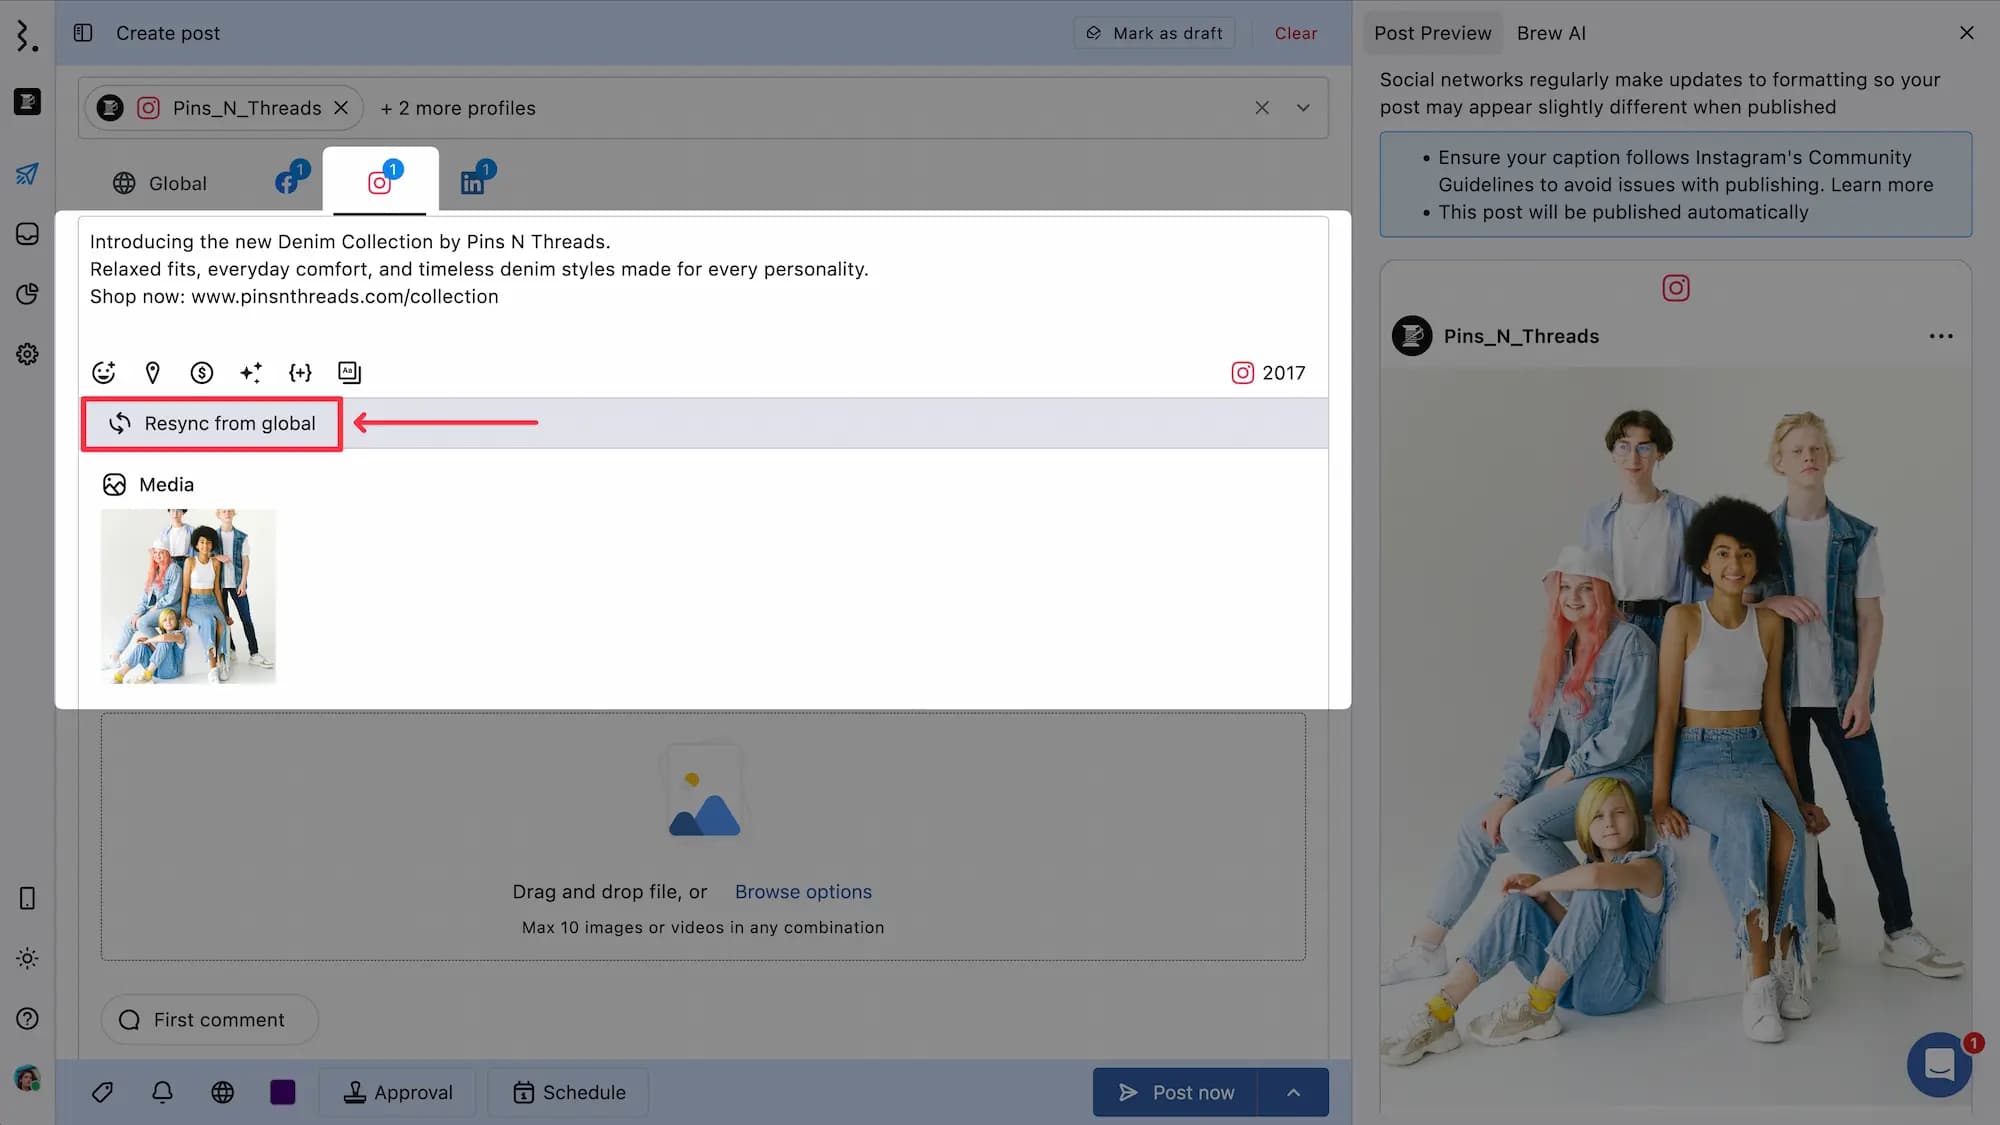
The Sync this version option will appear in the Global tab when the text content in any network-specific tab differs from the Global tab.
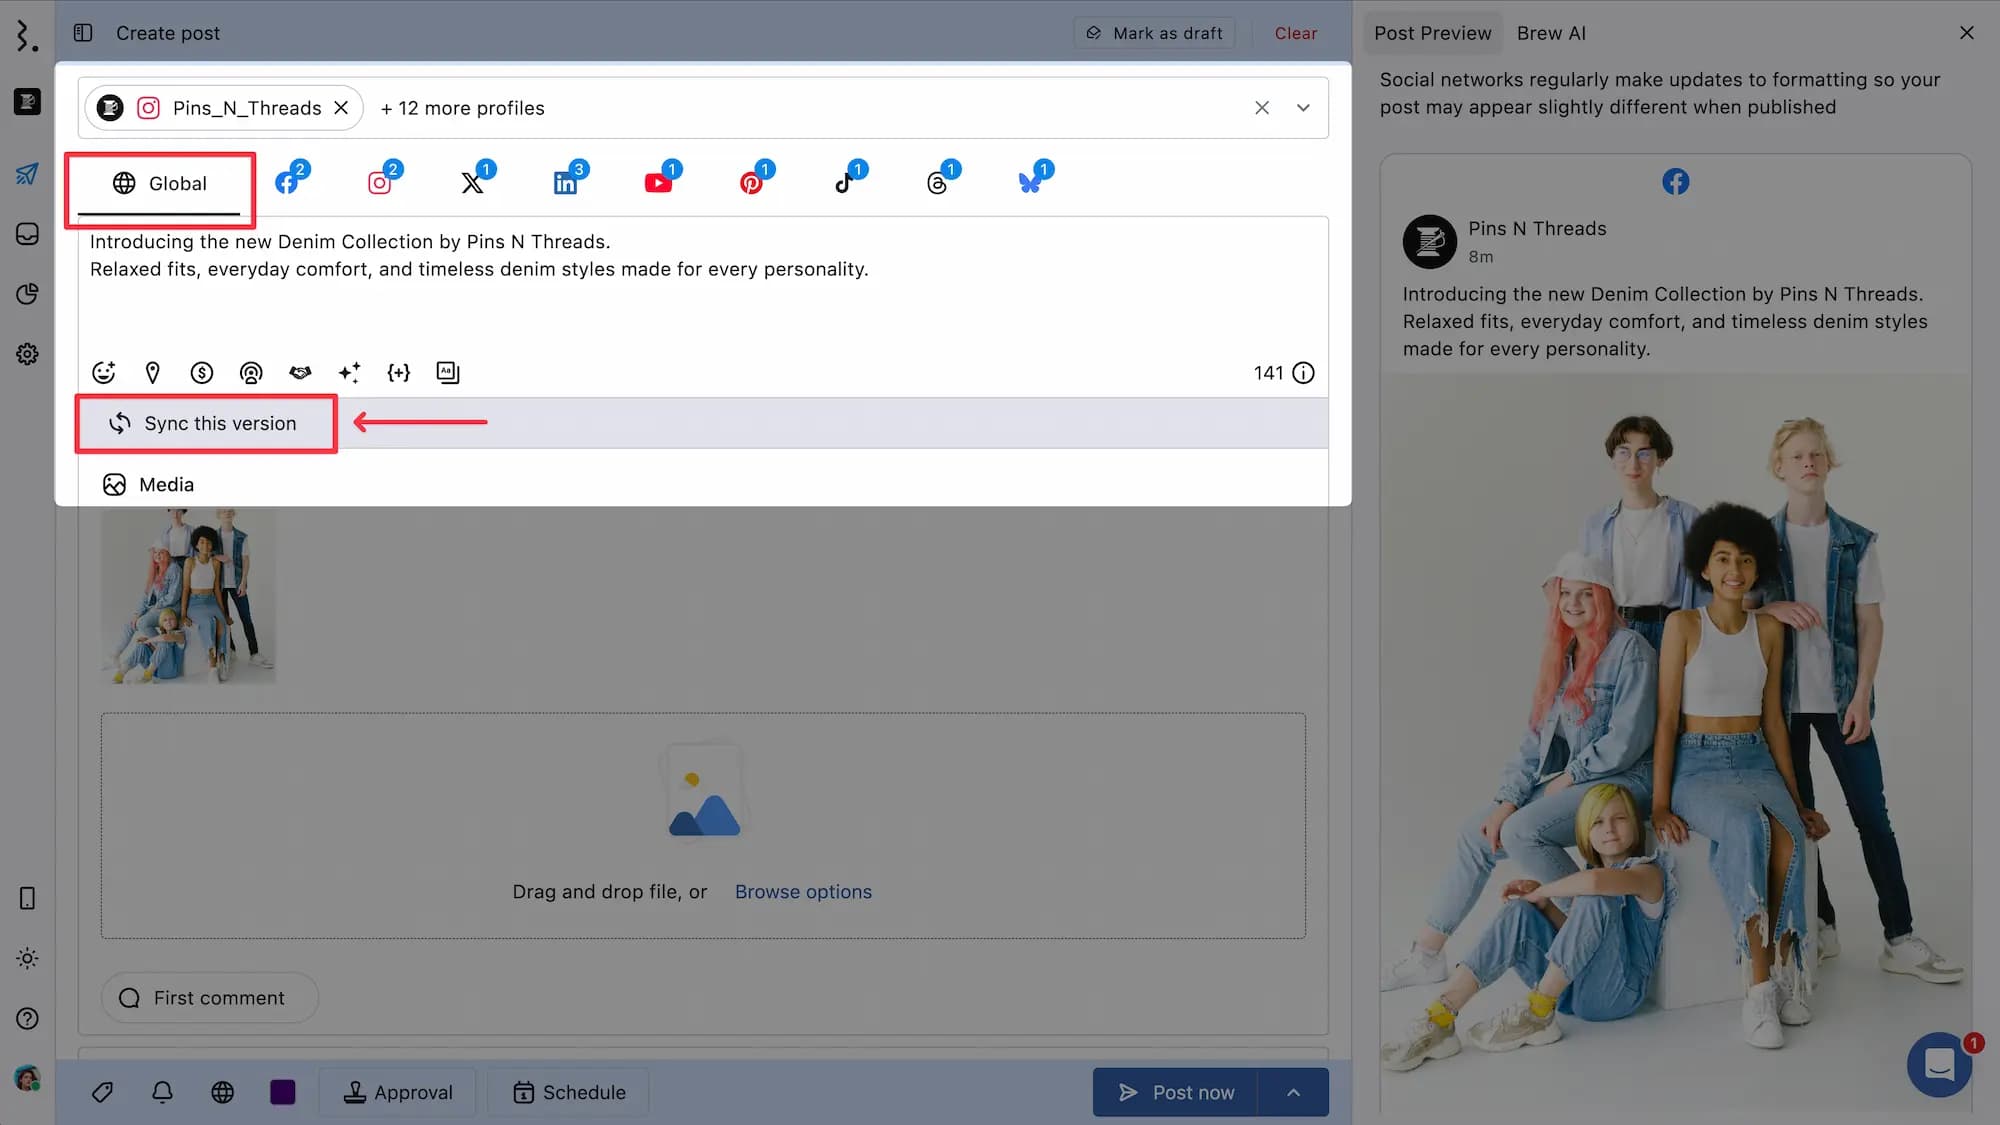
Using Resync text will overwrite the content in those network tabs with the text from the Global tab, ensuring consistency across all networks.
You can also:
Select Emoji to make your posts more visually appealing and relatable.
Add a custom post variable to personalize posts by inserting dynamic fields such as URLs, store addresses, or contact info, that automatically change based on the social profile.
Pick from Asset Manager to insert pre-approved text snippets, captions, templates, or hashtags from your Asset Manager for brand consistency and to speed up the creation process.
You can also choose to Save as draft to store unfinished content safely so you can return to refine and schedule it later without losing your work.
You can also upload media to make your posts engaging. You can drag files from your computer or select Browse options to upload your media.
Learn more in our article on How To Upload Media To Scheduled Posts.
You can’t schedule/publish posts for multiple TikTok, X, and YouTube profile, as its is against their service and privacy policy.
At the top of the caption box, you’ll see icons for each social network whose profile you have selected:
A blue badge above the network’s icon shows the number of profiles selected for that network.
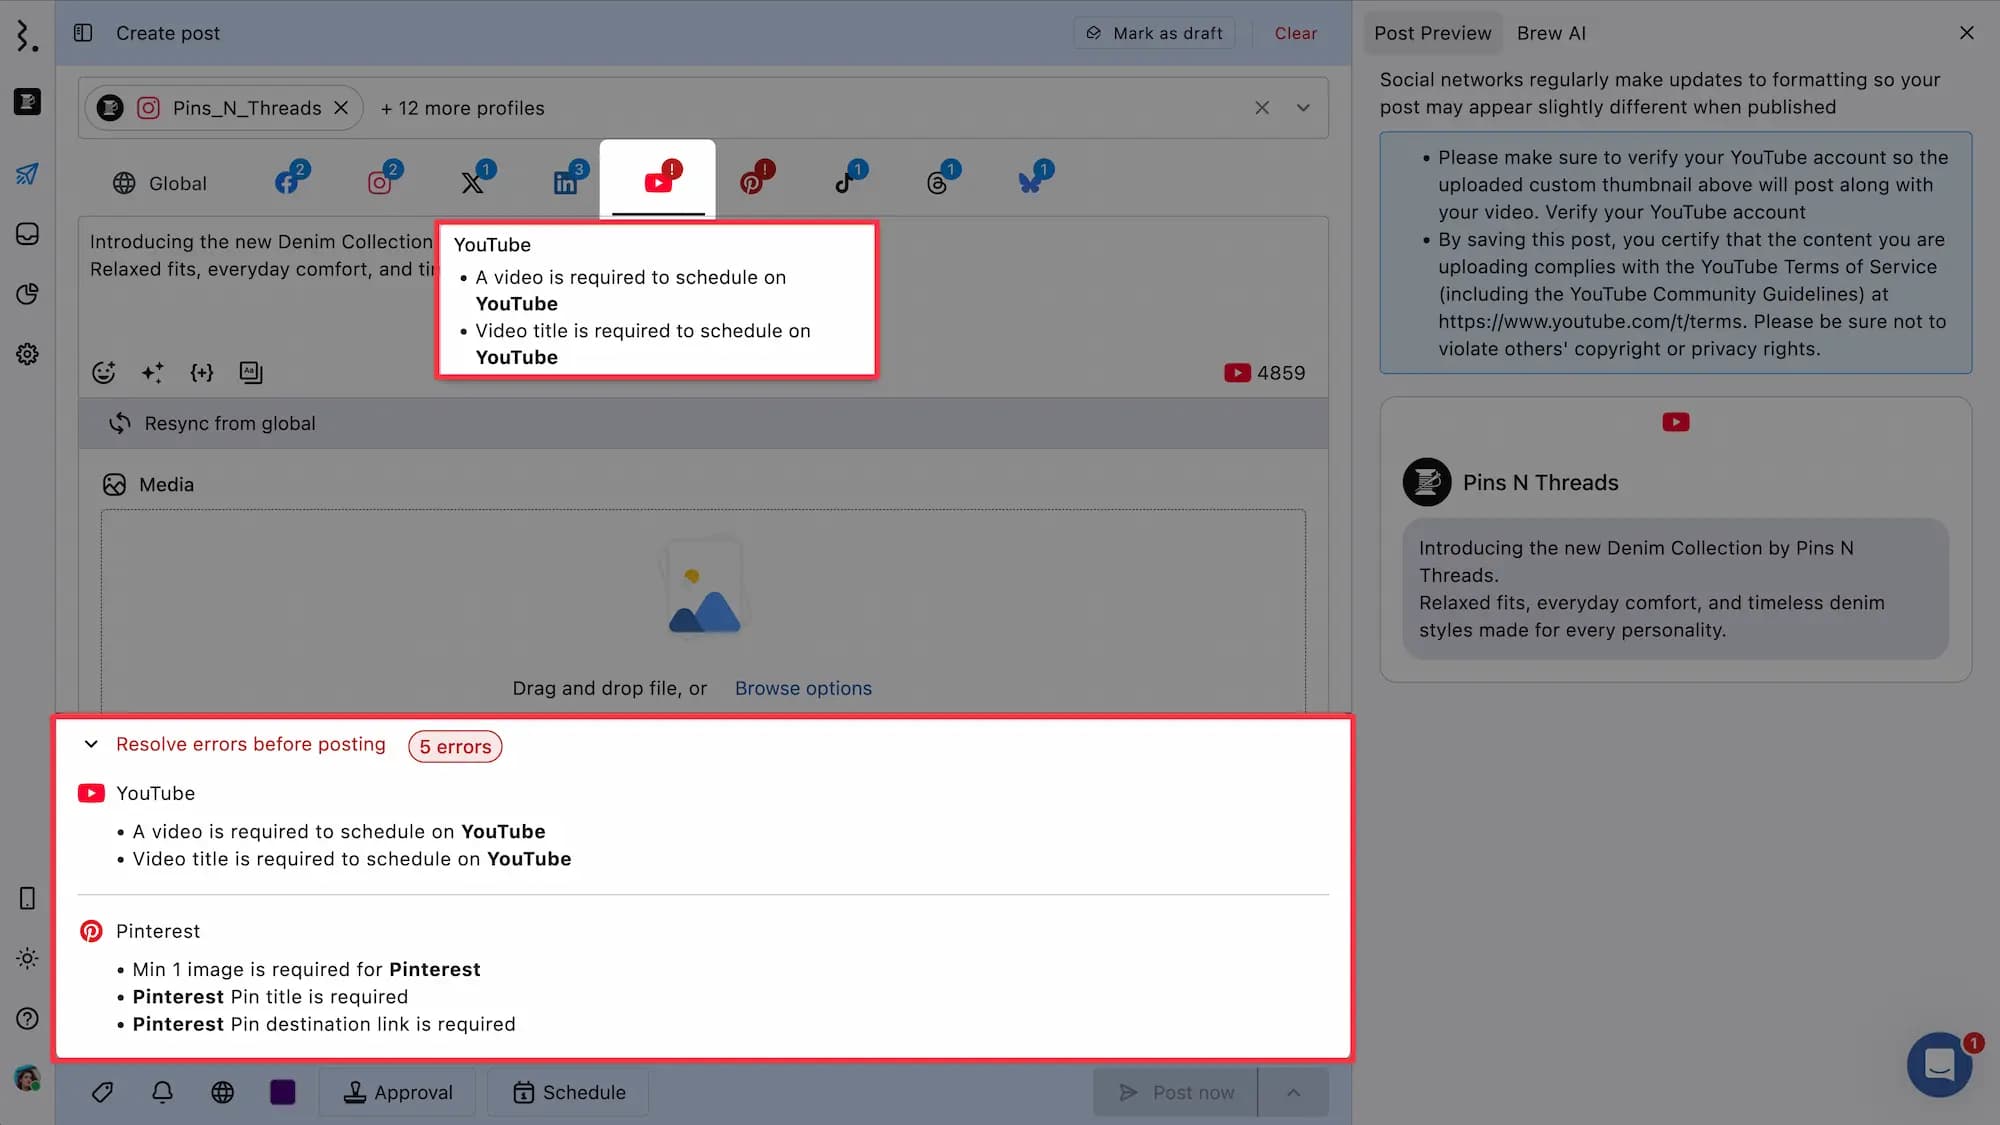
A red exclamation mark above the network’s icon indicates there’s a missing requirement for that network that must be resolved before publishing or scheduling.
If you hover over a red exclamation mark, you’ll see a detailed list of network-specific errors that must be fixed before you can publish or schedule the post.
This makes it easy to track both your profile selections and any network-specific actions needed at a glance.
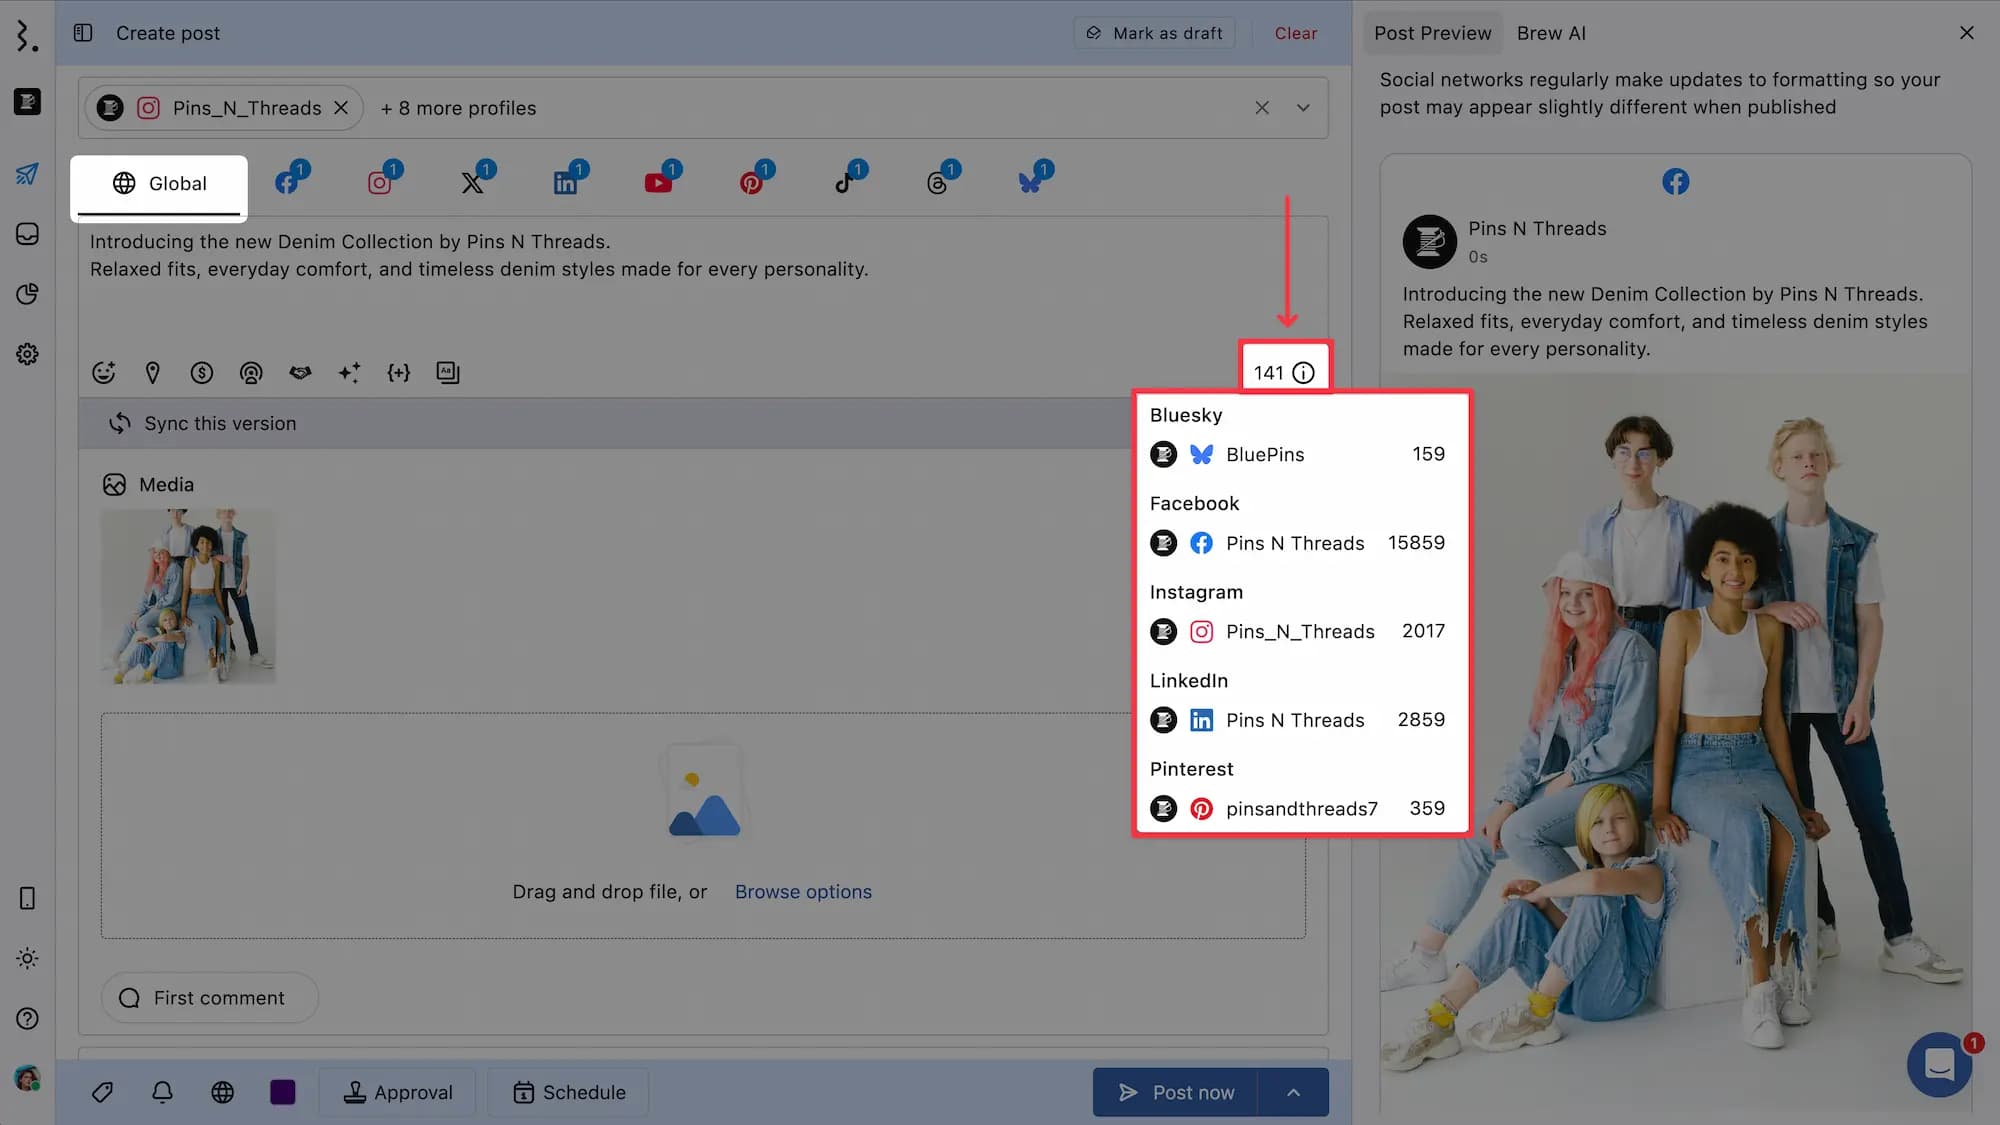
You can also see the character counter at the bottom right of the caption box.
Global Tab: Shows the total number of characters currently used in your caption. When you have selected multiple networks, hovering over the tooltip will show the number of characters remaining for each social network based on that platform’s character limit, grouped by network. If a platform’s limit is exceeded, the number of characters you need to remove.
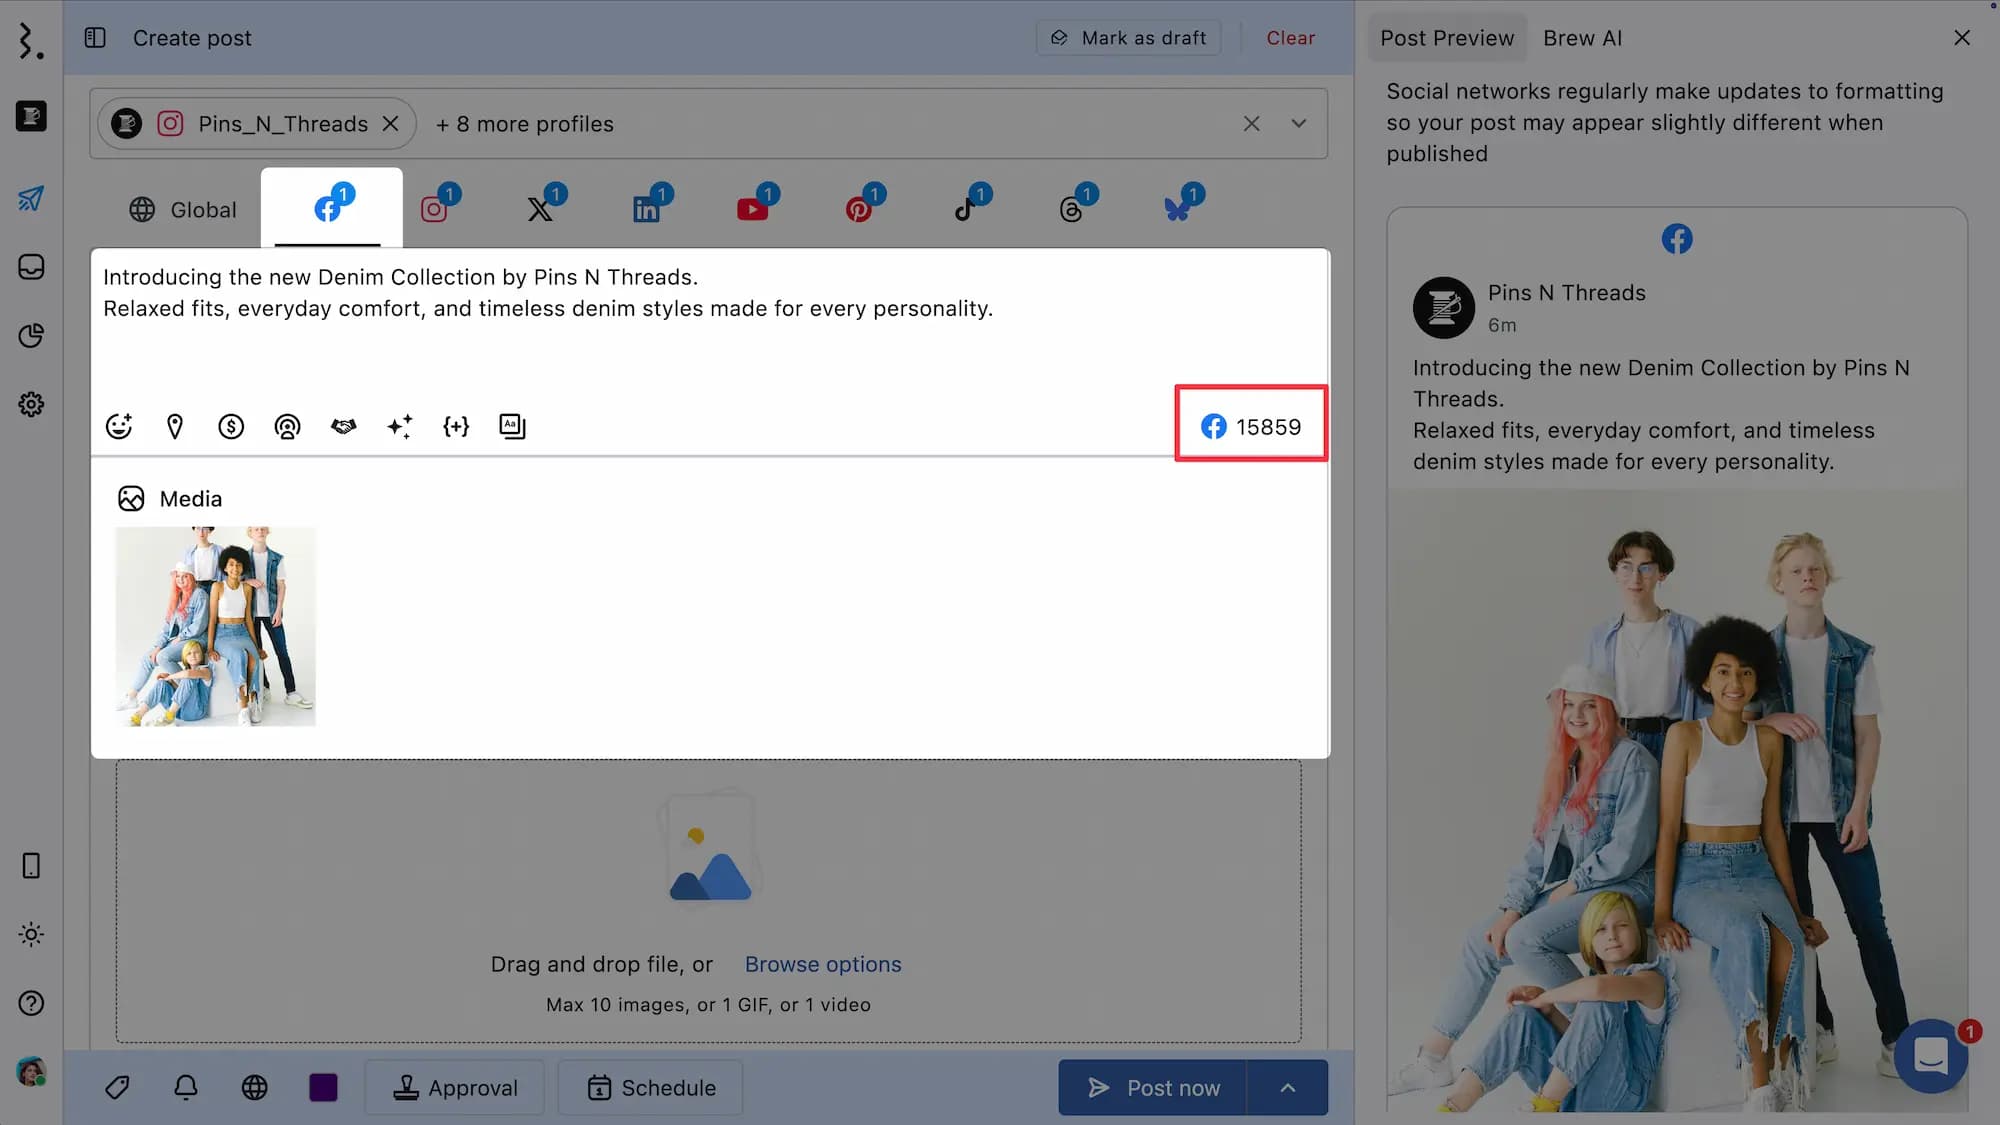
Network-Specific Tab: Shows the number of characters remaining before reaching that platform’s character limit. If you exceed a platform’s limit, the counter turns red and shows a negative number, indicating how many characters you need to remove.
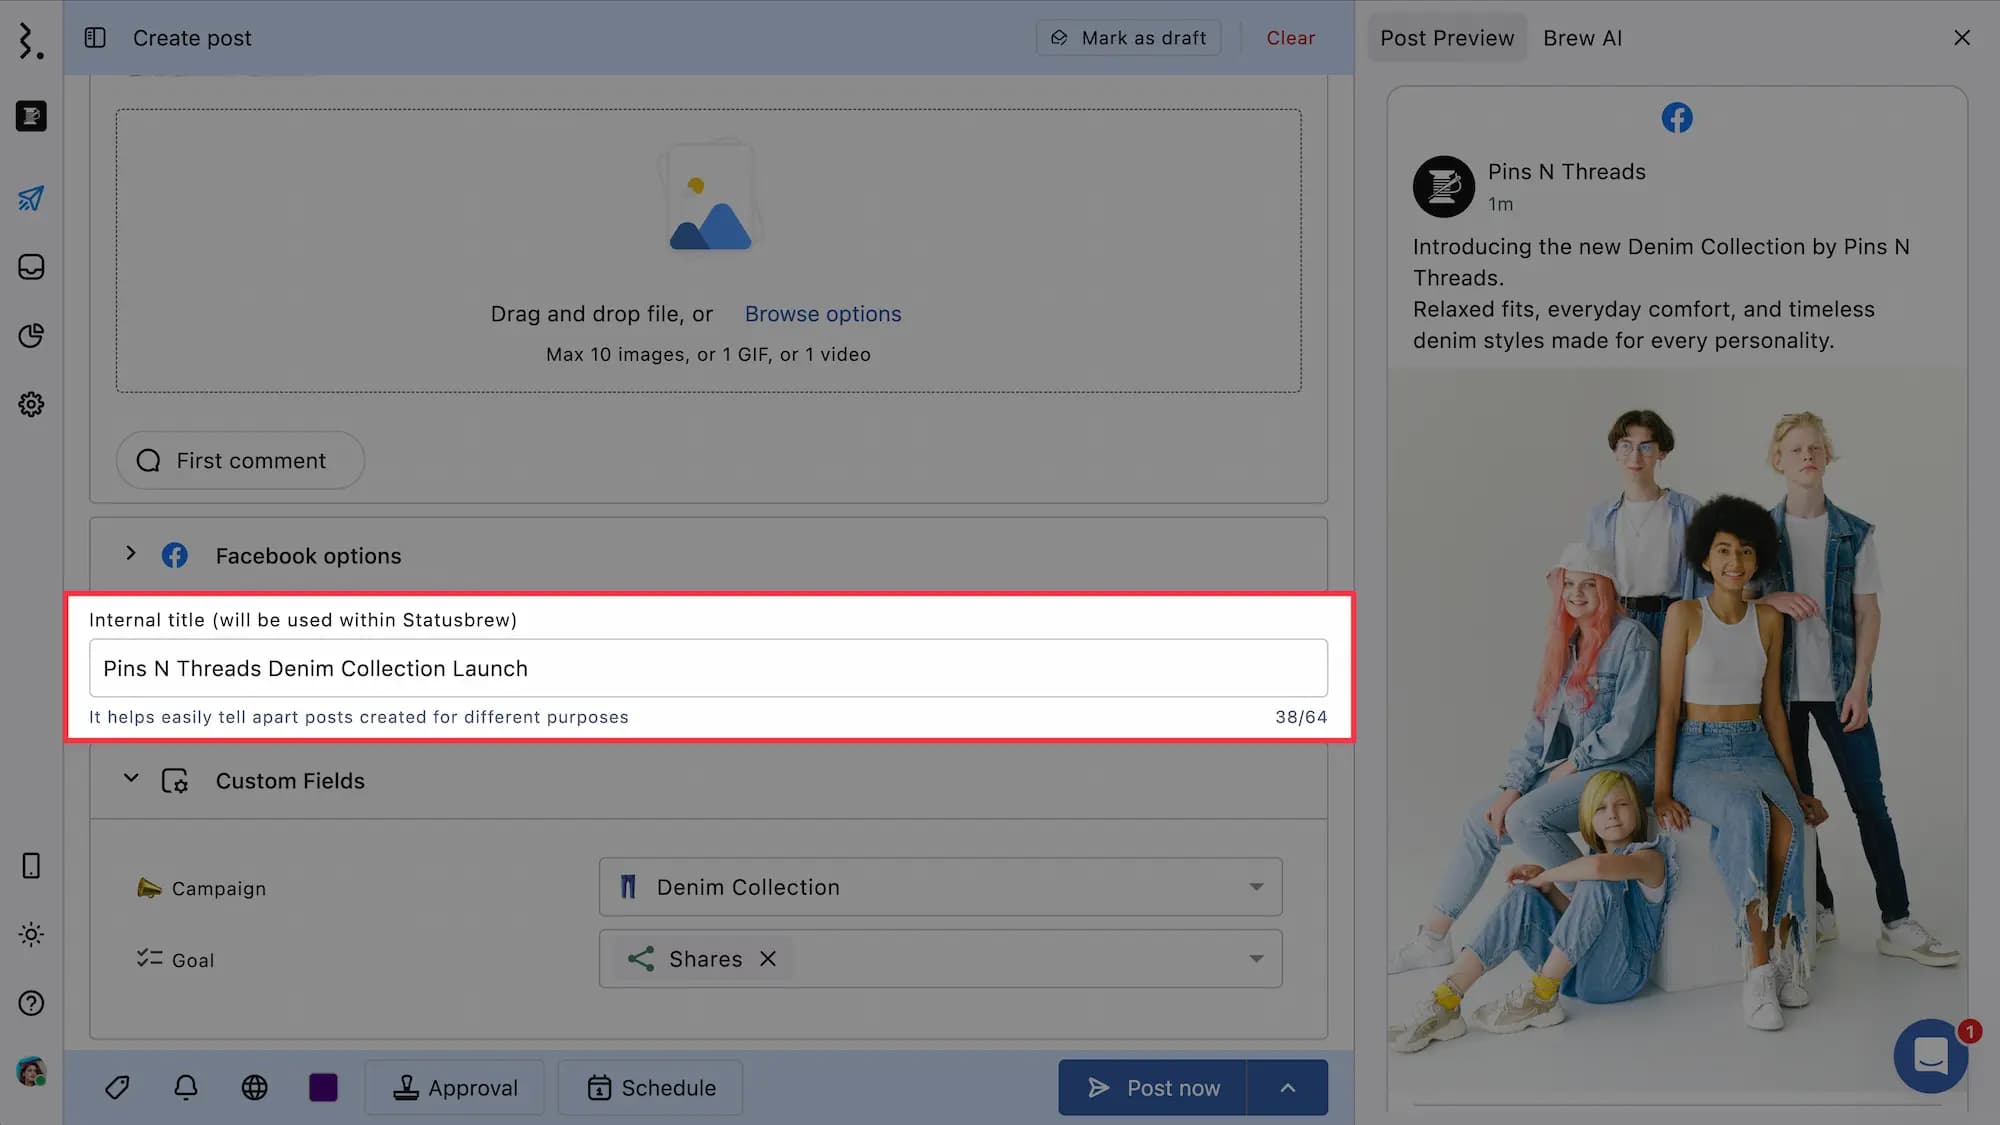
Internal Title
Add a post title for internal use within Statusbrew to easily differentiate posts created for different campaigns or purposes. This title is not published to your social networks; it’s only visible to your team for better organization and tracking.
Custom Fields
Expand the Custom Fields section to add structured labels that help your team track specific post details consistently, such as post status, campaign type, or priority.
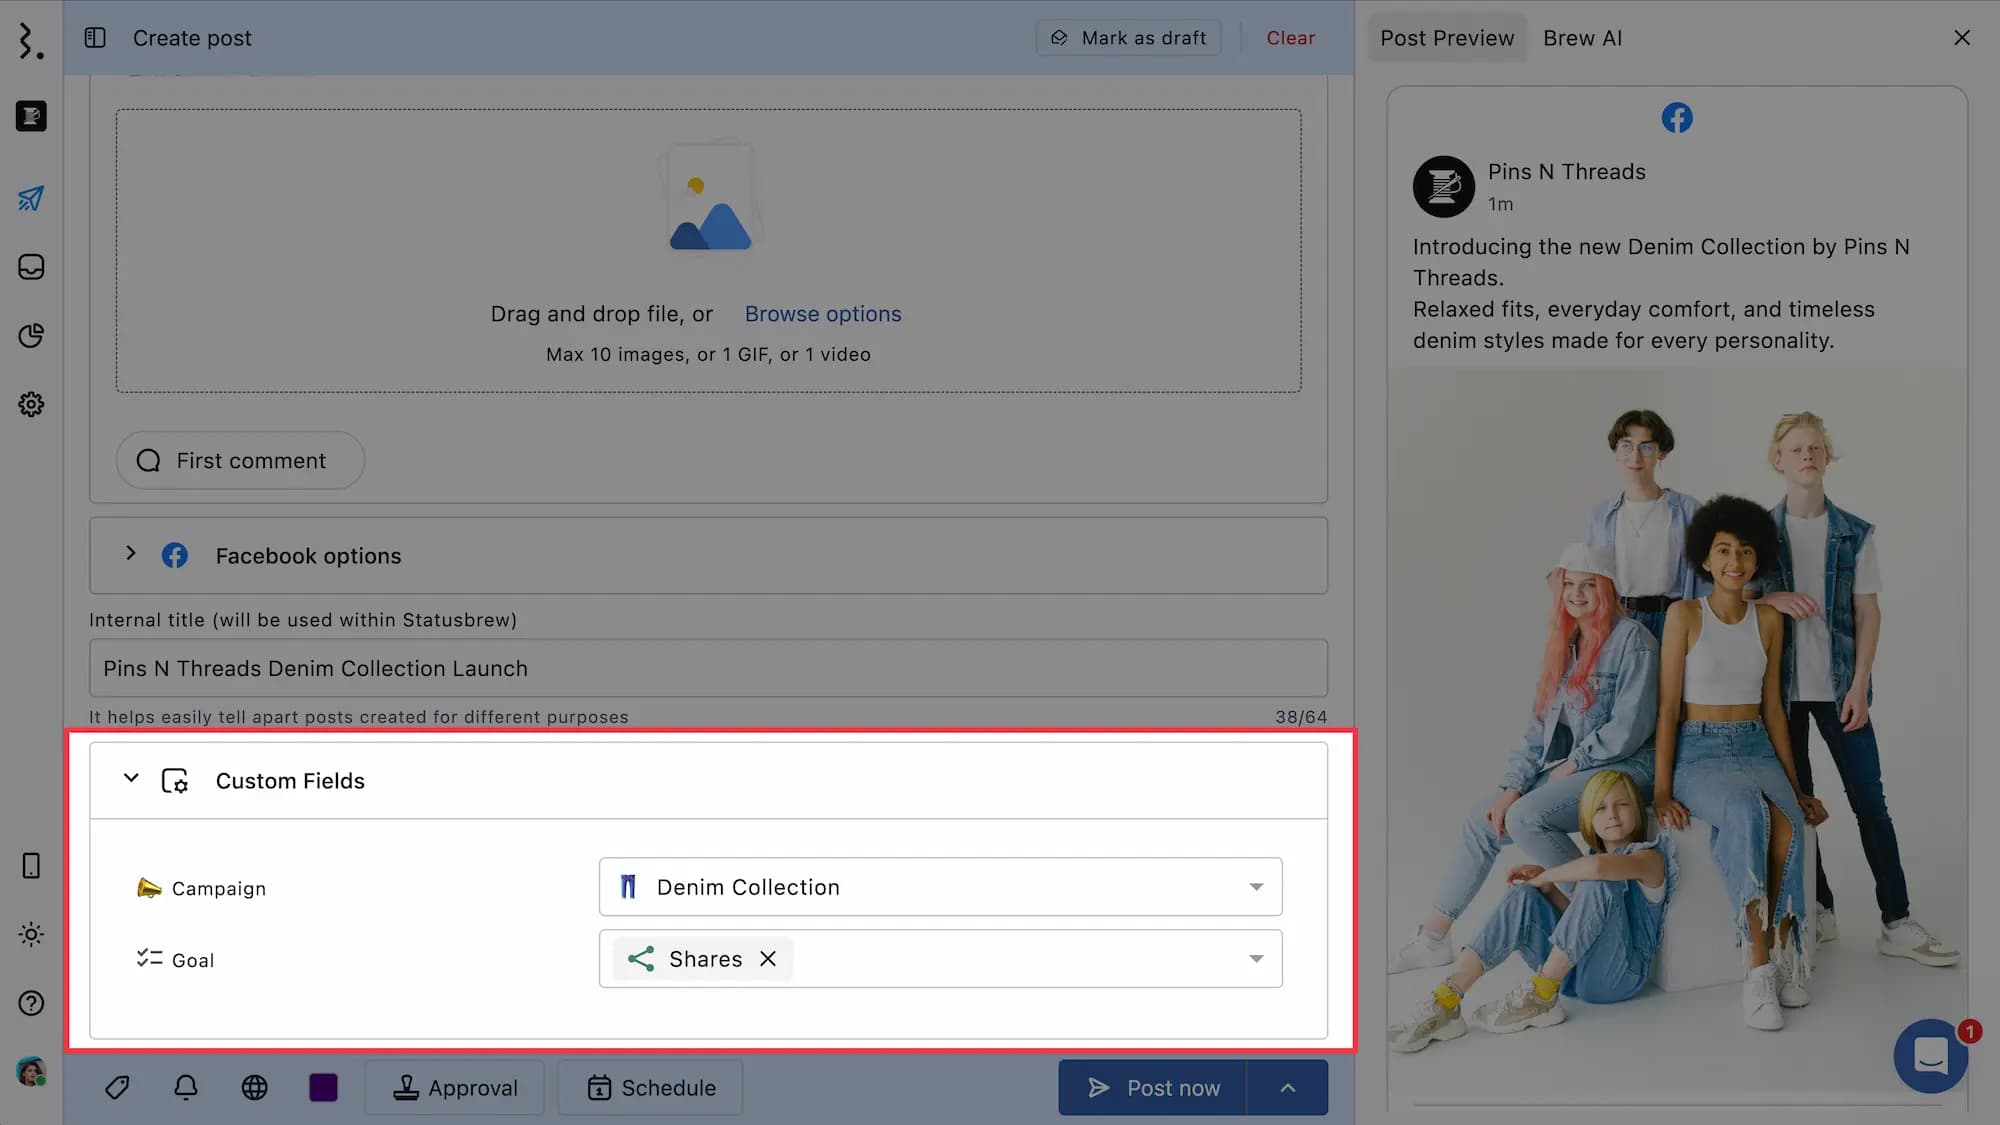
Learn more about custom fields in our help article.
Add Tags
Assign tags to your post to categorize it by campaign, topic, content type, or any other custom label you have created in Statusbrew.
Adding tags makes it easy to filter, search, and report on posts, helping you pull analytics by tag for performance tracking.
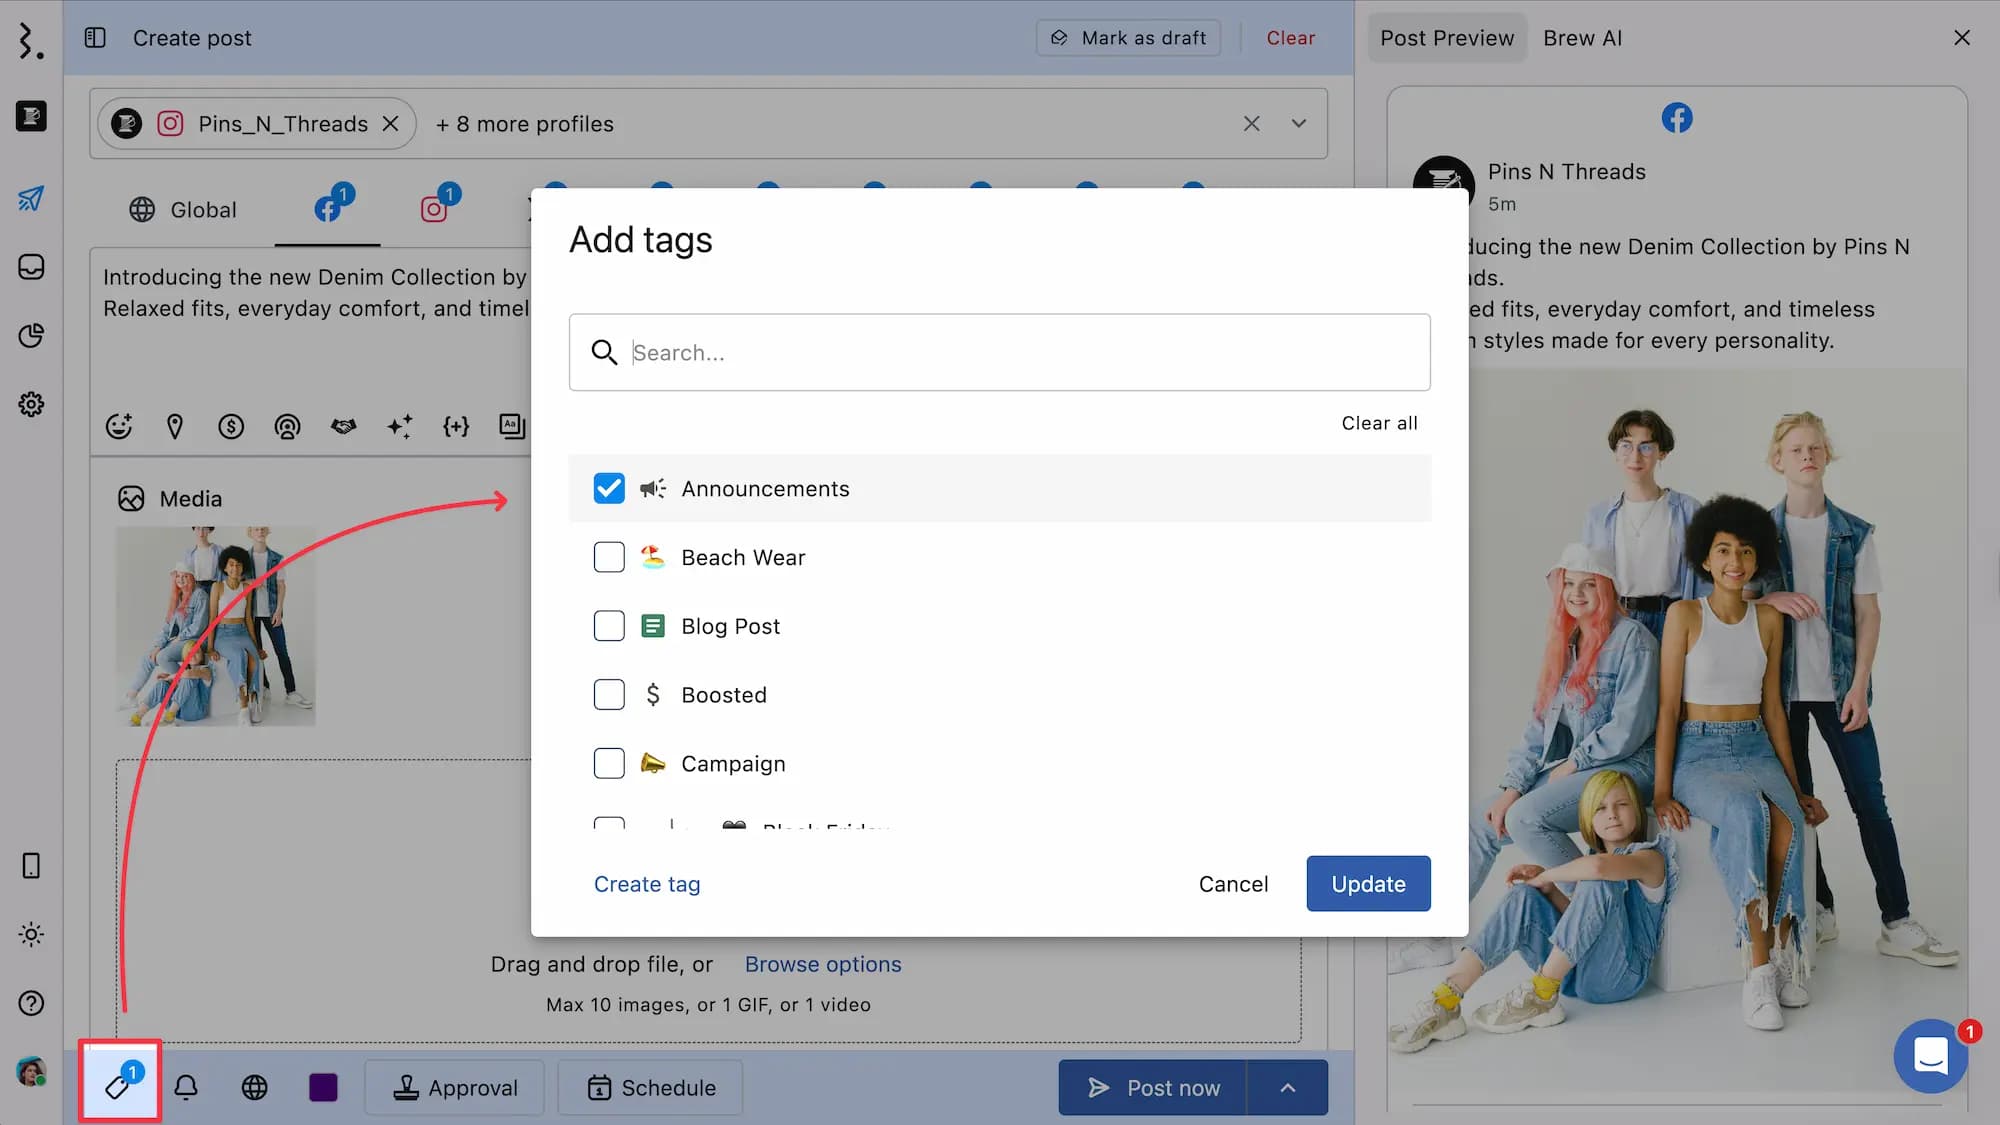
Learn more at Internal Tags & Adding A New Tag.
Add Watchers
Add team members as watchers to your post so they receive notifications and stay updated about various content publishing activities on the post.
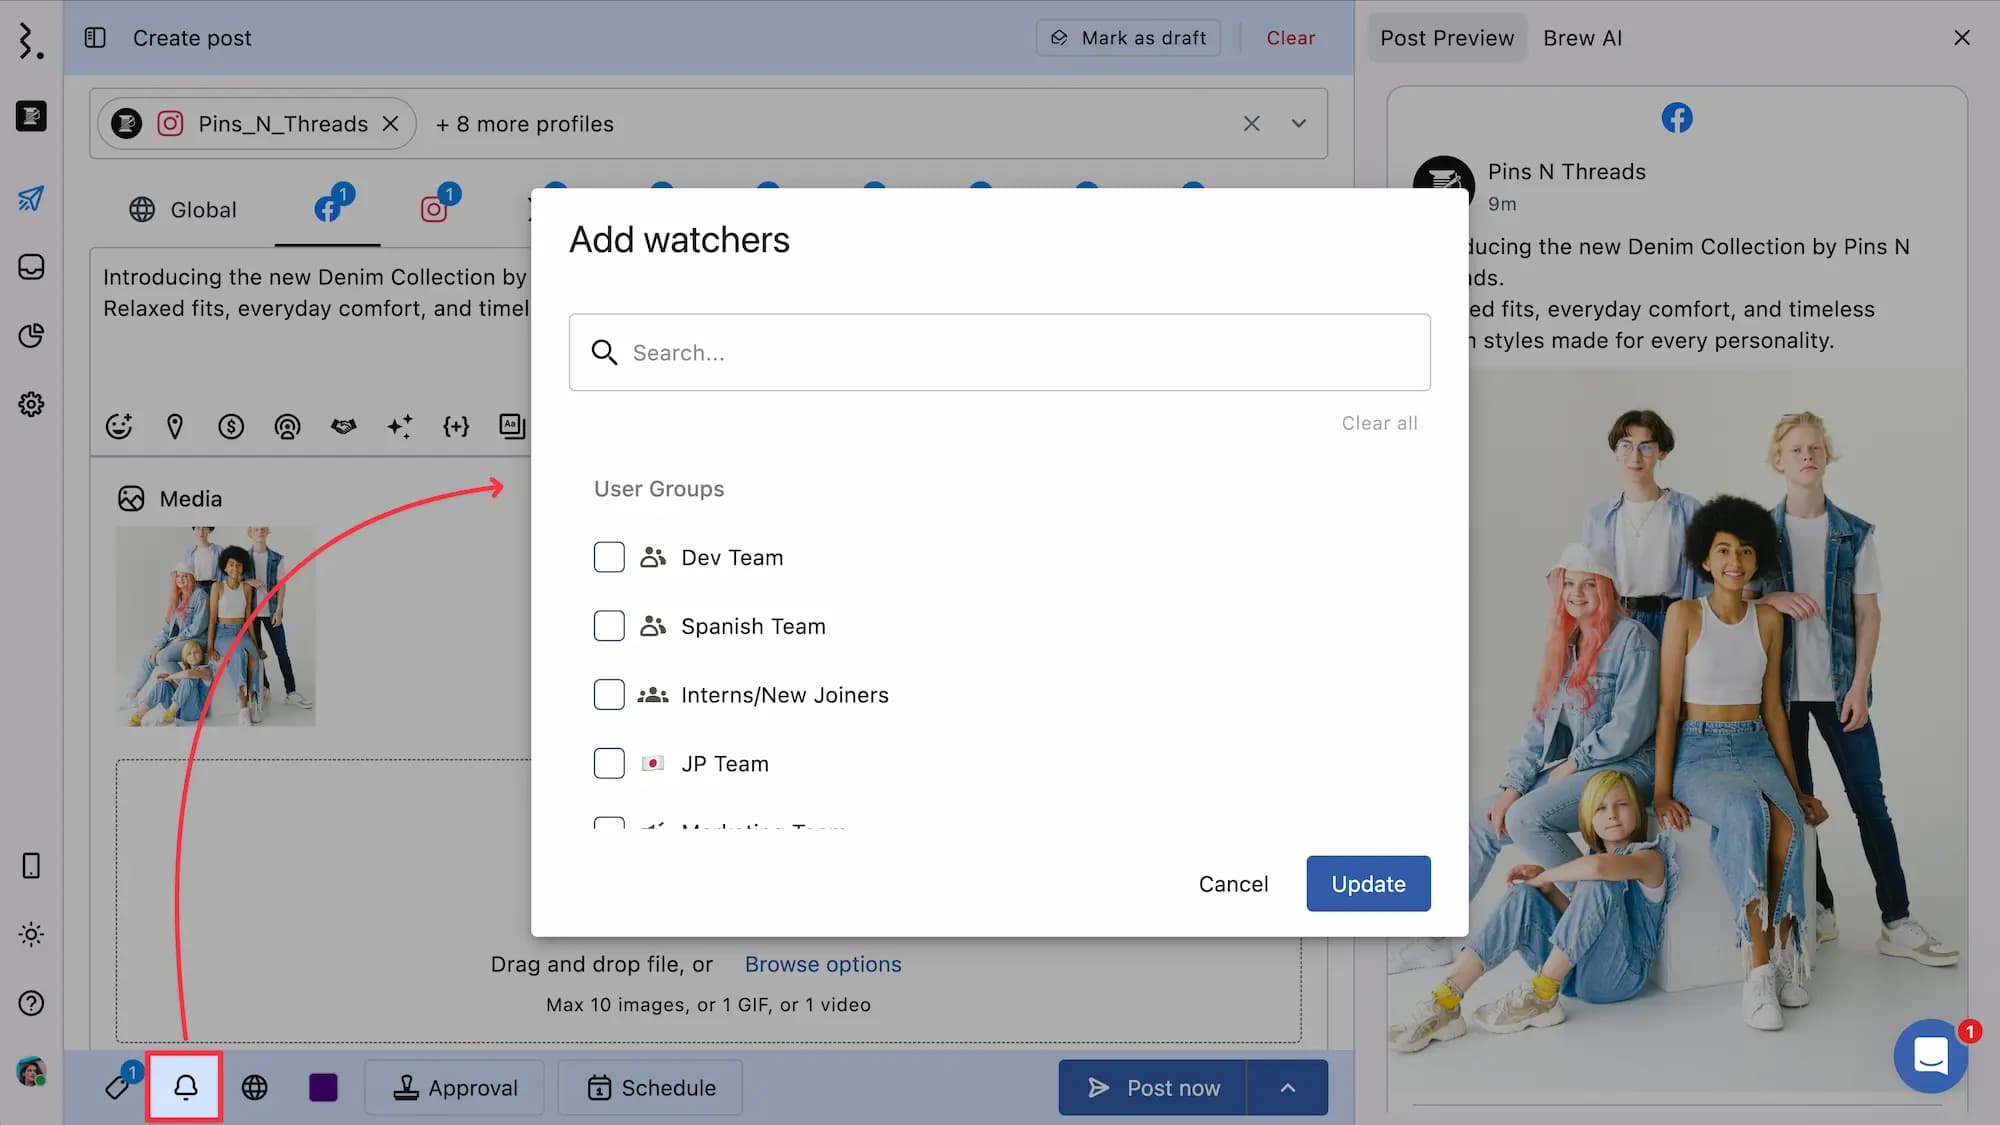
Learn more at Watchers In Publish.
Restrict Post Access
Choose the user(s)/user group(s) to share posts with and limit their visibility to specific team members to prevent unauthorized access.
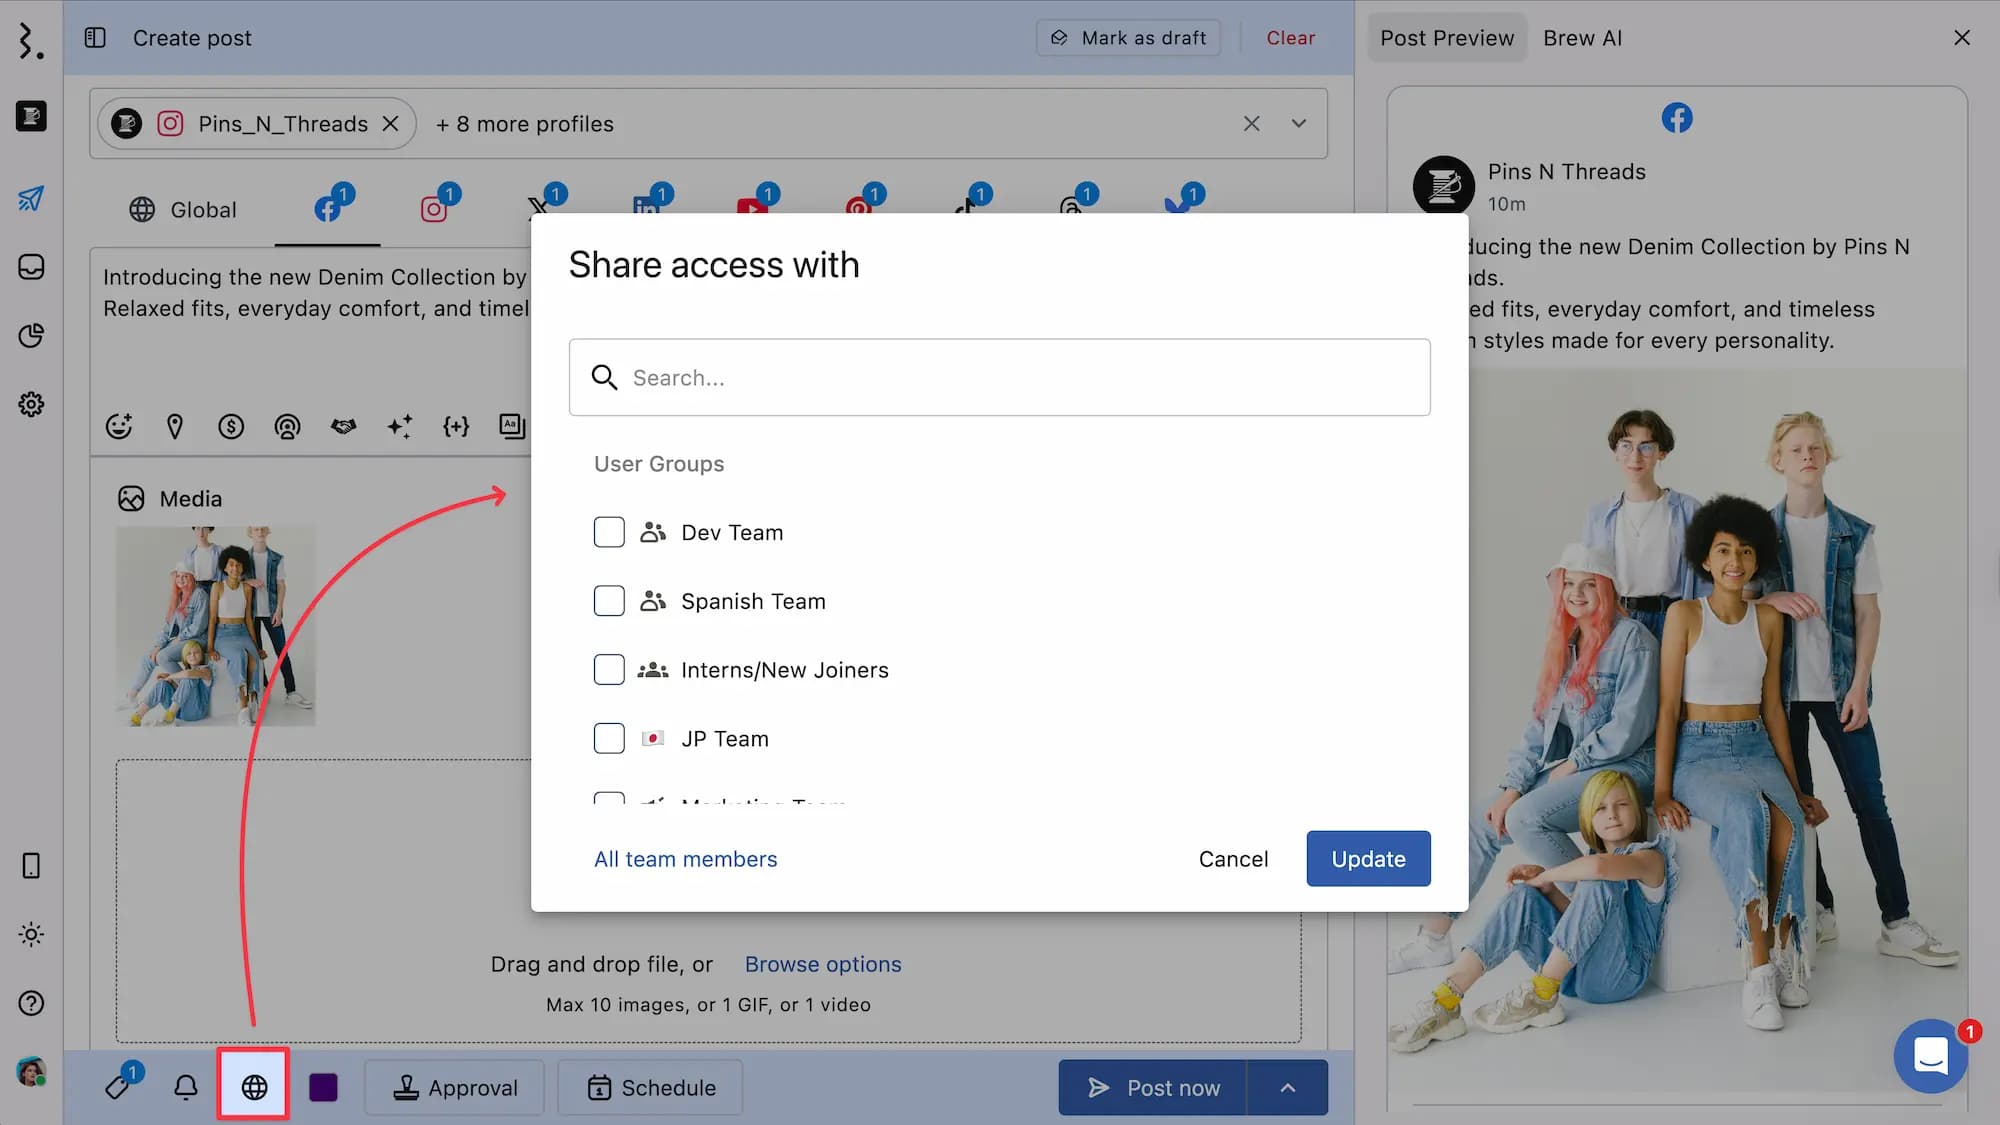
Learn more at How To Restrict Post Access With Your Team.
Add Post Colour
Assign a color label to your post to visually distinguish it in your publishing calendar. It allows you to quickly identify posts belonging to certain campaigns or themes at a glance.
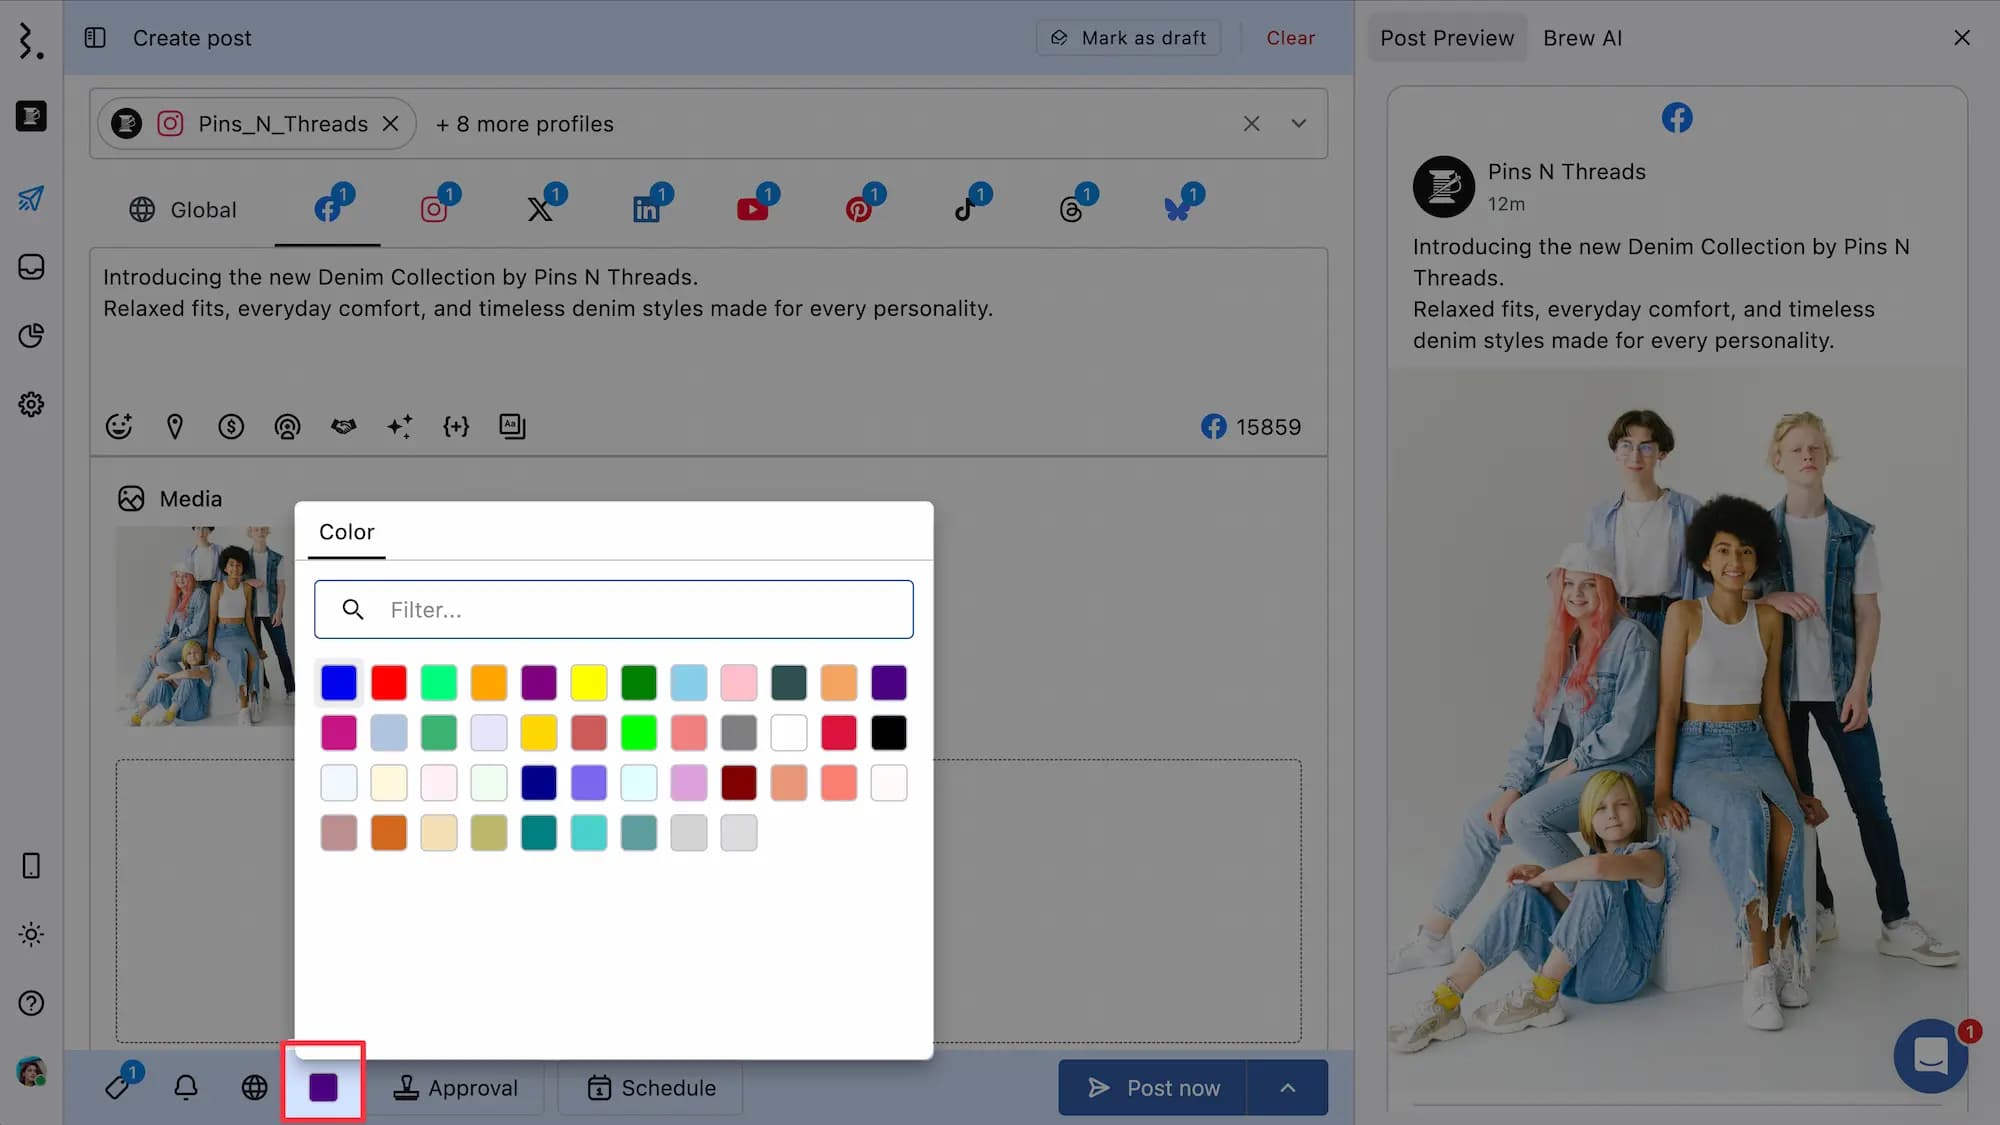
Learn more at Understanding Statusbrew Planner.
Post Preview
Use the Post Preview tab to see exactly how your post will appear on each selected social platform before publishing. This helps ensure your content looks polished and formatted correctly for every network.
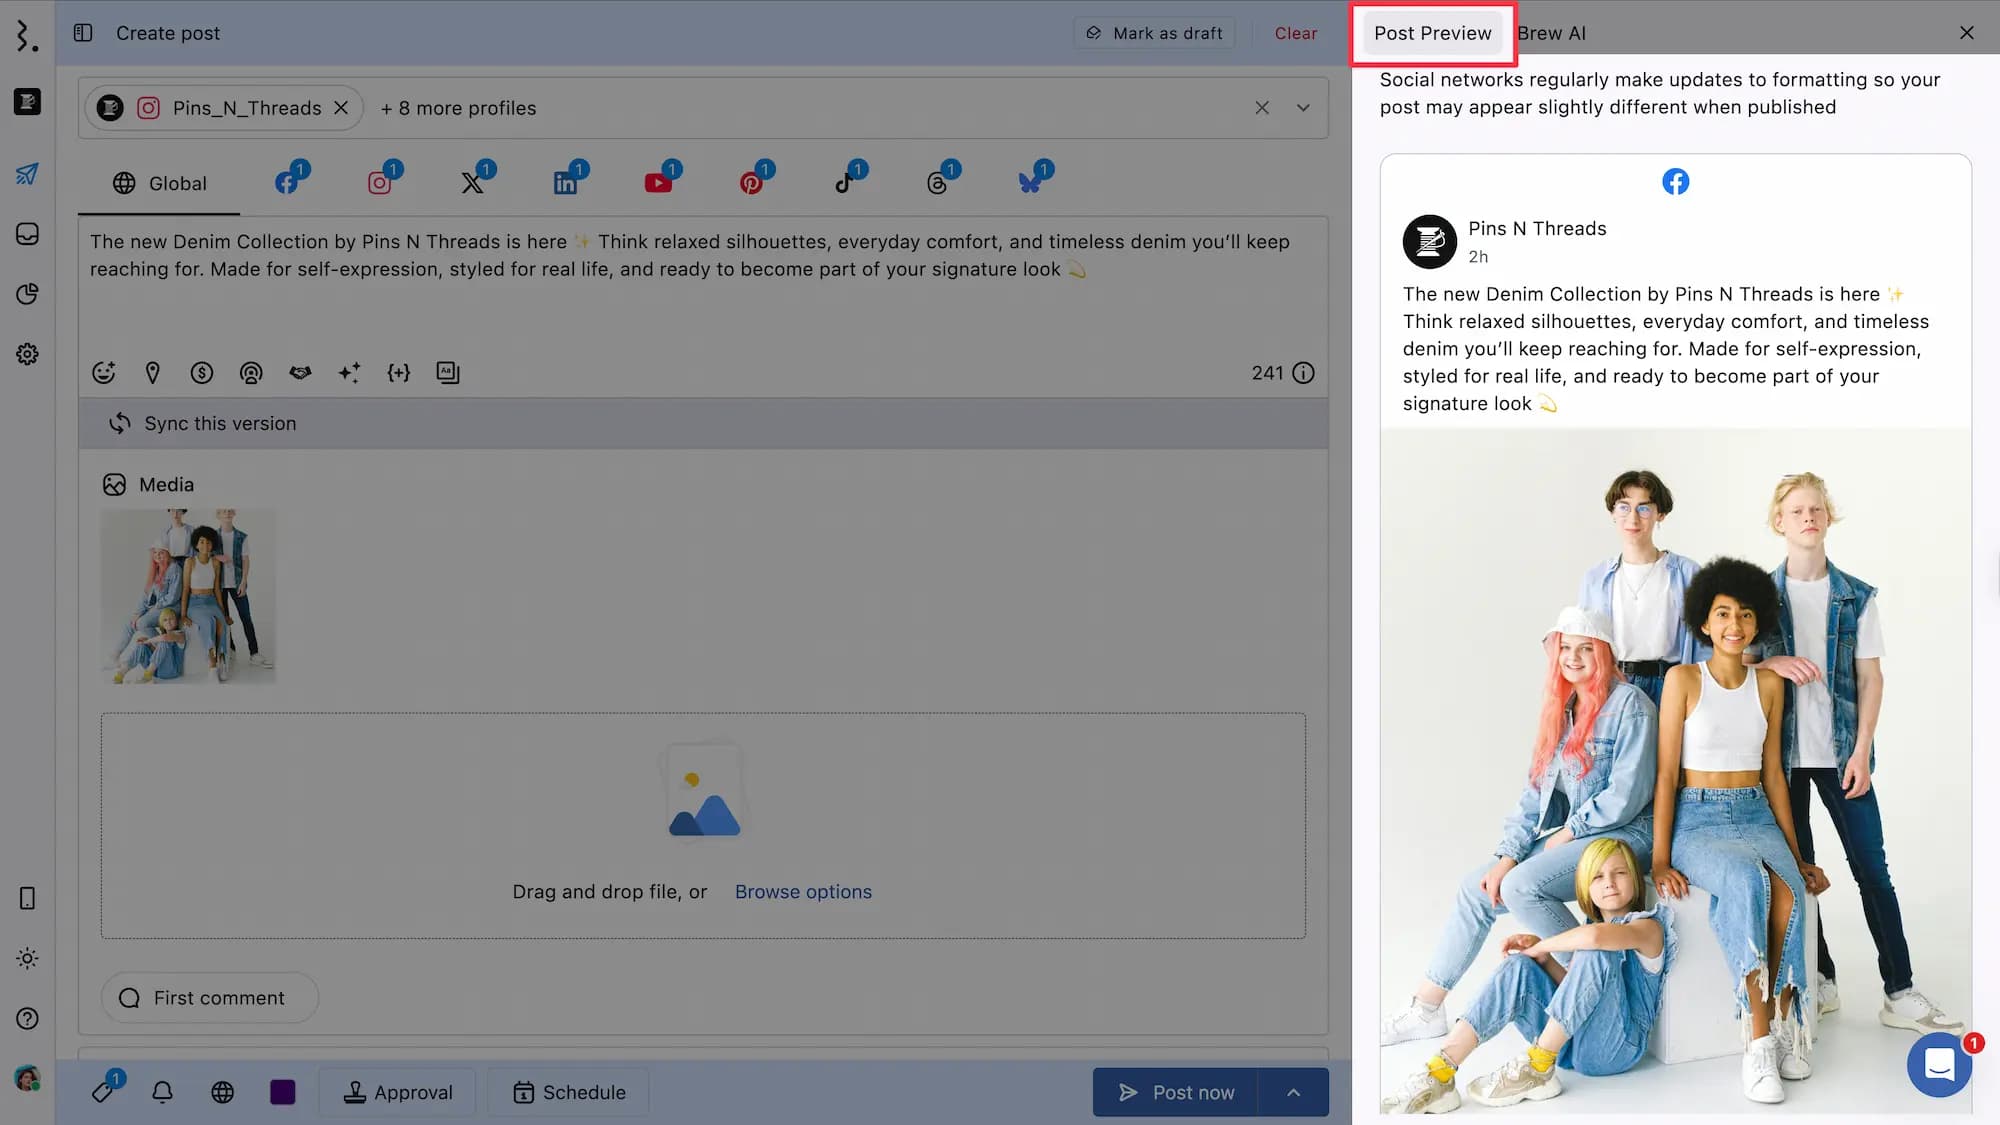
Note: To view a preview, you must first select at least one social profile.
Brew AI
Brew AI helps you create engaging, platform-ready content faster using AI, freeing up time for strategy and creativity. It can:
Write captions based on your top-performing posts
Suggest fresh ideas for your next posts
Rewrite or rephrase social media captions
Summarize articles into concise, shareable snippets
Translate captions into multiple languages
All while maintaining your brand voice.
Learn more at Using Brew AI: Statusbrew’s Content Creation Assistant.
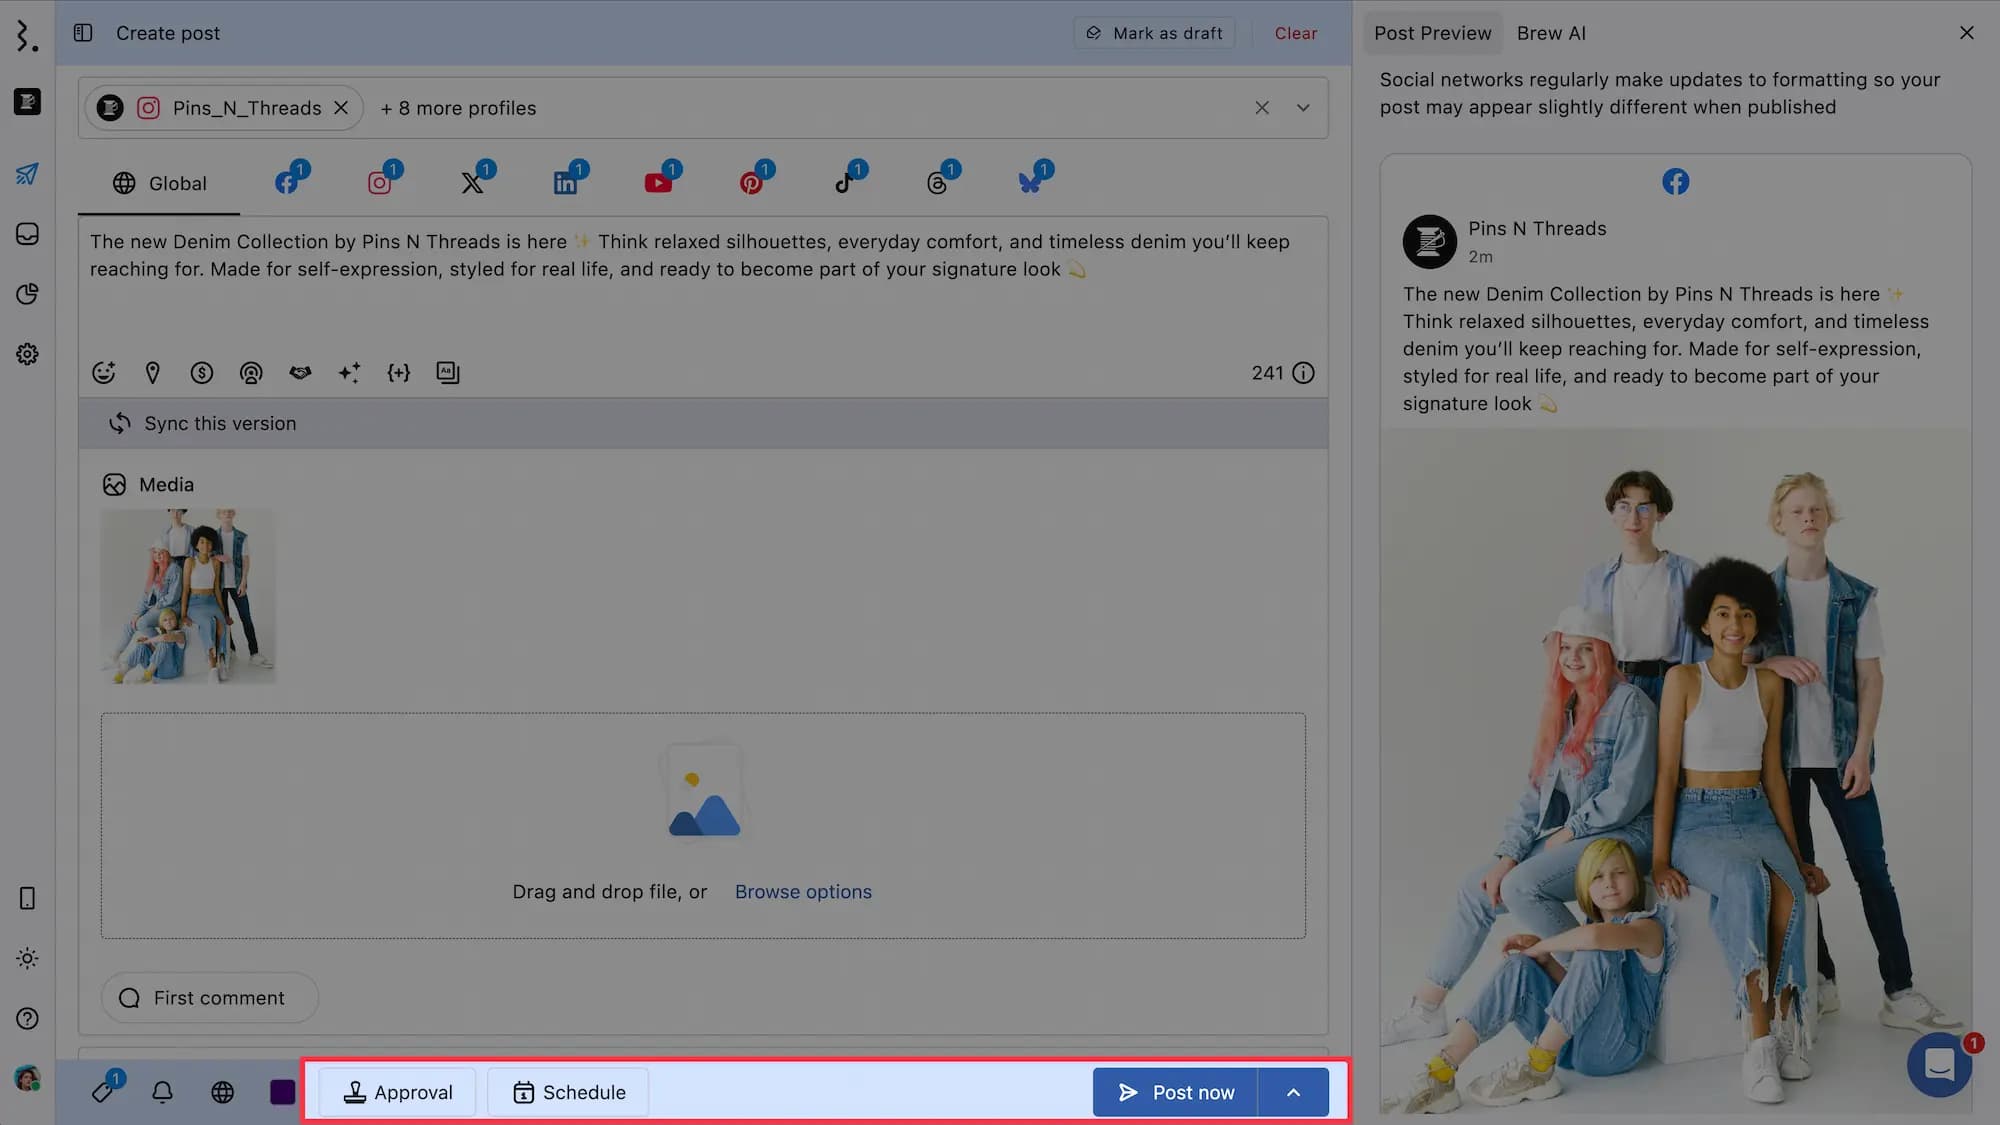
Publish, Schedule, Or Send Posts For Approval
Once your post is ready, you can:
Publish Now: Instantly publish your content with the Post now option
Schedule: Choose a specific date and time for posting.
Send for Approval: Share the post with approvers before it goes live to ensure it meets quality and compliance standards.
Learn more at How To Select Time To Post.
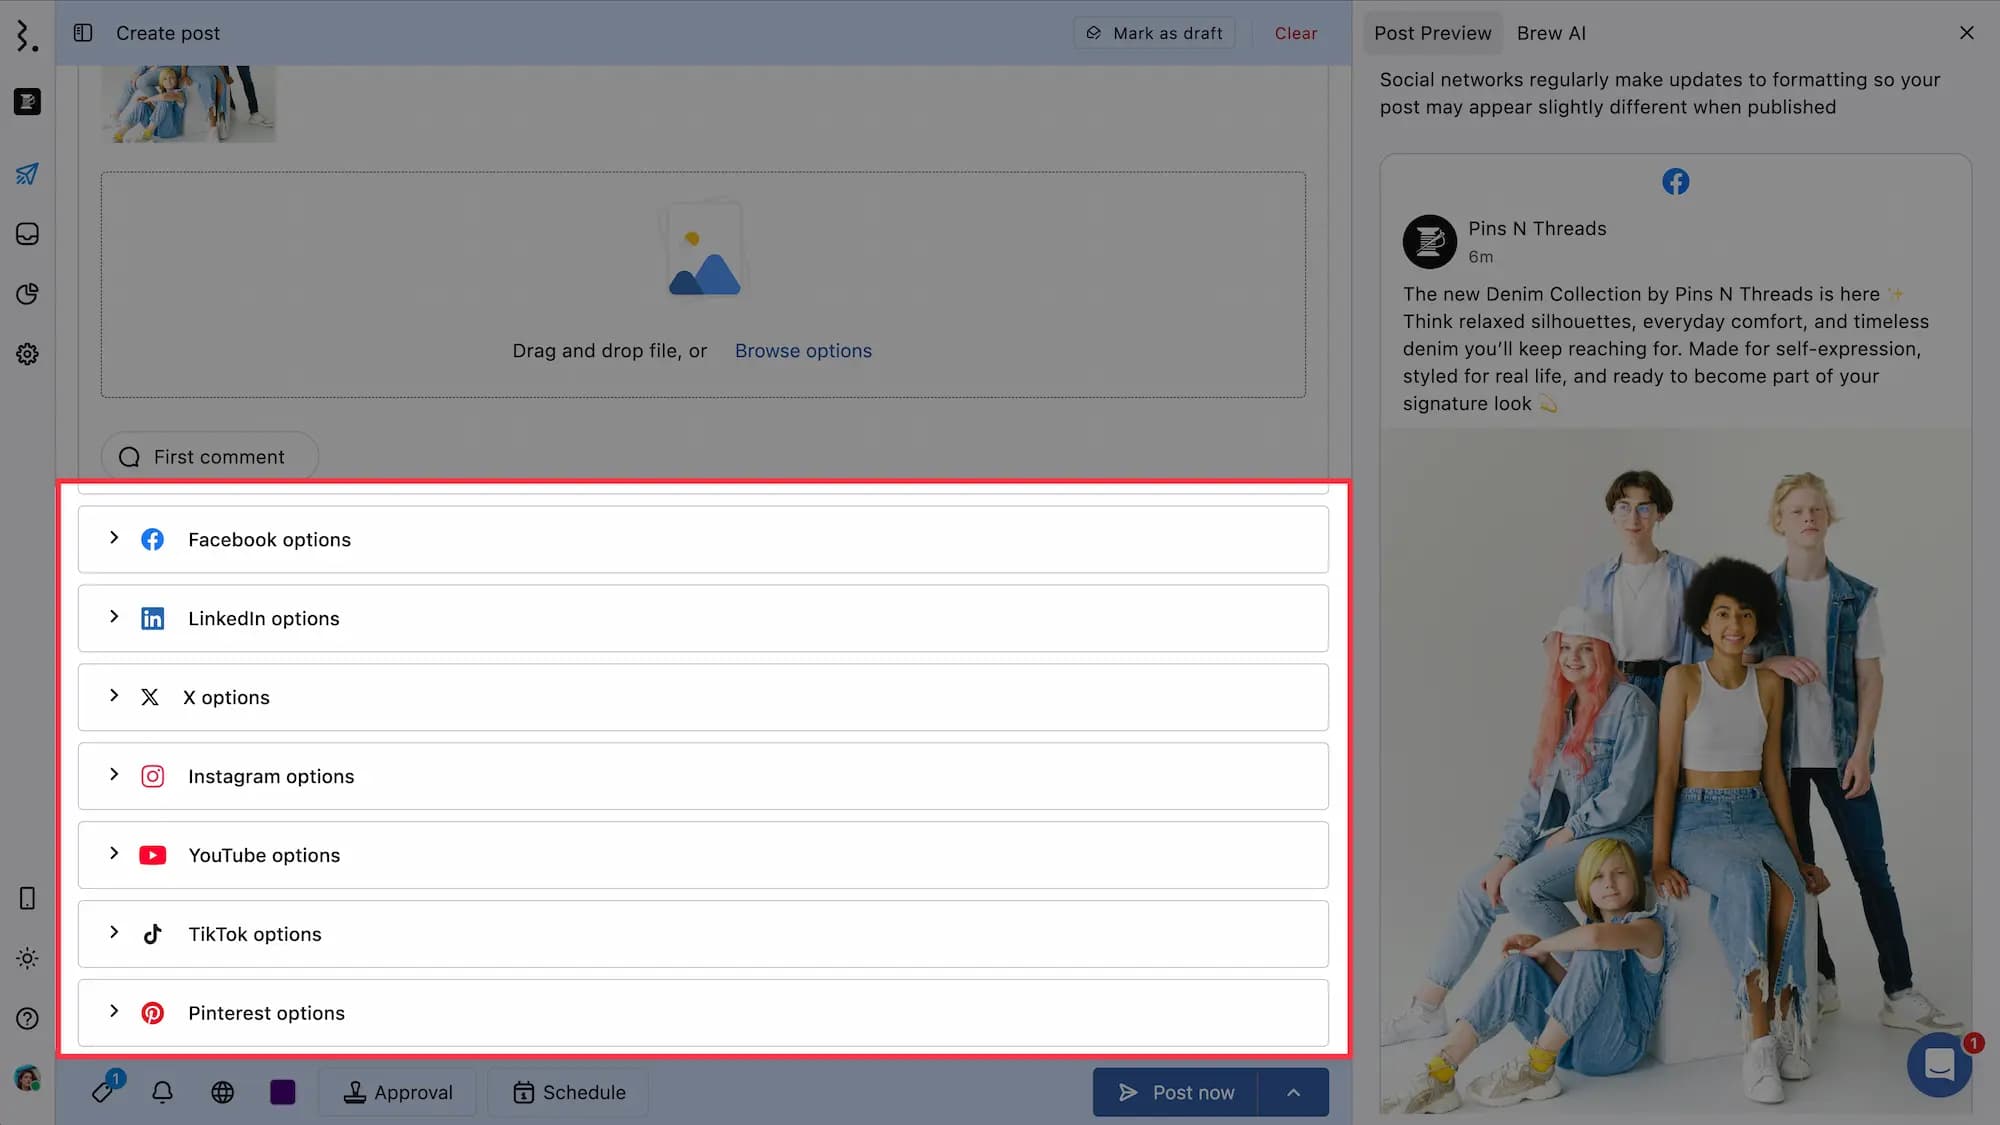
Network-specific Options
You will also see network-specific options, which allow you to customize posts according to each social network’s unique features. For example, you can create a Facebook Dark Post, add a LinkedIn Poll, or add a poll in X posts.
The following articles list steps for creating and publishing content to each social network:
Error Messages
If there are any publishing requirements you haven’t met, you will also see network-specific error messages. These errors must be resolved before you can publish, schedule, or send your post for approval.
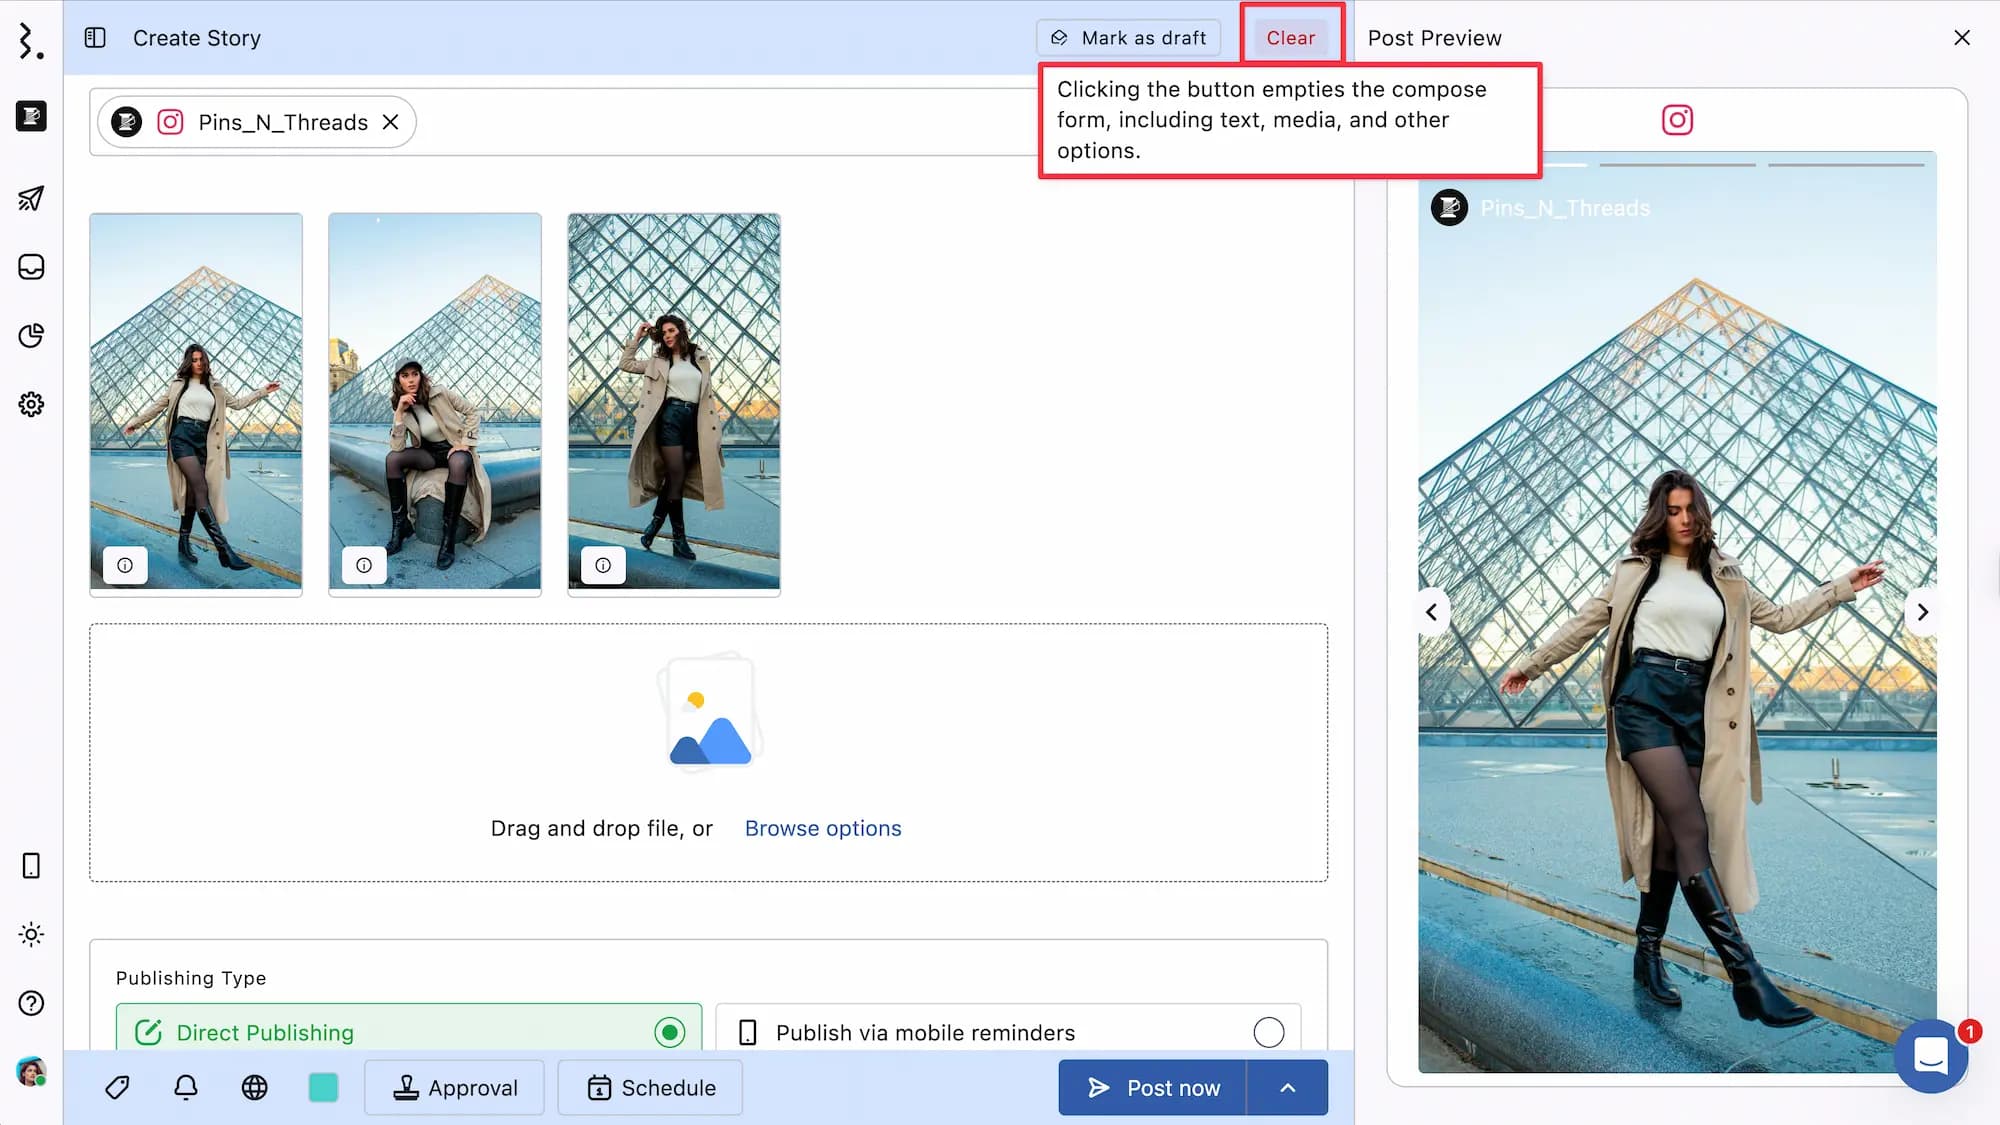
Clear
In the top-right corner of the Create post window, you’ll find the Clear button. Clicking this button instantly empties the window, removing all entered text, uploaded media, and any additional options you’ve set for the post.
This is useful if you want to start fresh without manually deleting each element. Once cleared, the Create post window will reset to its default state, allowing you to begin drafting a new post from scratch.
FAQs
What should I do if I forgot to select a network before saving a post as a draft or scheduling it?
Once a post has been saved as a draft or scheduled, you cannot add a new network to that same post. To publish it to another network, open the post from the calendar, duplicate it from the three-dot menu, select the required network, and then save or schedule the new post.
Why can’t I see the Post Now option after creating a post?
If you can create a post but do not see the Post Now option, your access to that profile likely requires approval.
This means you can compose the content, but you cannot publish it yourself. The post must be sent to another team member who has the required approval or publishing access for that connected profile.
Adding yourself as the approver will not help in this case. You may check the Needs Approval section or wait for an email notification, but you still will not be able to approve or publish the post if your own access requires approval.
To move the post forward, select an approver with the required permissions for that profile.
Note: Even if the posts are under "Waiting for approval" state, you will still be able to see them in your calendar boards. Make sure to select the correct date range, filters, or data source so posts appear correctly in your calendar board. It's not like the posts will only show in your calendar boards when they are approved or rejected. The calendar shows all types of post states.
Can I add a first comment to an X post?
No. Statusbrew does not support adding a first comment or reply to X posts right now.
As a workaround, you can use X Threads.
For example: Post 1: Add the main text and image. Post 2: Add the article link or extra context.
This lets you keep the link separate from the main post while still publishing both posts together as part of the same X thread.
Can I accept a collaborator or crosspost request from Statusbrew?
No. Statusbrew does not currently support accepting collaborator or crosspost requests from within the platform.
If another account, creator, or influencer adds your profile as a collaborator, the request appears in the native social network app, such as Instagram or Facebook. You need to open the native app and accept the request there.
This is controlled by the social network APIs. At the moment, those APIs do not allow Statusbrew to receive or accept collaborator/crosspost requests inside the platform.
Important: This is different from cross-posting content through Statusbrew. You can use Statusbrew to create one post and publish or schedule it across multiple selected social profiles. However, accepting a collaborator/crosspost request from another account still needs to be done in the native app.
How Can I Approve Posts of the Same Content Created for Multiple Networks at Once?
If the same content is created for multiple networks or profiles, each network version may appear as a separate post in the approval flow.
To make this easier, add the same tag to all related posts while creating or scheduling them. For example, use a campaign tag or a temporary review tag.
Then:
Go to List View
Filter posts by that tag
Select all related posts
Click the Approve icon
This lets you approve all selected posts in one action.
Statusbrew is also introducing Post Grouping soon. With Post Grouping, users can group similar versions of the same content and take a single action for all posts in that group, including approval actions.