Using Brew AI: Statusbrew’s Content Creation Assistant
Let Brew AI write captions for your posts based on your top-performing posts, give you ideas for your next posts, or rewrite or rephrase social media captions for you, summarize articles, and translate them into multiple languages - all while maintaining your brand voice.
Brew AI is Statusbrew’s AI-powered content assistant that supports your daily content creation needs.
Brew AI feature is available on Premium plans and above. See full pricing details.
In this article, we’ll see how to use Brew AI effectively.
What Is Brew AI?
Brew AI is Statusbrew’s built-in generative AI assistant designed to simplify your social media content creation. It can help you:
Rewrite or paraphrase content you’ve already created.
Create new posts by entering your own topics and instructions.
Translate your post content into multiple supported languages.
Summarize and turn linked articles into ready-to-post captions.
Create fresh content inspired by your most engaging past posts.
How To Use Brew AI?
Let’s understand how to use Brew AI inside Statusbrew's Compose.
Step 1: Open Compose
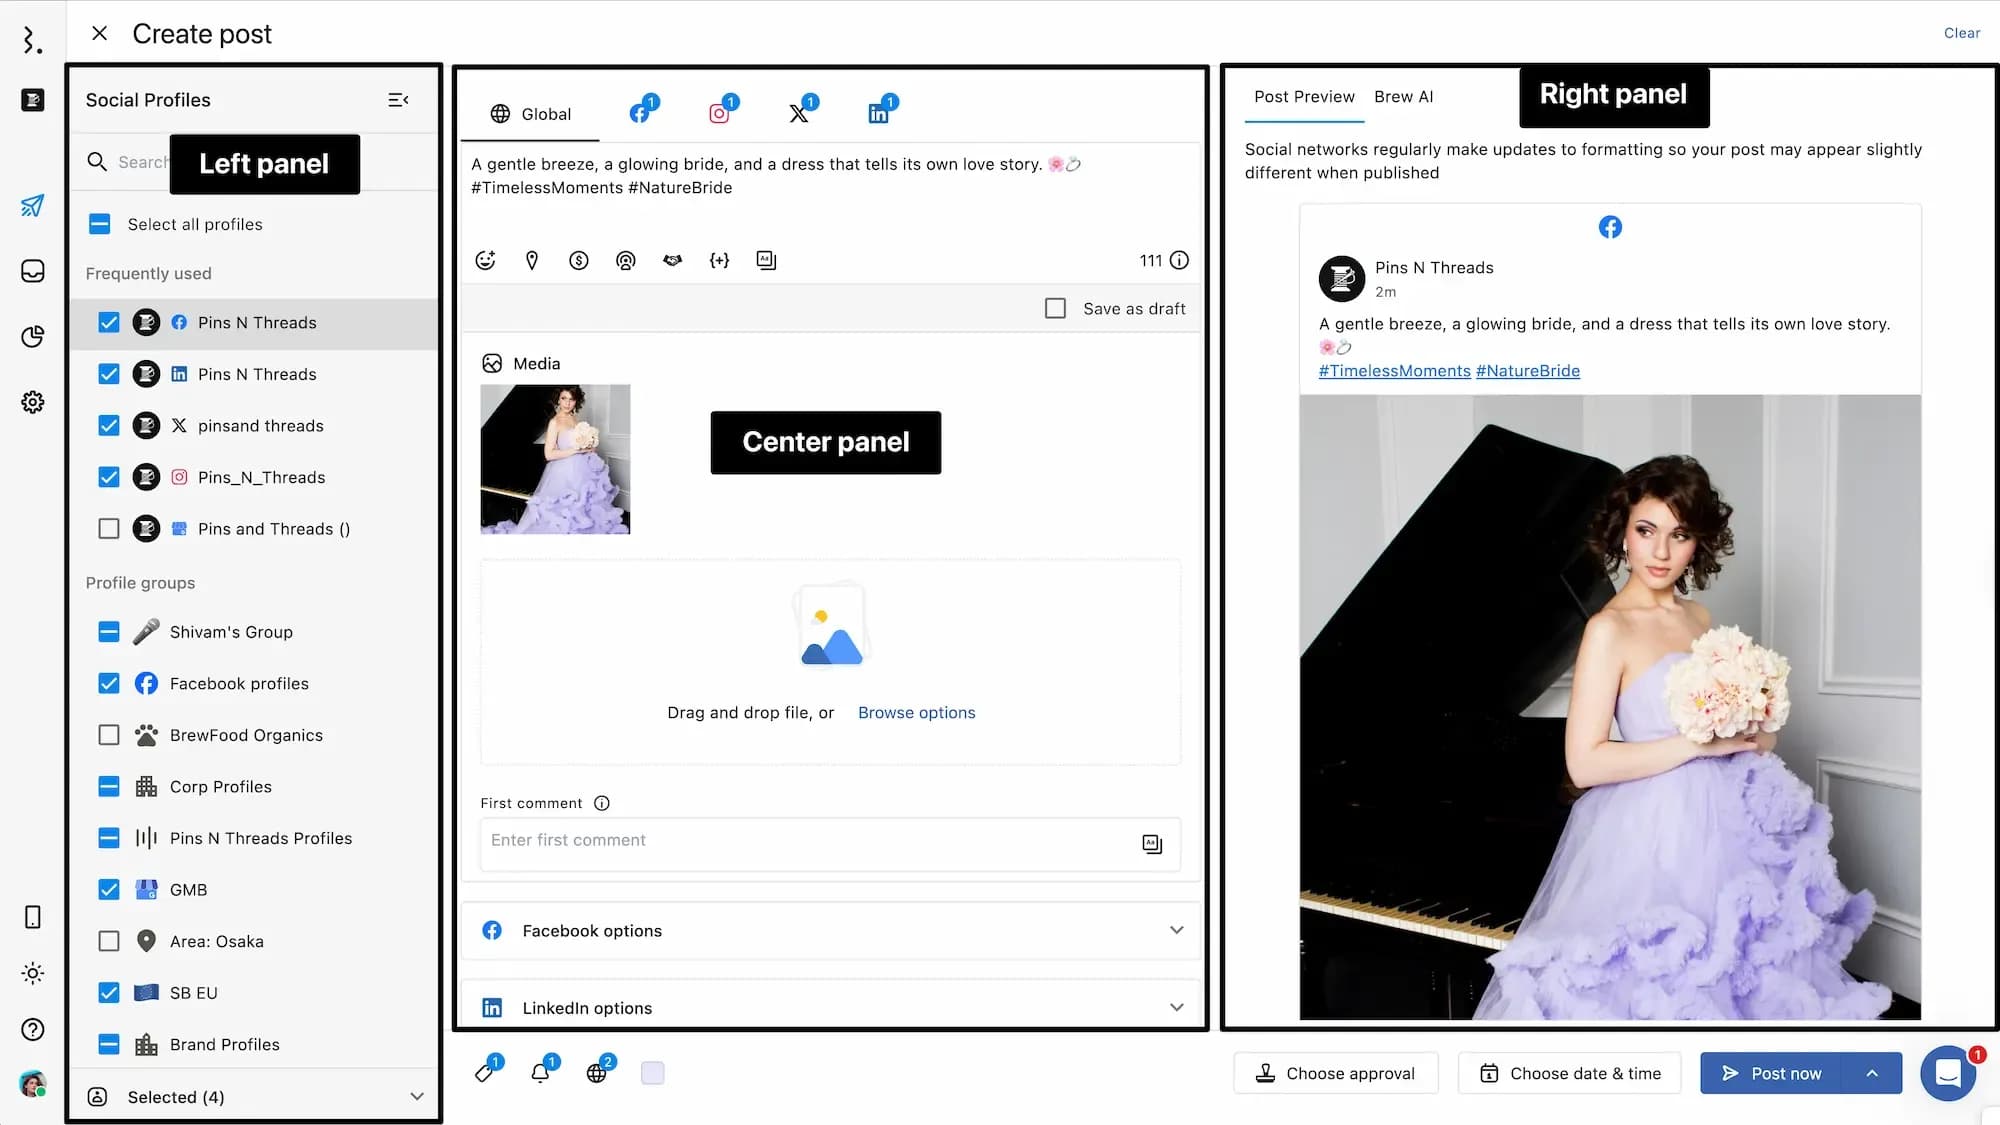
From your Statusbrew dashboard, click on Compose. The Create post window will open, which is divided into three vertical sections:
Left panel: Here, you can select the social media profile(s)/profile group(s) to create and schedule posts for.
Center panel: Here, you can create a post by adding details such as captions, media, links, and other network-specific options.
Right panel: You can Post Preview how your post will look once published, and use Brew AI to generate or refine captions.
Step 2: Launch Brew AI
By default, the right panel in the Create post window has the Preview open. To access Brew AI:
Click on the Brew AI tab.
At the bottom, you’ll see a button labeled Tell Brew AI what to do next… . Click this button to display the five available content generation methods:
Generate from existing posts
Translate an existing post
Generate from Custom Topic
Generate from Article
Generate from top performing posts
Step 3: Choose a Method and Generate Content
After selecting your preferred method, a dialog will open where you need to enter the required input, then click Submit.
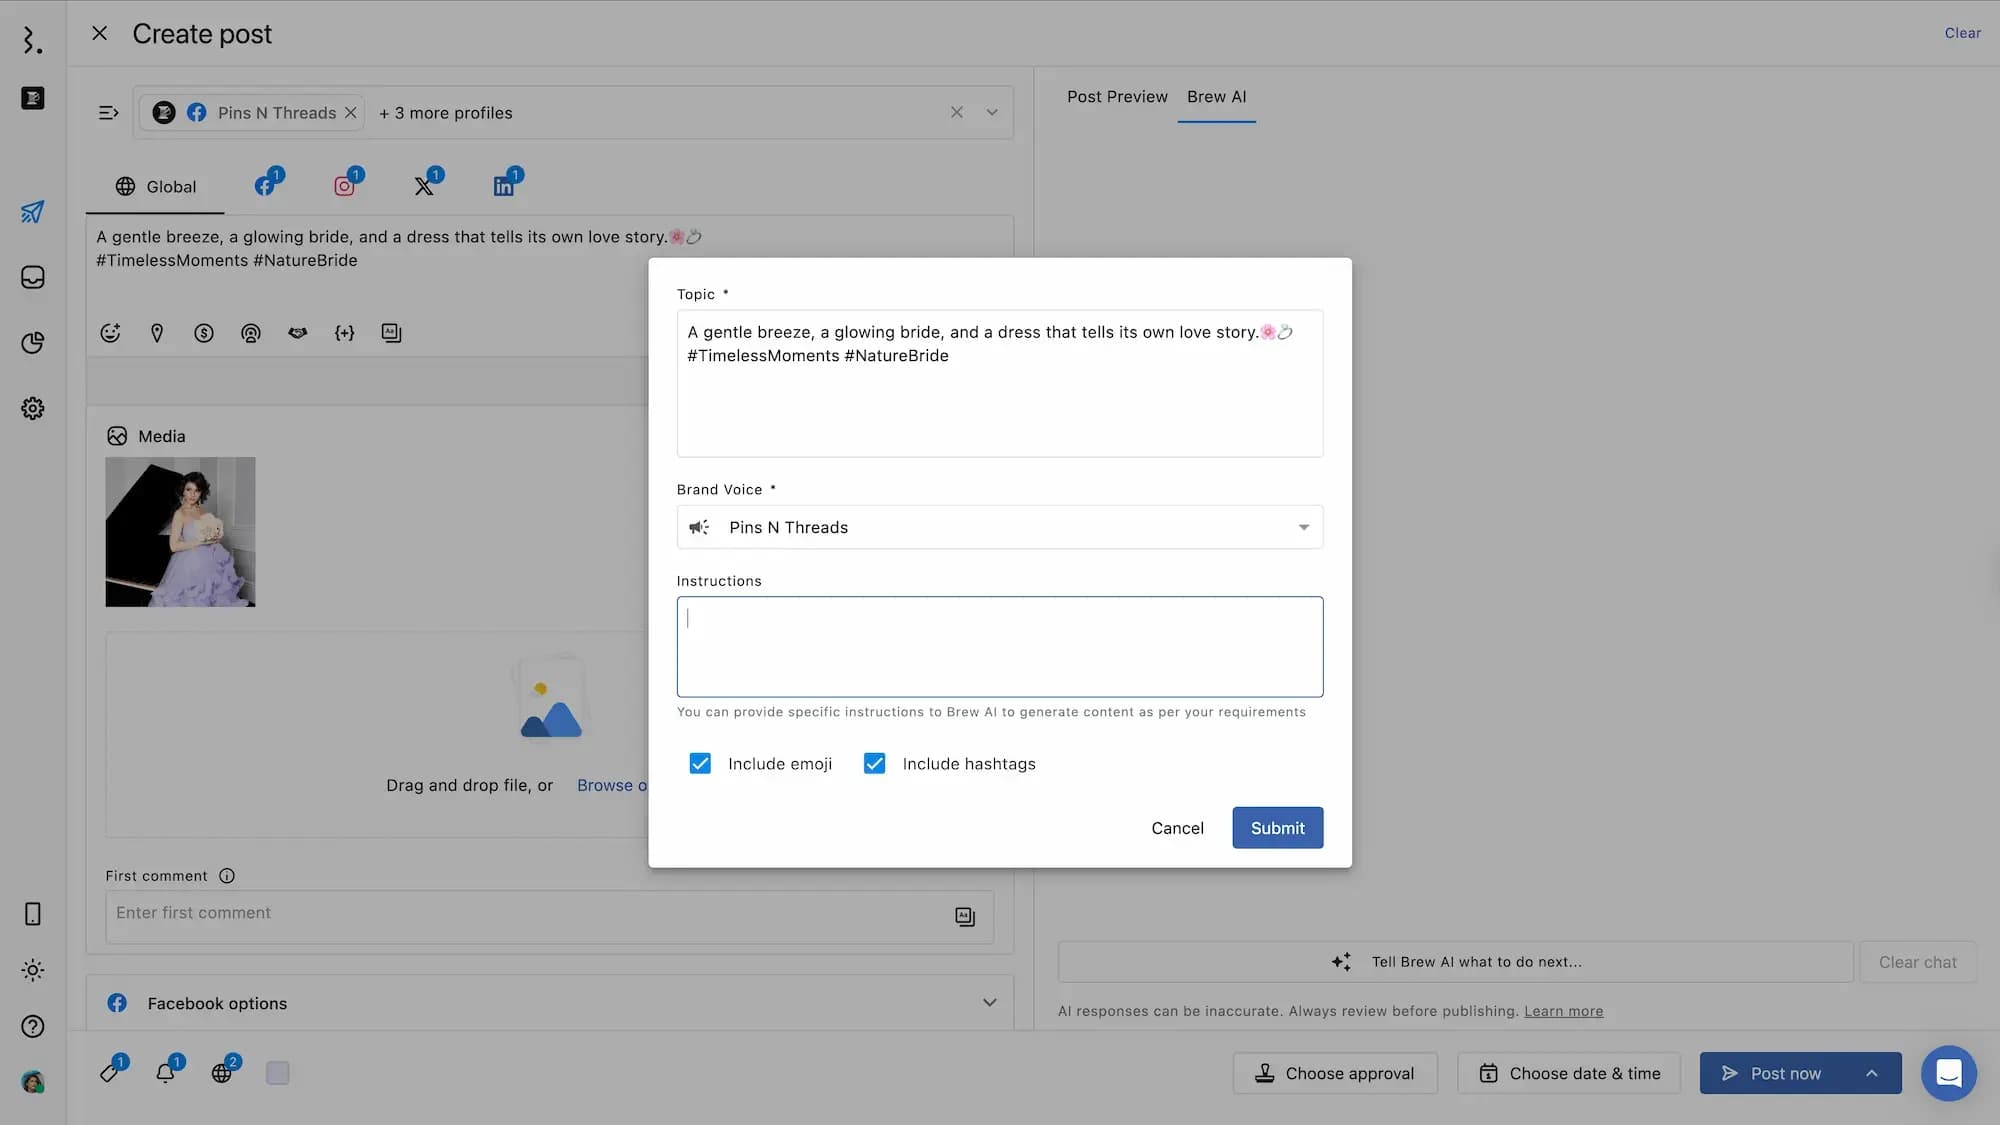
Here’s a breakdown of the input fields:
Topic (Required): Describe what your post is about. This field is filled with your current post caption added in the Create post dialog. You can edit or refine it before submission.
Brand Voice (Required): Select from your predefined brand voice in Statusbrew. You can also click on Create a new one if you haven’t set one up yet or need to define a different voice. This ensures Brew AI generates content that aligns with your tone and communication style.
Instructions: Add any specific instructions you want Brew AI to follow while generating content.
Include emoji: Check this box if you want emojis added to the generated caption.
Include hashtags: Check this box to generate relevant hashtags in the caption automatically.
Translate an existing post
Clicking on Translate an existing post will give you the option to select the desired language to translate. You can select from:
English
Japanese
Spanish
Portuguese
French
German
Arabic
Swedish
Danish
Hebrew
Croatian
Chinese
Russian
Italian
Hindi
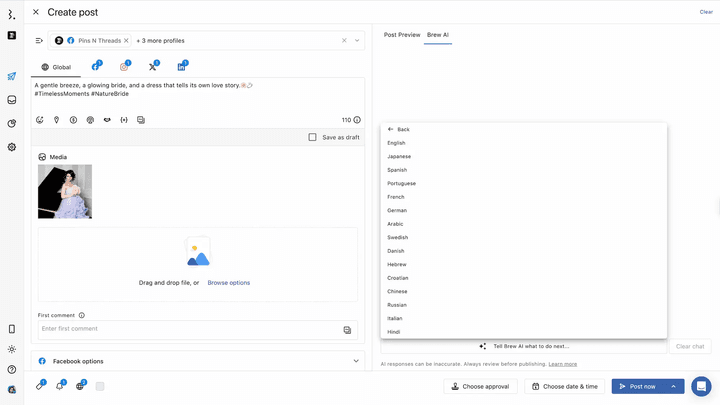
Once you select the desired language, Brew AI will return the translated text.
For Generate from top performing posts, you won’t need to add Topic and select Brand Voice.
For all options except translation, Brew AI will return three suggestions.
If you use the Generate from top performing posts method, you’ll receive five suggestions.
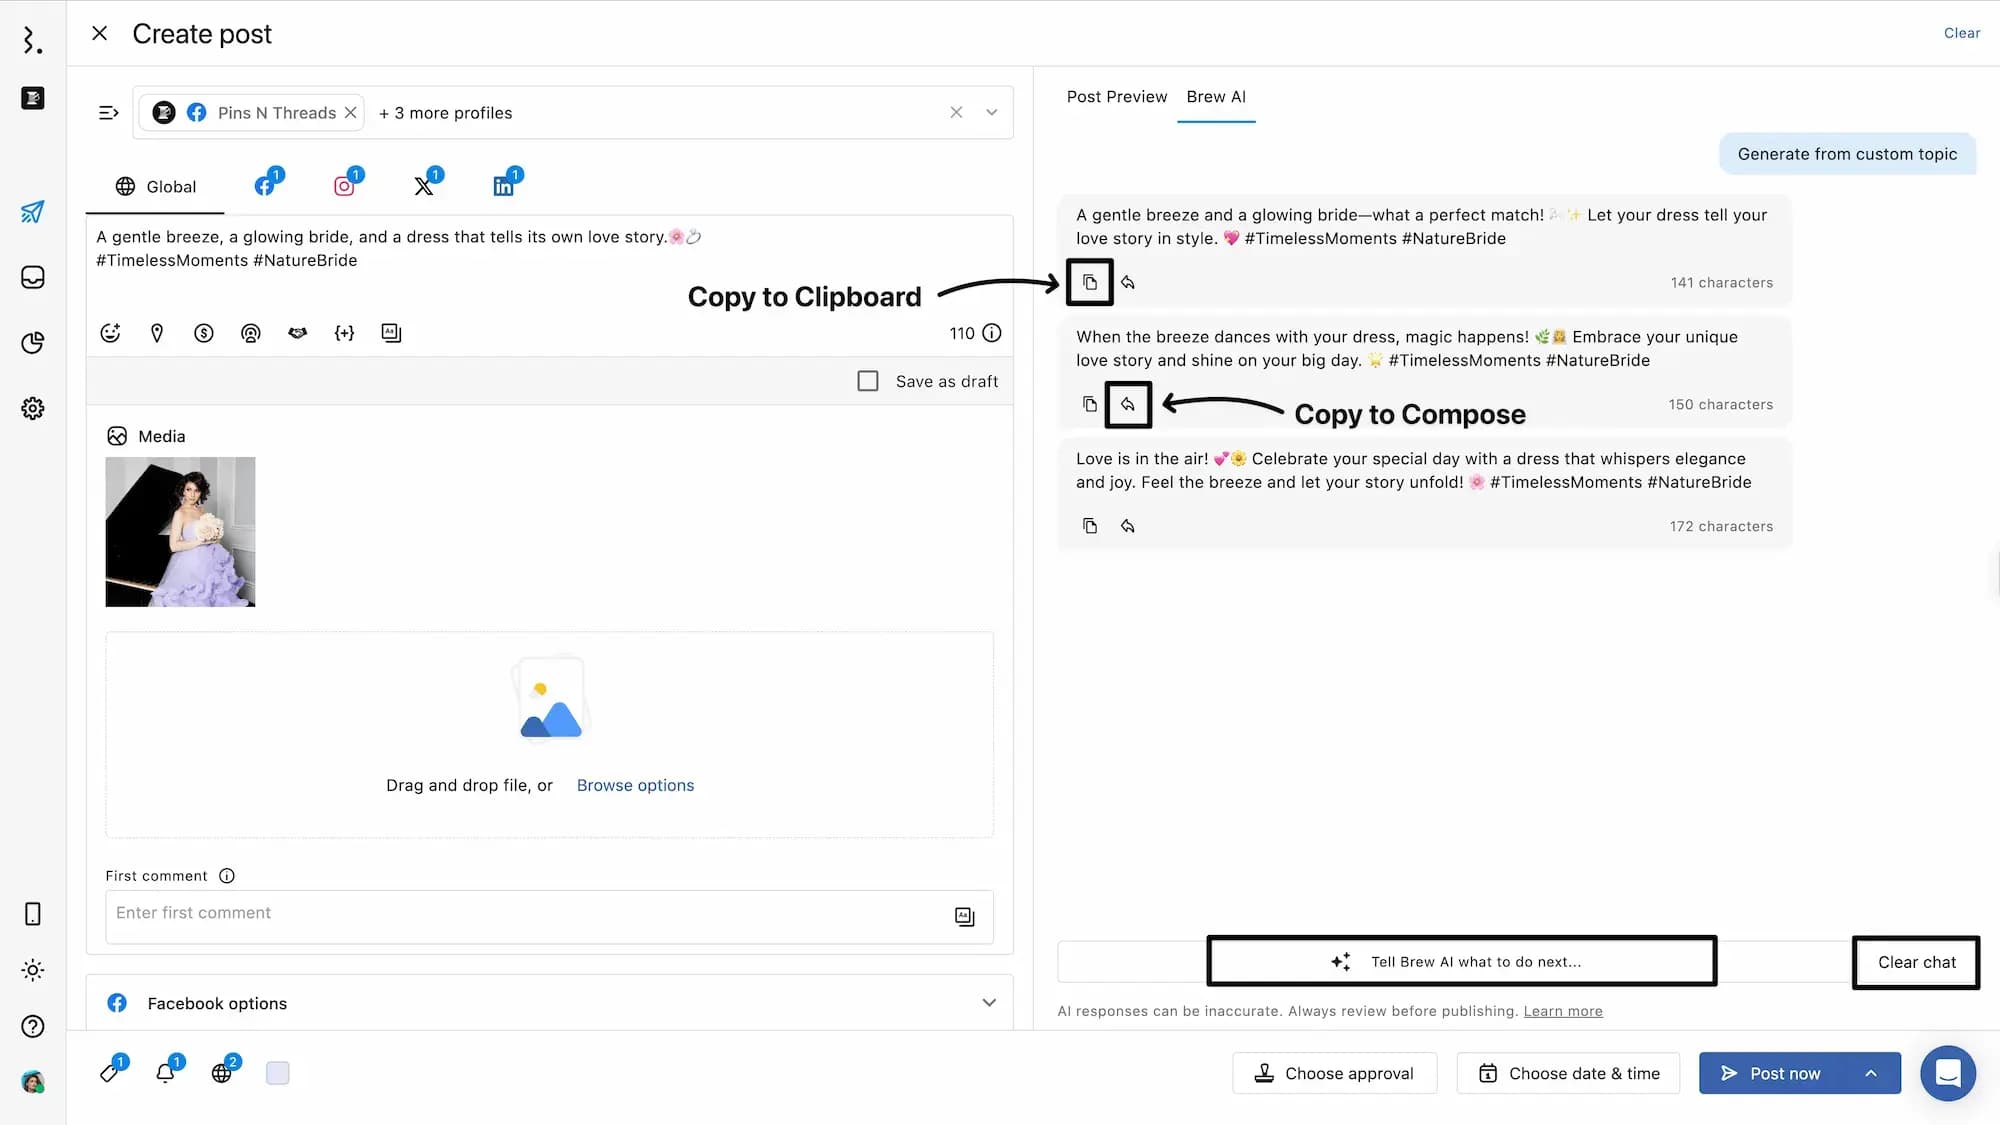
Step 4: Use the Generated Text
Each AI-generated suggestion offers the following options:
Copy to clipboard: Copies the text to your clipboard so you can manually paste it into any profile tab of your choice.
Copy to Compose: Automatically pastes the generated text into the caption bar of the currently selected profile tab.
Tell Brew AI what to do next… : Click to regenerate if you're not satisfied with the results.
Clear Chat: Resets the AI response area. Note: This cannot be undone.
Important: If you've selected multiple profiles, using Copy to Compose will paste the text only into the currently selected profile tab.
For example, selecting the Instagram tab will only paste the text there.
Selecting the Global tab will paste the caption across all selected profile tabs.
Step 5: Finalize Your Post
After pasting the generated content into the caption, you can modify it further:
Modify the caption
Tweak platform-specific options (e.g., adding collaborators for Instagram)
🔒 Note: Any edits you make are not used to train Brew AI. Your changes remain private and will not influence future AI outputs.
Once you're done:
Be sure to switch from the Brew AI tab back to the Post Preview tab.
This lets you preview your final post and avoid publishing without reviewing the content.
Complete scheduling or publishing your post by selecting Choose date & time option and the Post Now or Schedule. Learn how to select the right posting time.
Important Tips For Using Brew AI
Always switch back to the Preview tab after using Brew AI: After generating content, we recommend returning to the Post Preview tab to review your post before publishing. If you forget to switch tabs, you risk publishing without reviewing the final post, so please double-check.
Set your brand voice in advance: If you choose Generate from existing posts, Generate from Custom Topic, or Generate from Article, Brew AI will prompt you to select your brand voice. To simplify your workflow, we recommend configuring your brand voice ahead of time for more consistent and on-brand results.
5 Ways To Generate Posts With Brew AI
Brew AI offers five methods to help you create engaging and consistent social media posts.
1. Generate from existing posts
Use this option if you want to rewrite or rephrase content already entered in the caption field.
Ideal for updating older content or improving the tone and clarity of your post
Brand voice selection is required to maintain consistency in messaging
2. Translate an existing post
Use this option when you want to translate your caption into another language.
Statusbrew supports translation into 15 languages, including English, Spanish, and Chinese
Helps expand your reach across multilingual audiences
No brand voice selection required
3. Generate from Custom Topic
Input a specific topic and get relevant post suggestions.
Example: Topic - “Introduce our new vegetarian burger”
Brew AI will generate post ideas tailored to your input
Brand voice selection is essential
4. Generate from Article
Summarize a linked article into a social media post.
Enter a URL to any online article, blog post, or press release
Brew AI will create a post based on its content
Brand voice must be selected to align with your messaging
5. Generate from top performing posts
Generate new content inspired by your top-performing posts.
Useful for brainstorming new ideas based on what has worked well
Example instruction: “Take inspiration from posts with high reach. Create post text for dance-related videos.”
Brew AI will suggest new captions based on past engagement metrics
How To Set Your Brand Voice?
When using the following Brew AI generation methods:
Generate from existing posts
Generate from Custom Topic
Generate from Article
It is mandatory to select a brand voice.
What Is Brand Voice?
Your brand voice is the consistent writing style and tone that represents your brand’s personality. Think of it as the “feel” your content conveys.
Without a unified voice, your posts may seem inconsistent, weakening the impact of your brand message. In an era where content is increasingly AI-generated, defining your brand voice has never been more important.
Why Set It In Advance?
Statusbrew recommends configuring your brand voice before using Brew AI. This ensures that all AI-generated content aligns with your messaging goals and feels cohesive across platforms.
For example, you might choose a brand voice that is:
Trustworthy and formal for public relations posts
Exciting and participatory for campaign content
Where To Set Your Brand Voice?
You can configure your brand voice in Statusbrew, refer to our article on how to set up brand voice.
Writing Clear Prompts
When using Brew AI, the instructions you provide to guide the AI are called prompts.
A prompt is the content of your request.
For example:
"Please rewrite in a more user-friendly tone."
The quality and direction of the generated post will largely depend on how clear and specific your prompt is.
The more specific your prompt, the more accurately Brew AI can generate content that matches your goals. Even if you're not sure how to phrase your request perfectly, simply being detailed helps Brew AI translate your thoughts into clear and useful captions.
To learn more about how to write effective prompts, refer to our article on How To Write Clear Prompts For Better AI Responses.
Additional Options for Generation Methods
For all Brew AI generation methods except Translate an existing post, you can also choose to:
Include emojis
Include hashtags
You can enable these options with a simple checkbox selection. Since manually choosing emojis or hashtags can be time-consuming, Brew AI helps you automate this process, which is perfect for increasing engagement while saving time.