Internal Tags
Tags help you structure and organize your posts, conversations, and contacts. You can classify your posts, conversations, and contacts by category, which is useful for tracking.
Think of tags as internal hashtags that can be added to your posts, conversations, and contacts without being visible to the public.
All users can use and apply tags to posts, conversations, and contacts, but only Admins and Owners of a Statusbrew Space can create, archive & edit Tags.
Note: Tags are helpful for you and your team. However, they aren't visible to your customers in published posts or messages.
Tag Outgoing Content & Parent-Child Tagging are available on all plans. Tag Incoming conversations & Inbound Tag Reporting, Tag Report are available in Standard Plan and above.
You can have a maximum of 10,000 active and archived tags for an account.
Tags are available in Standard, Premium and Enterprise plans. See full pricing details.
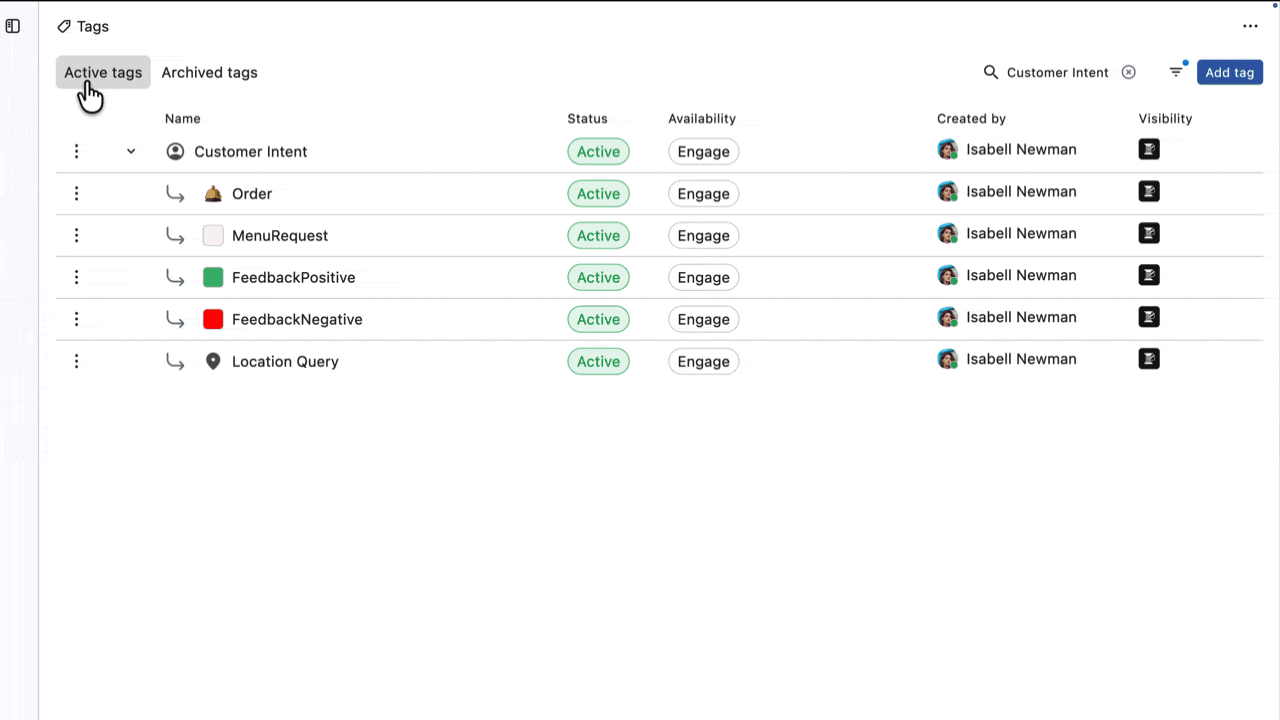
Parent Tag & Child Tag
Parent Tag: A broader category that acts as a container.
Child Tag: A more specific label nested under a parent tag. These help break down the parent category into focused segments.
For Example:
For example, if you’re a software company, you might receive customer conversations related to bugs or technical issues.
Rather than tagging all of them as "Bug," you can introduce a parent tag like "Bug" and organize them further using child tags such as "Bug - Front End Error," "Bug - Back End Error," or "Bug - User Error."
This allows your team to quickly understand where the issue lies and assign it to the right team.
How To Create A Parent Tag?
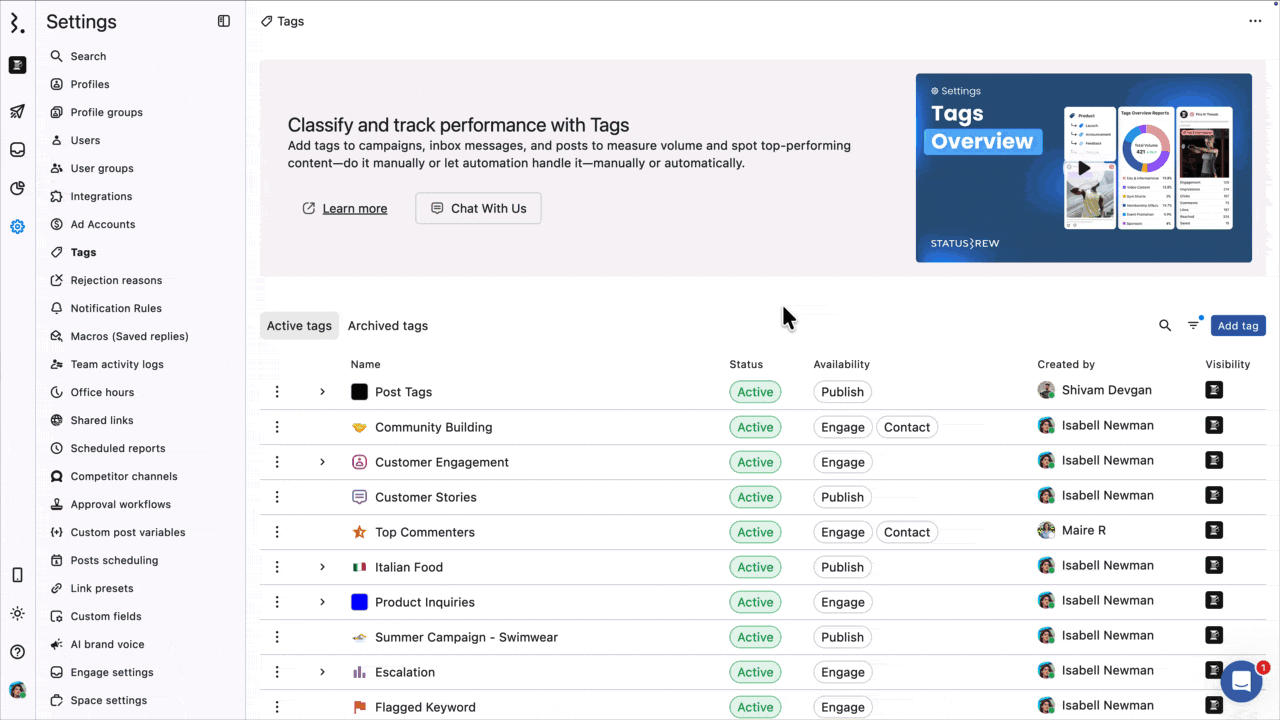
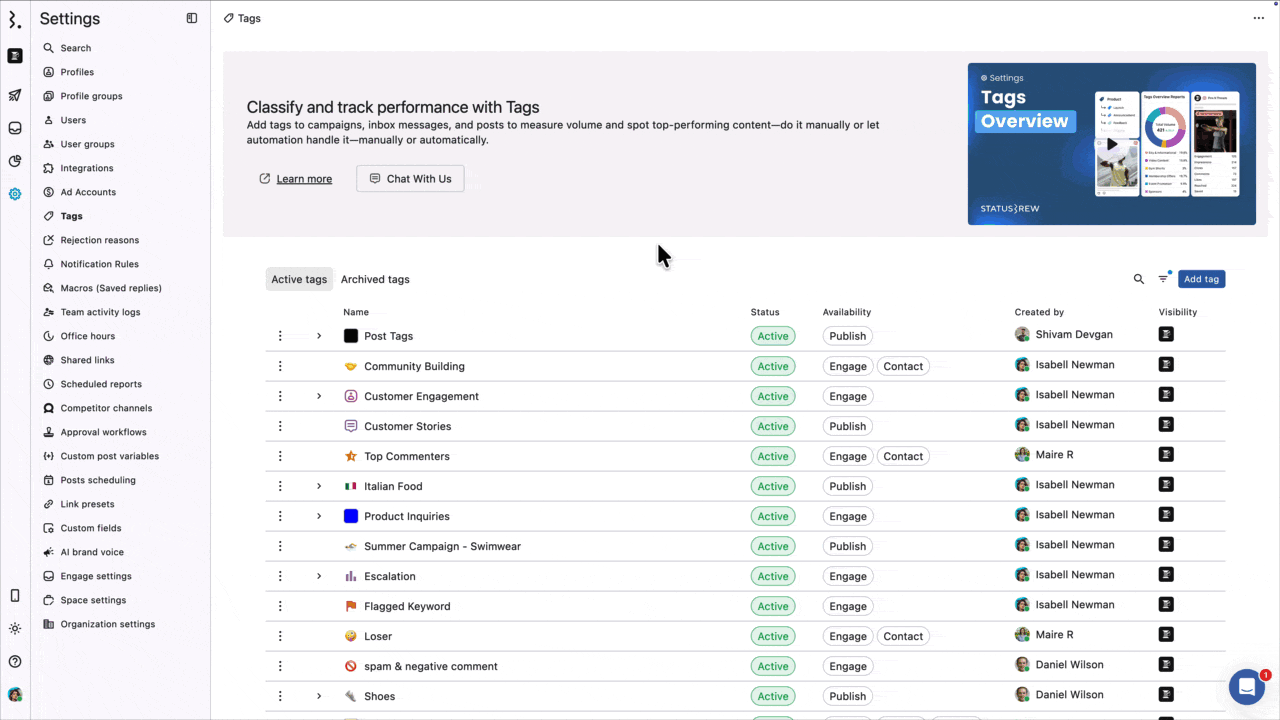
Go to Settings.
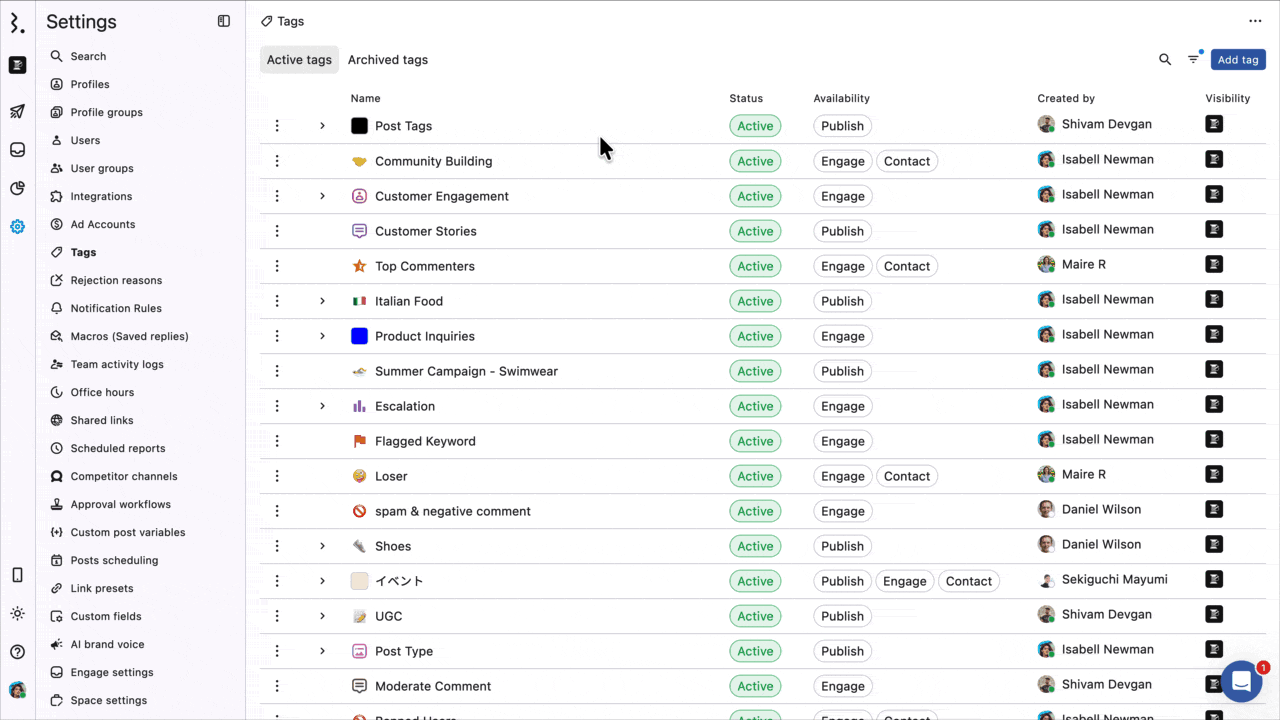
Select Tags. The Tags window will open, where you can see all the tags created and manage them.
Click Add tag.
Give a Name to the tag (up to 32 characters).
You can also change the icon.
Add a tag Description to provide context for when the tag should be used. Descriptions are visible to organization members when they apply tags to content.
Select whether the tag should be used in Publish, Engage, and/or Contact. By default, all three are selected, but you can click on to remove one.
Open the Additional options by clicking and select tag color.
Click Create.
How To Create A Child Tag?
Go to Settings.
Select Tags. The Tags window will open.
Click Add tag.
Give a Name to the tag (up to 32 characters).
You can also change the icon.
Add a tag Description to provide context for when the tag should be used.
Select whether the tag should be used in Publish, Engage, and/or Contact. By default, all three are selected, but you can click on to remove one.
Select the Parent tag.
Open the Additional options by clicking and select tag color.
Click Create.

While creating tags, a preview of the tag is displayed, including the tag name, color, and the associated parent or child tag hierarchy.
The Create tag window can also be accessed from the Add tags dialog box.
How To Import Tags?
Setting up individual tags can be tedious and time-consuming, especially for teams managing a large number of tags or complex parent-child tag structures.
To simplify this workflow, Statusbrew offers a bulk import feature that allows users to copy and paste their entire list of tags directly into the platform. Whether you're migrating from another tool or organizing an extensive tagging system for the first time, this feature simplifies setup.
Go to Settings.
Select Tags. The Tags window will open.
Click Add tag.
Select Import Tags.
Copy and paste tags in the Add tags box, separated by a comma. You can only add up to 200 items in one go.
To create a parent tag, just enter its name (e.g.,
tag1).To create a child tag, use the format
tag1 - tag2.
Click Preview.
Choose the Scope:
Global: Makes the tags available across all spaces.
Space: Makes the tags available only in a specific space(s)
Choose where the tags should be available:
Publish
Engage
Contact
Review the generated tags. You can:
Change the tag color using the color square.
Select a parent tag from the Parent dropdown.
Remove a tag from the list before adding it.
Click Add All to import the tags.

Editing A Tag
Go to Settings.
Select Tags. The Tags window will open.
Find the tag you want to edit and select (More) besides the tag. You can also use the search bar to quickly find tags.
Select Edit.
Make the required changes.
Click Update.
Archiving A Tag
You can hide the unused tags from the list of Active Tags by archiving them.
Archiving a tag will make it unavailable across the app. You and your team will no longer be able to use the tag. However, it will continue to appear on the content to which it was previously applied.
Go to Settings.
Select Tags. The Tags window will open.
Find the tag you want to archive and select (More) besides the tag.
Select Archive.
Confirm your choice.
Archiving cleans up your tag list without deleting historical tag data.
Unarchiving A Tag
Unarchiving an archived tag will again make it available across the app for you and your team to use and view in your Analytics.
Go to Settings.
Select Tags. The Tags window will open.
Go to Archived tags.
Find the tag you want to unarchive and select (More) besides the tag.
Select Activate.
FAQs
How can I delete tags in Statusbrew?
Tags cannot be permanently deleted in Statusbrew.
You can only archive a tag.
Go to: Settings → Tags
Find the tag you want to remove from active use and archive it.
Once archived, the tag will no longer be available for new tagging in areas such as Publish and Engage.
Archived tags may still appear in Reports because reports retain historical data for posts or conversations that used those tags earlier.
Why are my Tags not showing on the Tags page?
If your Tags page looks empty, check the tag filter on the right side of the page.
The Tags page can be filtered by:
All: shows all tags Global: shows tags with no space restrictions Space: shows tags available only in the current space
By default, the filter may be set to Space. If your tags were created as Global tags, they may not appear in this filtered view.
To find them, change the filter to All or Global.
When creating a tag, Global is selected by default. This means the tag is available across all connected spaces. You can also select specific spaces if you want the tag to be available only there.
Note: If you try to update a tag and see an error after saving, you can try reloading the Tags page or doing a hard refresh.
In most cases, the tag update is already saved, but the page may not reflect the change immediately, and can show an error. After refreshing, check the tag again to confirm the updated color/icon.
Why do I see a different number of Tags than my colleague?
This usually happens because the Tags page filter is set differently for each user.
The Tags page can be filtered by:
All: shows all tags Global: shows tags with no space restrictions Space: shows tags available only in the current space
If you and your colleague see different tag counts, check the filter on the right side of the Tags page and make sure you're both using the same filter.
For the full list, change the filter to All.