Facebook Boosting
Boosted posts are a simple way to turn your existing Facebook posts into paid ads. By boosting, you can extend the reach of your high-performing content, helping it appear in front of a larger audience and driving more engagement in the form of likes, shares, comments, and clicks.
Promoting Facebook Posts is easy to do from Statusbrew to maximize your content’s reach. You can promote Facebook posts from Compose or from Publish.
Step 1: Add your Facebook Business Page to your business portfolio in Meta Business Suite
Before boosting Facebook posts from within Statusbrew, you have to make sure your Facebook Business Page is added to your business portfolio in Meta Business Suite.
Learn how in Facebook’s help article.
Step 2: Add your Facebook ad account to your business portfolio in Business Manager
Your Facebook ad account must be added to Facebook Business Manager before you can boost posts from within Statusbrew.
Learn how in Facebook’s help article.
Step 3: Connect your Facebook Business Page to Statusbrew
To connect your Facebook Business Page to Statatusbrew:
Go to Settings.
Select Profiles.
Select Add profile.
Select Facebook.
Select Add Facebook page. You'll now be redirected to Facebook.
You'll get a login window if you aren't logged in already. Enter your Facebook account credentials (email and password), then select Log In.
Review the permissions Statusbrew will receive and select Continue as [Your Facebook Profile Name]. This does not connect your personal profile to Statusbrew — it only authorizes access to the Pages linked to your account.
Check the box next to the Facebook Page(s) you'd like to connect to and click on Add.
Step 4: Connect your Facebook Ad Account to Statusbrew
To connect your Facebook ad account to Statatusbrew:
Go to Settings.
Select Ad Accounts.
Select Add Ad Account.
Select Facebook. You'll now be redirected to Facebook.
You'll get a login window if you aren't logged in already. Enter your Facebook account credentials (email and password), then select Log In. Authorize Statusbrew to access your Facebook account.
Choose Facebook ad accounts that you want to connect and click Submit.
See Ad Accounts.
Step 5: Boost a post from Statusbrew's Compose
You can boost any Facebook post type in Statusbrew, including drafted, scheduled, or Publish Now posts. You can also boost posts that need approval.
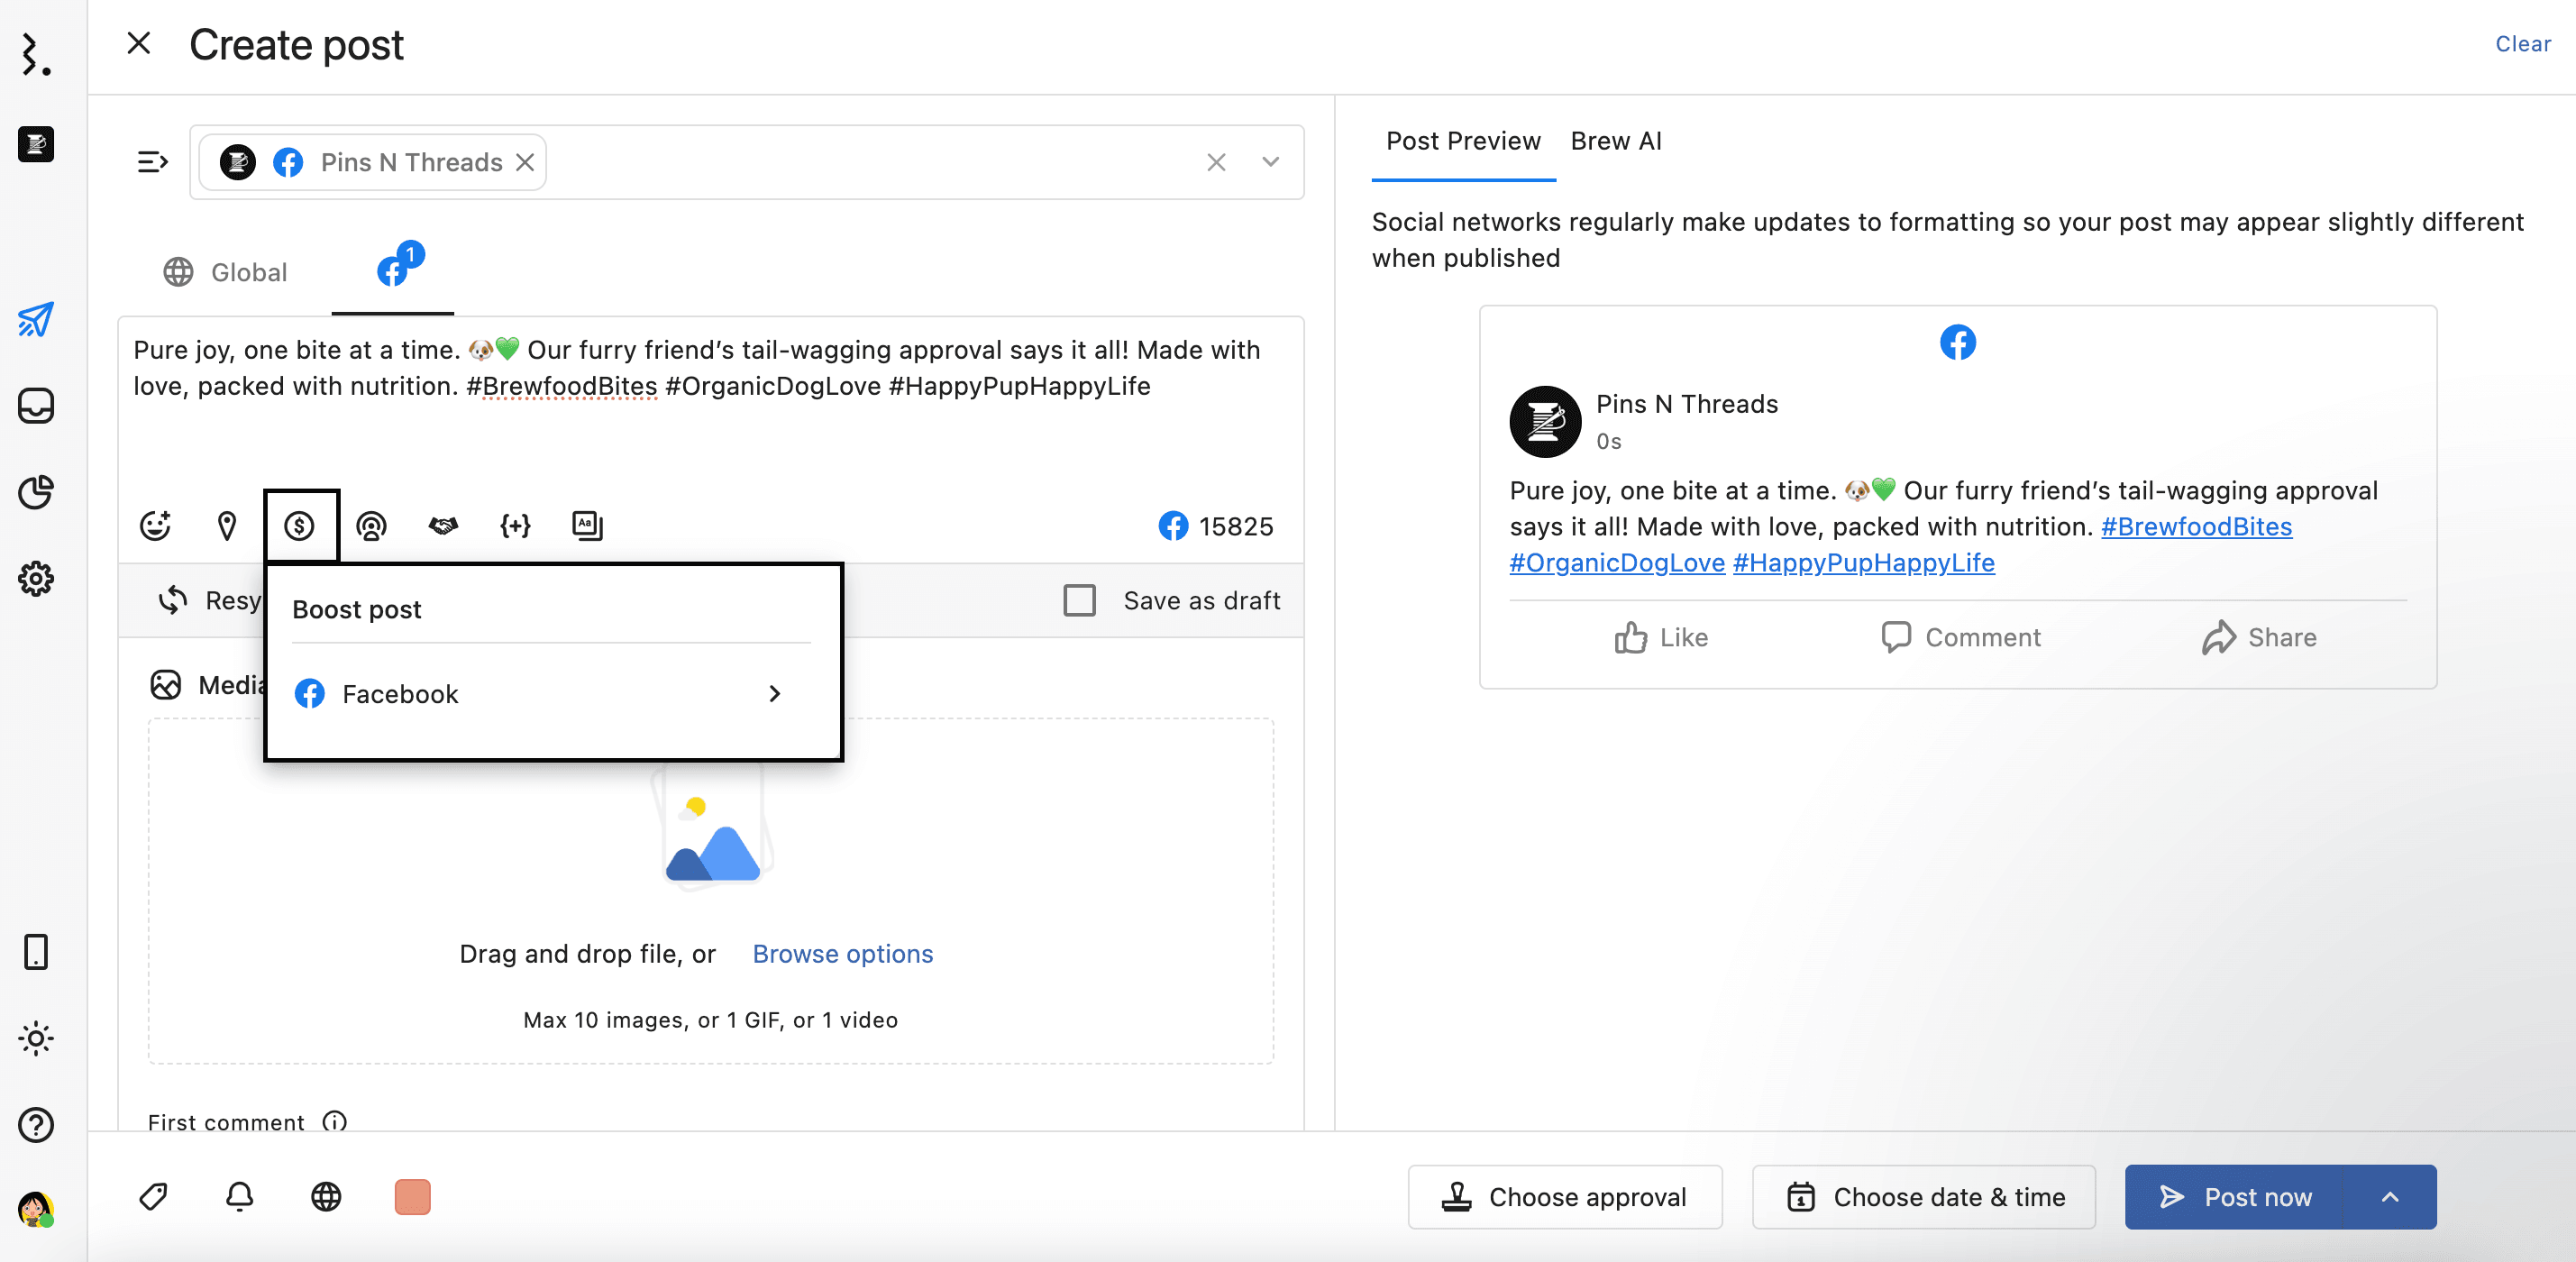
Go to Compose.
Select the Facebook Page connected to your ad account from the Profile Picker.
Click Boost post.

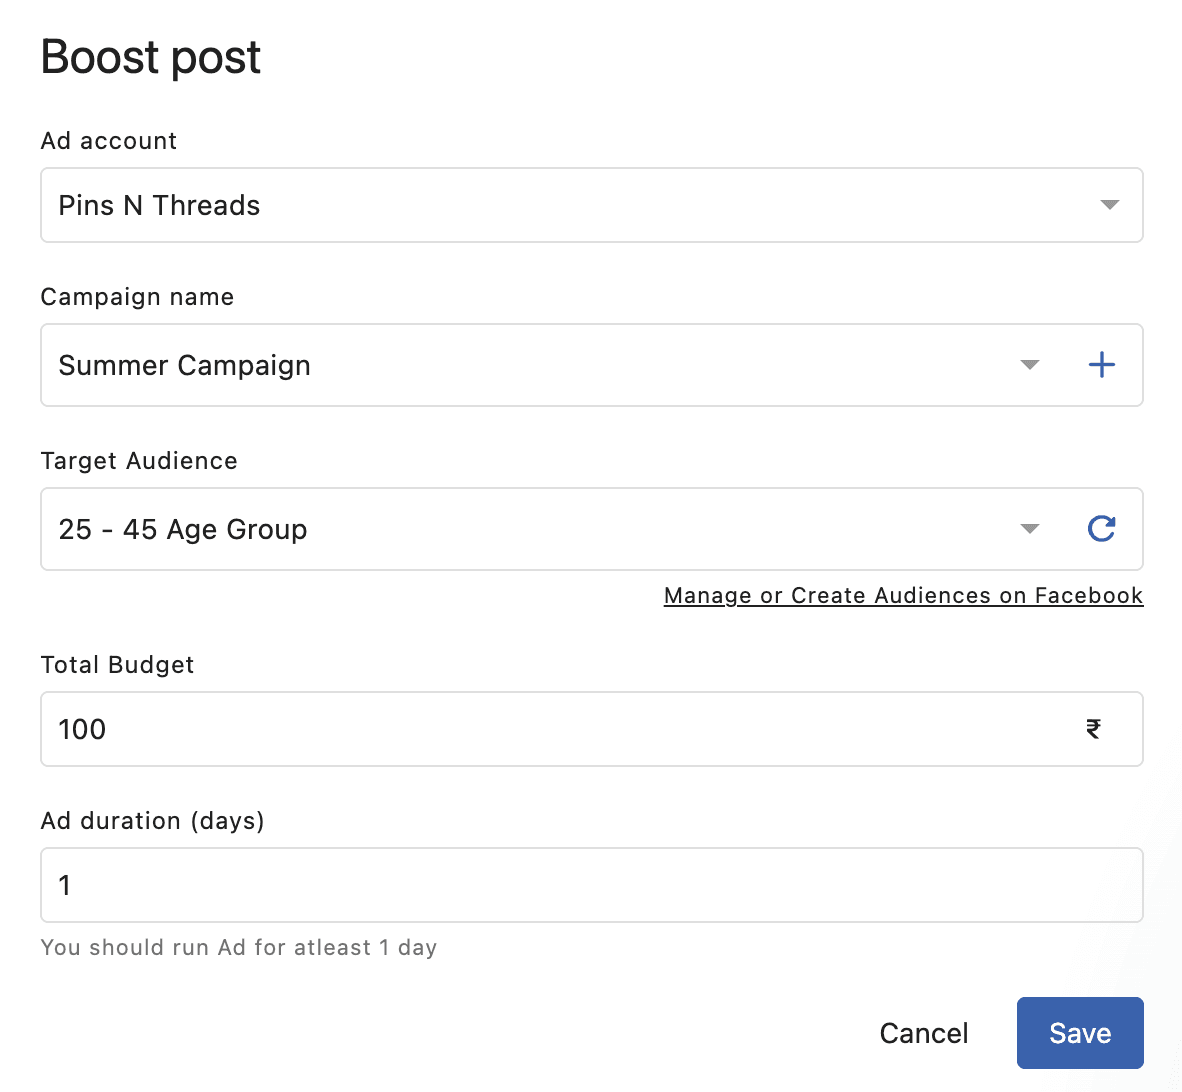
Choose an Ad Account.
Add a Campaign name. You can also click Add new campaign to create a new one.
Choose Target Audience. You can manage or create audiences on Facebook Ad Manager.
Set the Total Budget of the campaign.
Add the Ad duration (in days).
Click Save.

You can publish this promoted post like any other post in Statusbrew - you can either choose to publish immediately, put it in the scheduling queue, schedule it manually, or save it as a draft.
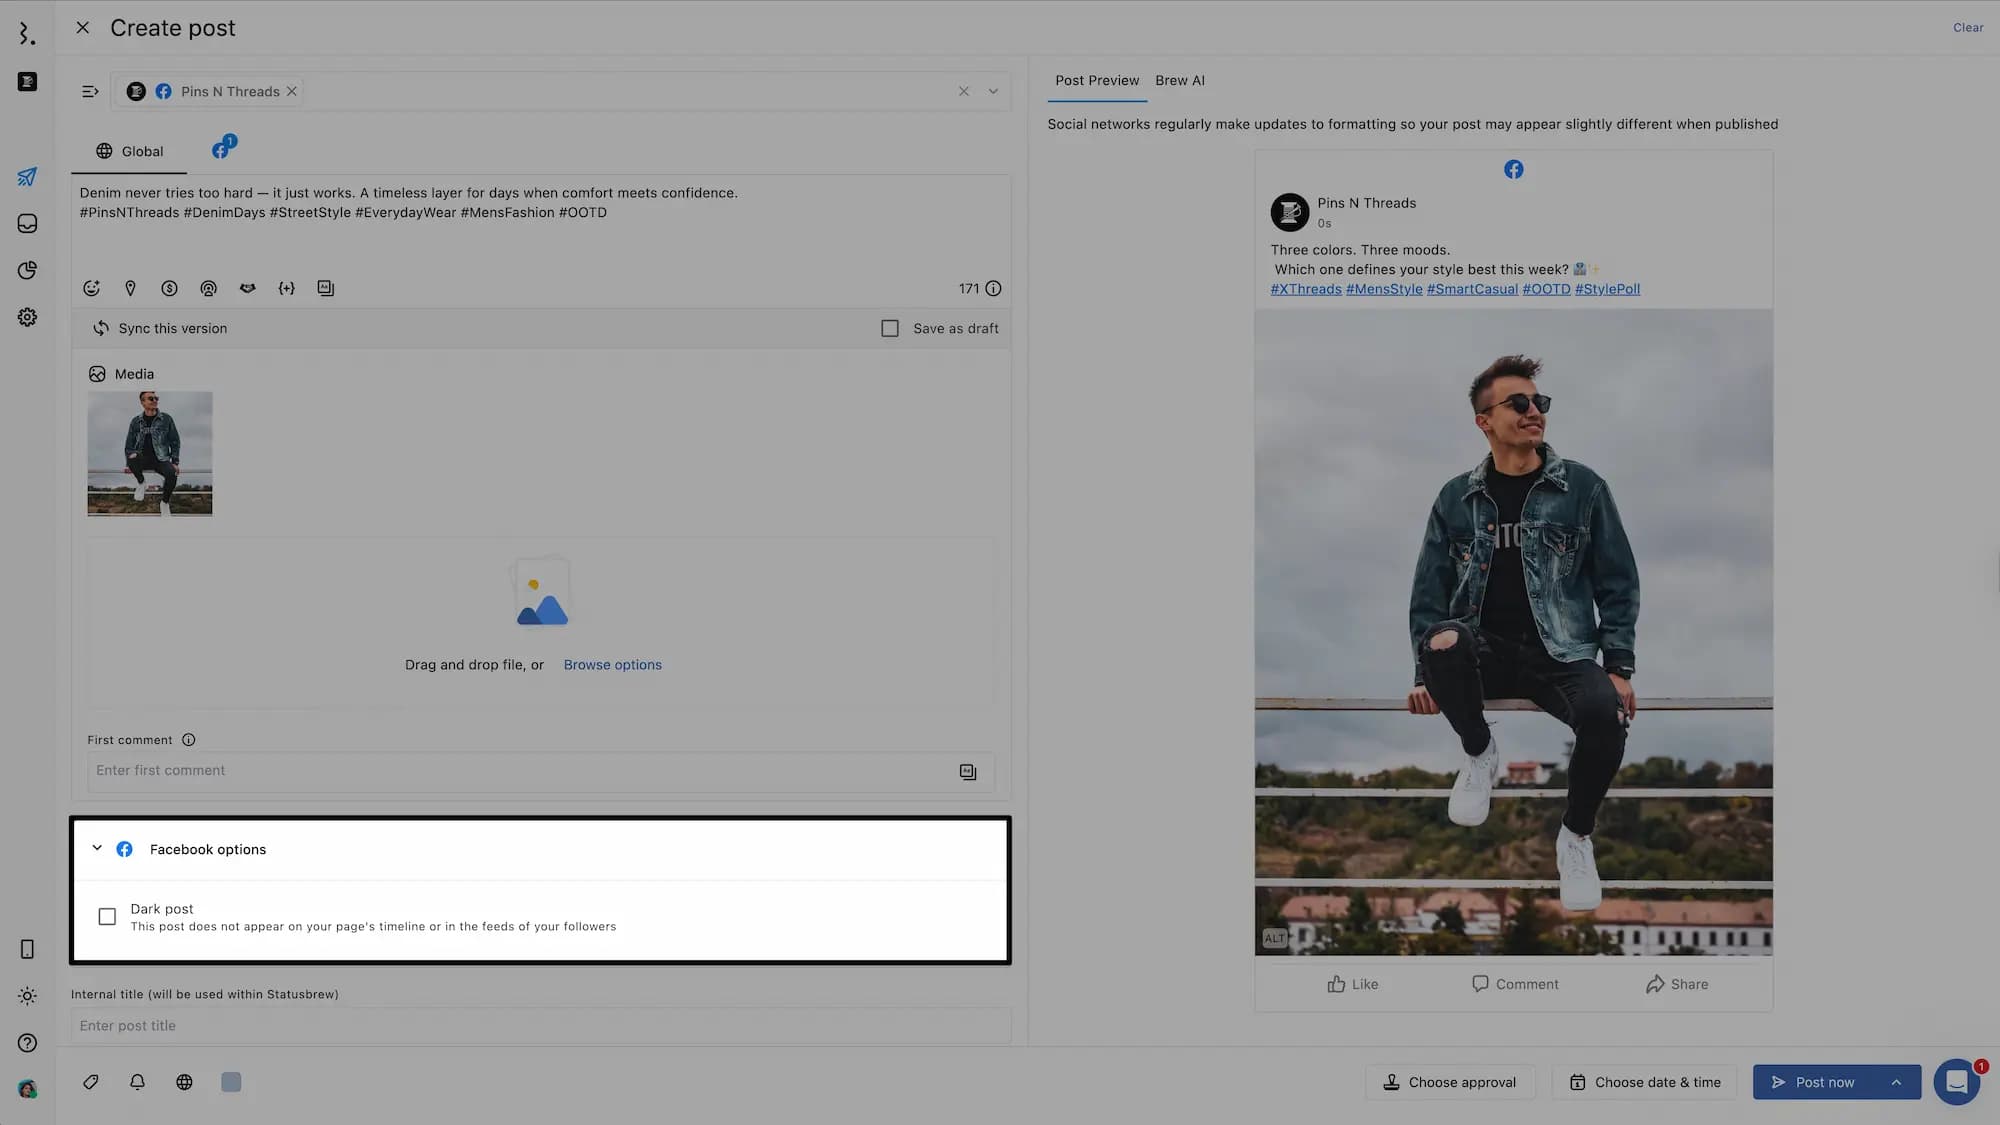
You can select Dark post in Facebook options if you don’t want your post to appear on your page's timeline or in your followers' feeds.

Promoting a post from Statusbrew's Planner
You can also promote your published Facebook posts from Statusbrew's Planner.
Go to Publish > All Posts from the sidebar.
Find the Facebook post that you want to promote. You can also create a Planner Board of all published Facebook posts to find them easily or filter posts by profiles, networks, or even post state.
Click on the post to open its detail view.
Select More actions
Click Boost post.
Choose an Ad Account.
It will open the Boost Post dialog. Complete the form and click Save.
Once a post was boosted, you can quickly find it by looking for the icon that appears in the Publishing Calendar.

Statusbrew's Premium & Enterprise plans users can get in-depth insights into the performance of their promoted content using Statusbrew's Facebook Paid Performance Report.
Statusbrew also fetches all the comments on your Promoted content which you can moderate using Engage Inbox in the Standard, Premium & Enterprise plans. See Hiding/Deleting Comments.
How To Edit A Scheduled Boosted Post?
If you want to make changes to a scheduled boosted post, you can do so by
Go to Publish
Find the Facebook post that you want to edit.
Click on the post to open its detail view.
Click on the Boost post section. The Boost Post will become editable.
Make the required changes and click to Save your changes or to Discard the edits.

FAQs
Why does my post say boost is unavailable?
Certain posts, such as shared posts, can’t be boosted. See Facebook’s help article "Why is my boost unavailable" to learn more about why your boost is unavailable.
Why does my boost post have an error status?
An error status means the post failed to pass Facebook’s review and was not published. Sign in to your ad account on Facebook for details.