What are Macros?
Saved Replies + Actions = Macros
If you're dealing with the same queries over and over again on your socials, Macros can cut your team's response time by letting you save and reuse responses instead of typing them out repeatedly.
But that’s not all! Macros can also automate actions like assigning conversations to the right team or moving them to a specific inbox. This means fewer manual steps and a smoother engagement flow for your team.
Watch the video below for a full walkthrough, or jump right into the article and create your first macro!
Creating a Macro
Admins of a space in Statusbrew can create, edit, or delete Macros, but once created, all users in the space can use them.
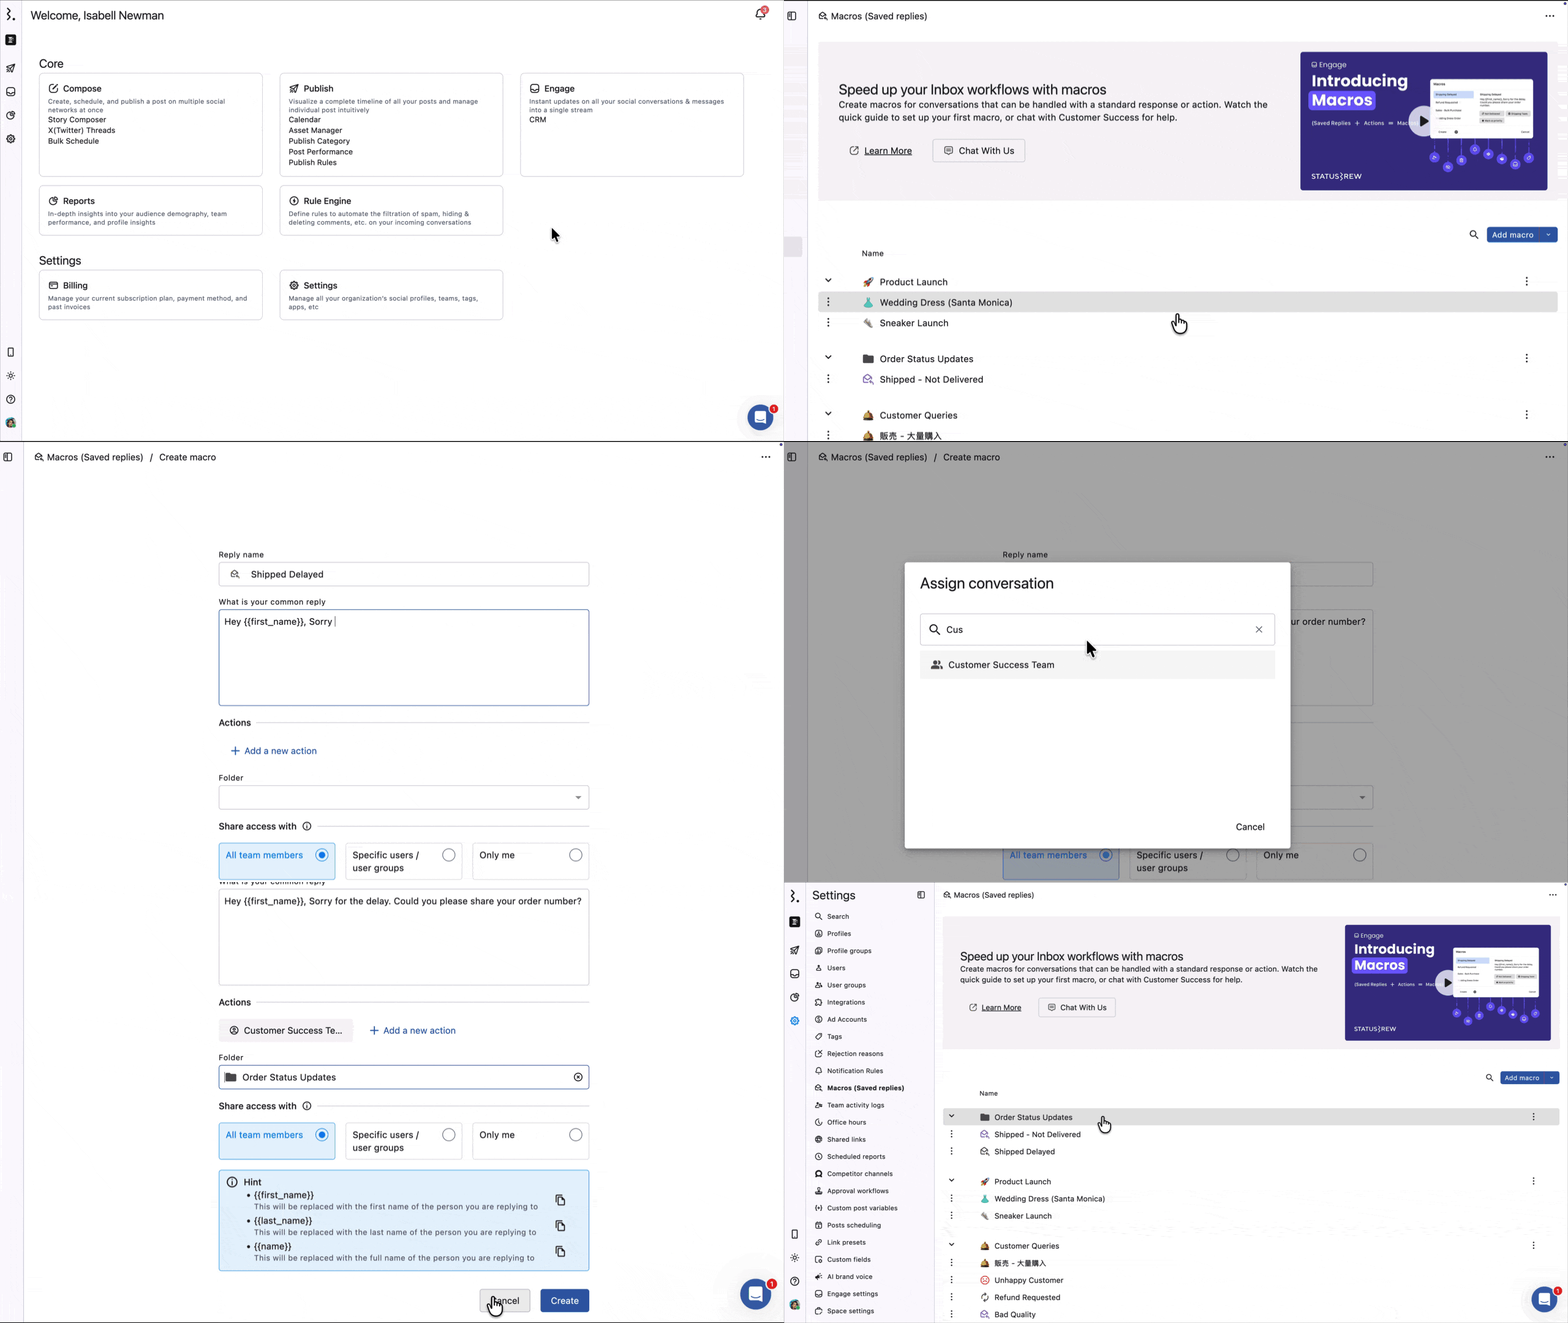
Go to your Statusbrew dashboard & click on Settings.
Click Macros (Saved replies).
Click
Add macrobutton in the top right corner.Enter a recognizable name in
Reply namefield.Craft or paste your response in the
What is your common replyfield.Click Add a new action.
Select Folder to create the macro in.
Choose an action for the conversation when this Macro is applied—e.g., Hide/Delete a comment, send a Slack notification, or send an email.
Decide who can use this Macro:
Share with all users or specific user groups.
Only me (visible only to you).
Click
Submitto save your Macro.
There's More!
Personalize replies with placeholders like {{first_name}}, {{last_name}}, or {{name}}—they’ll auto-fill with the recipient’s name or username. Just copy and paste these from the hint section!
Pro tip: Need a Macro fast? Create one directly in Engage in just a few clicks:
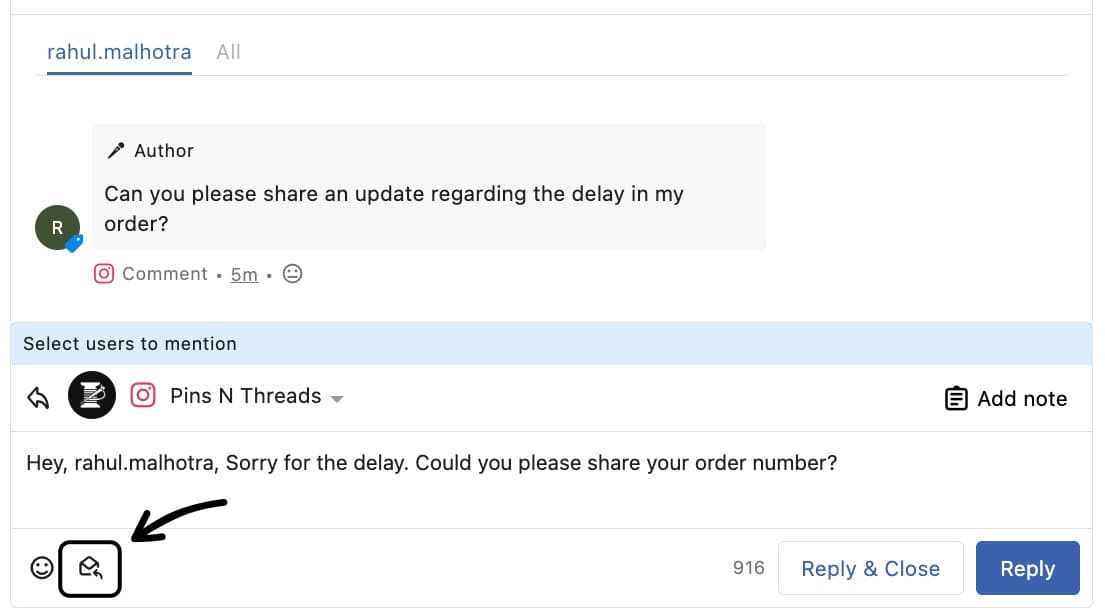
In an Engage conversation, click Macros icon at the bottom of Reply box.
Click Create button.
To create a macro within a folder, click beside the folder in which you have to create a folder and select Add macro. In the Createmacroview dialog that opens, the folder will be auto-filled.
How Do I Import Macros In Bulk?
If you already have a set of replies written up, upload them all at once with a CSV file instead of creating them one by one.
What Your CSV Needs:
Row 1 is the header. Column A reads name, Column B reads body. Keep it lowercase.
Column A: the macro name. Max 64 characters.
Column B: the reply text. Max 10,000 characters.
Up to 500 macros per upload.
You can use name placeholders in the body column. {{first_name}}, {{last_name}}, and {{name}} are replaced with the first name, last name, and full name of the person you are replying to.
Importing Your Macros
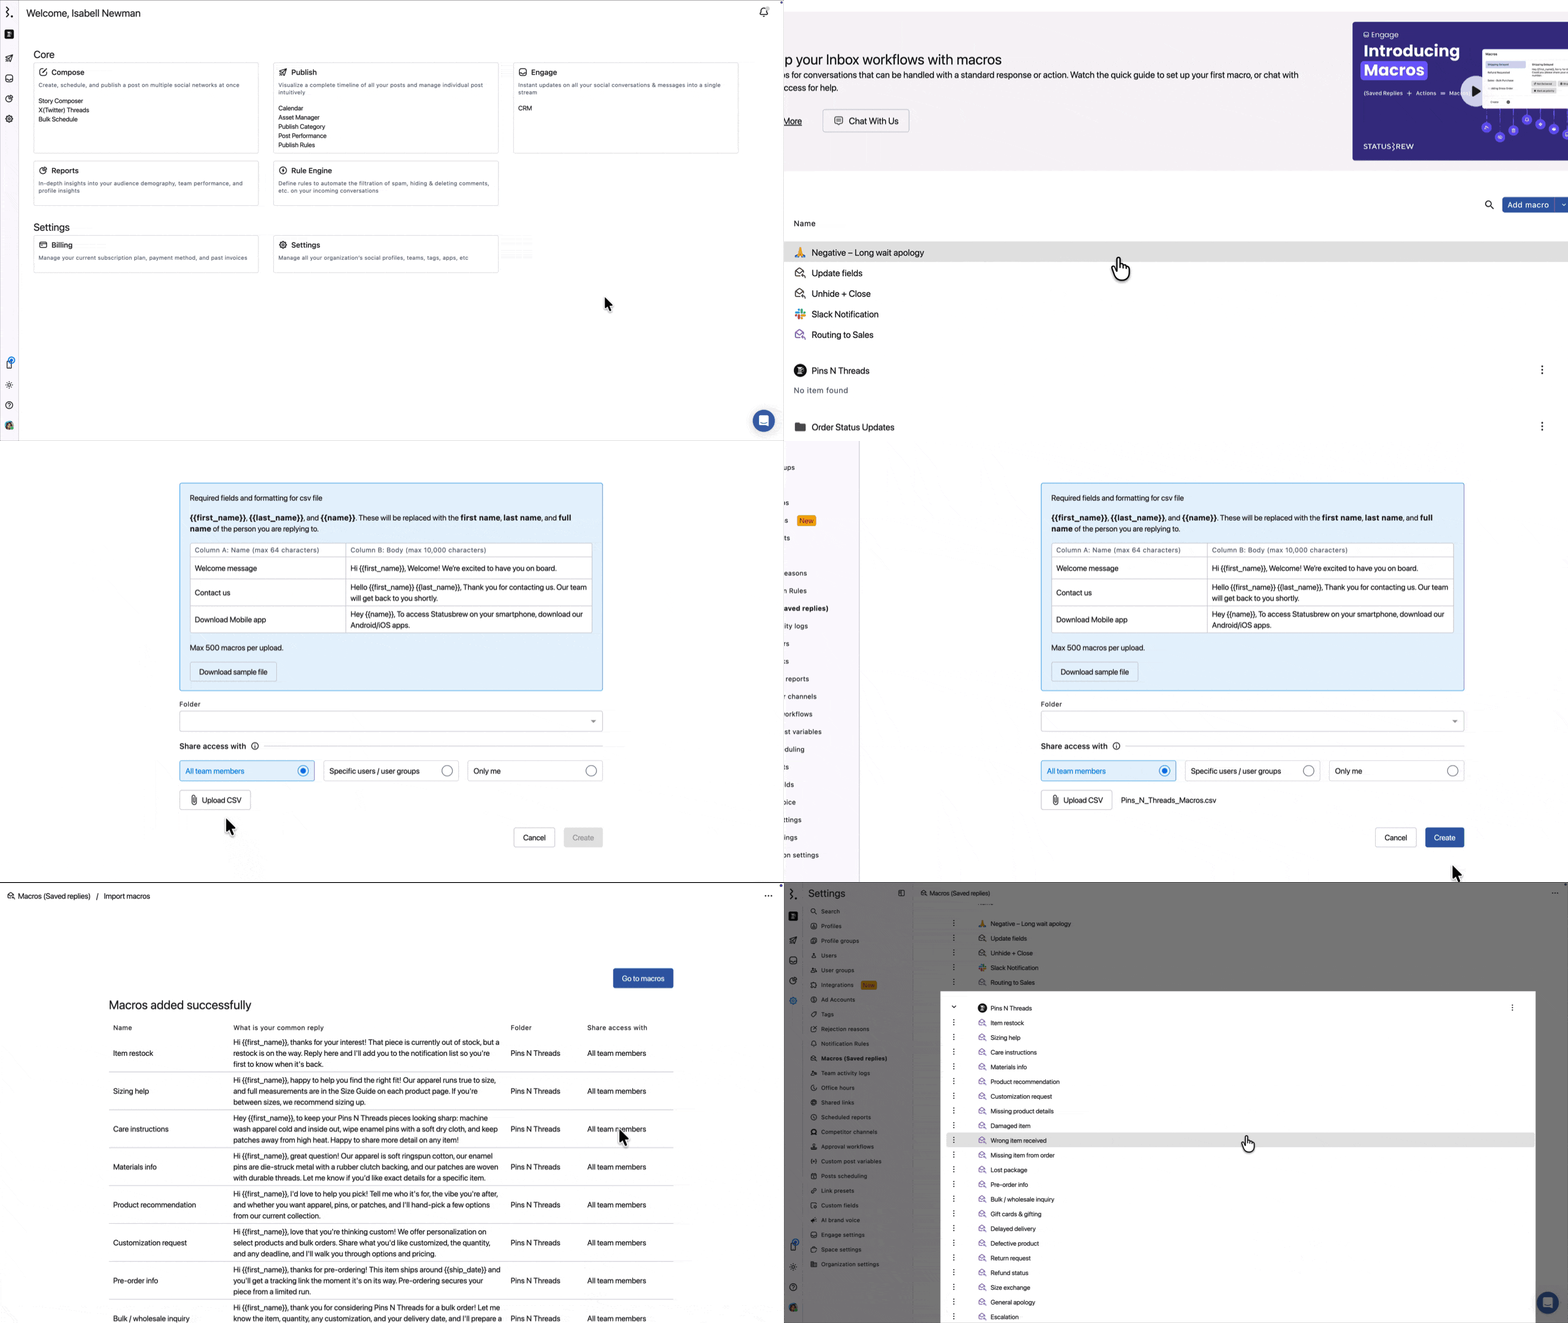
From your Statusbrew dashboard, go to Settings → Macros (Saved replies)
Click the Add macro button in the top right corner
Click Import macros at the bottom left of the Create macro screen
Click Download sample file to get a correctly formatted CSV with the header already in place
Replace the example rows with your own macros and save the file in .csv format
Back in Statusbrew, select a Folder to import the macros into
Under Share access with, choose All team members, Specific users/user groups, or Only me
Click Upload CSV, and select your file
Click Create
Imported macros contain reply text only. Actions like Add tags, Assign conversation, or Hide comment are not included in the CSV. To add actions, edit the macro after importing.
The Share access with setting applies to every macro in the upload. If different macros need different access, split them into separate CSV files.
Using Macros in Engage
Open any conversation in Engage.
Click the Macros icon in the reply box.
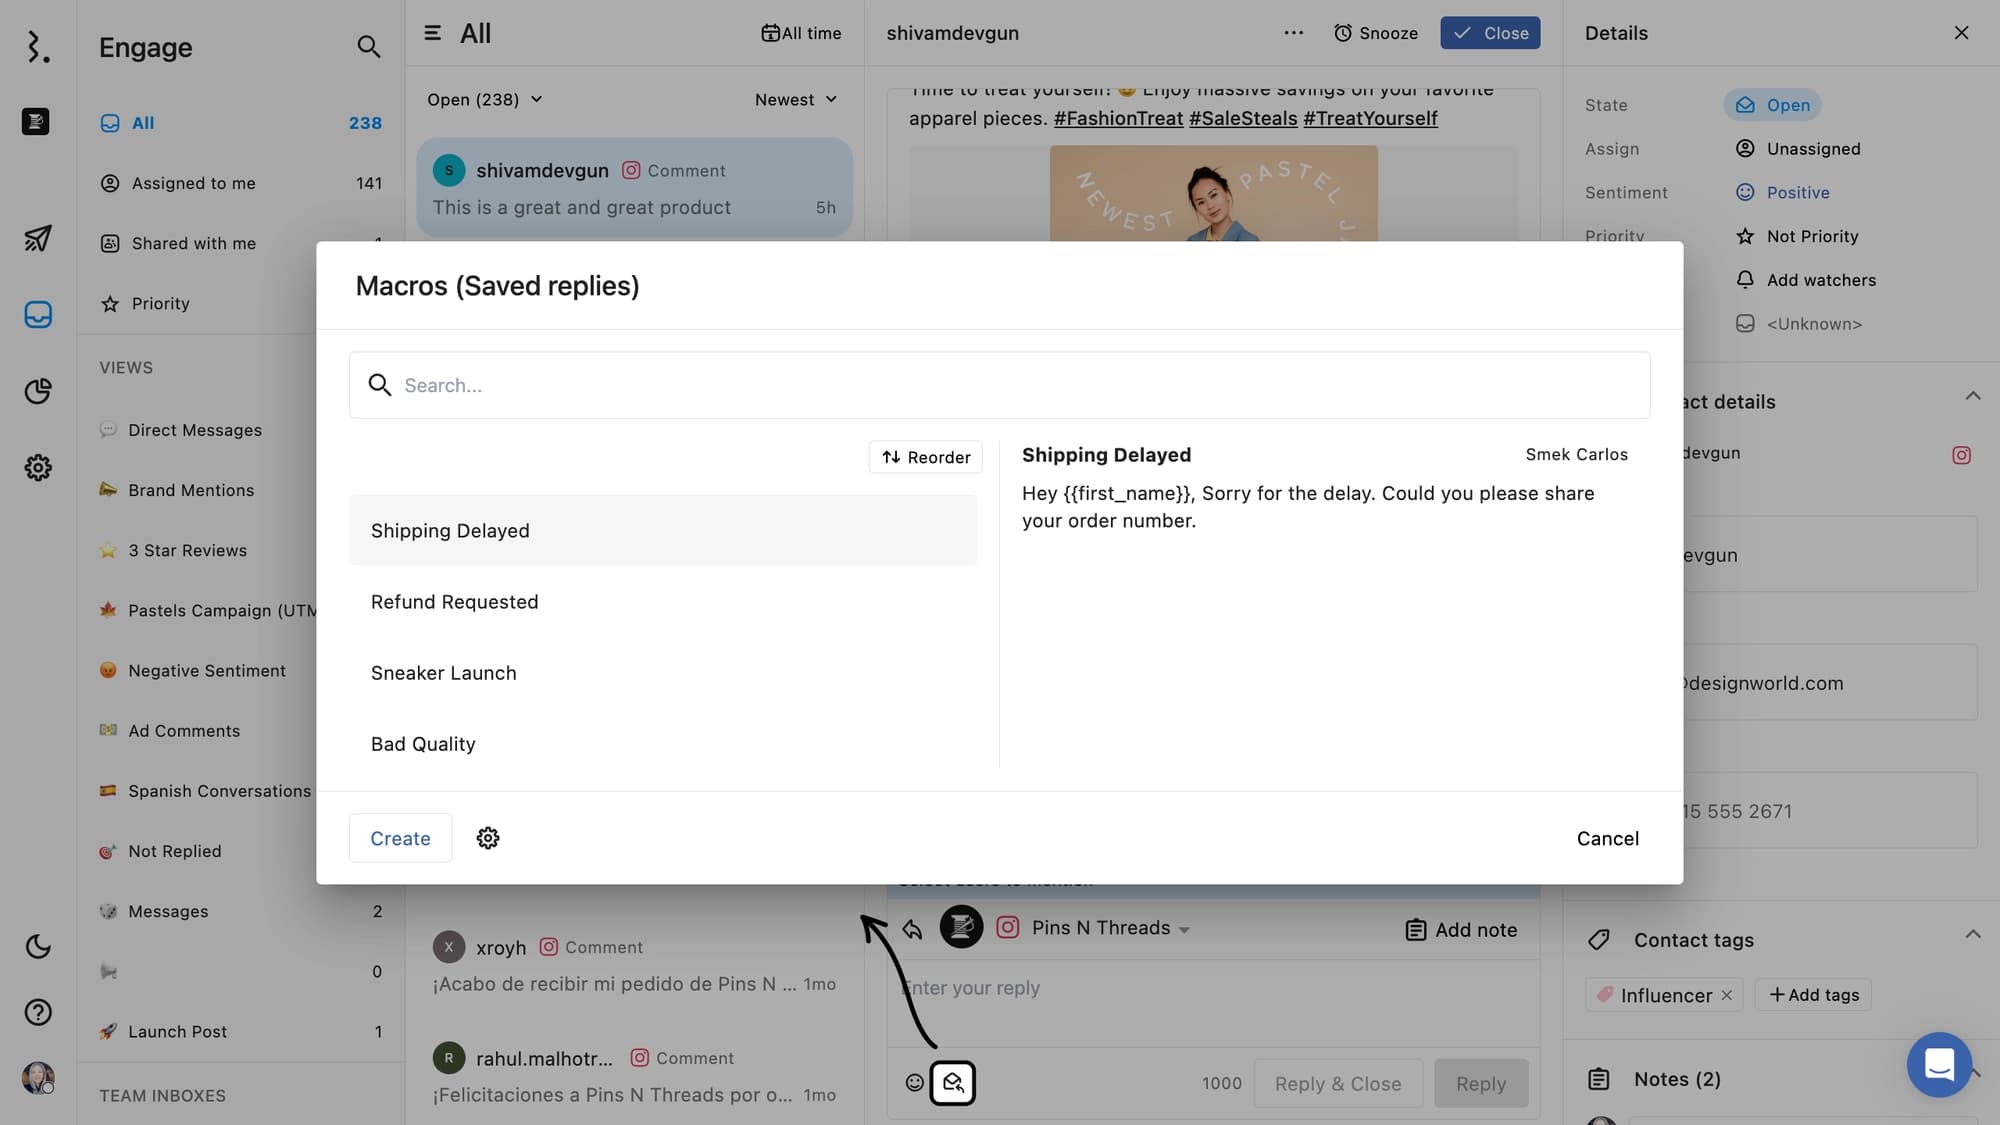
Select & click a Macro from the list—it will be inserted automatically.
Click
Replyto send your response.
Pro tip: Use keyboard shortcuts to make this process even faster. Follow the steps:
Open any conversation in Engage.
Press s to open Macros dialog.
Navigate using Up & Down arrow keys to preview through saved macros.
Press ↵ to select a macro.
You can now click Reply or Reply and close button!
We have a dedicated article on moving faster with Keyboard Shortcuts in Engage. Do check it out!
Manage Macros
Only admins can edit or delete Macros. Here’s how:
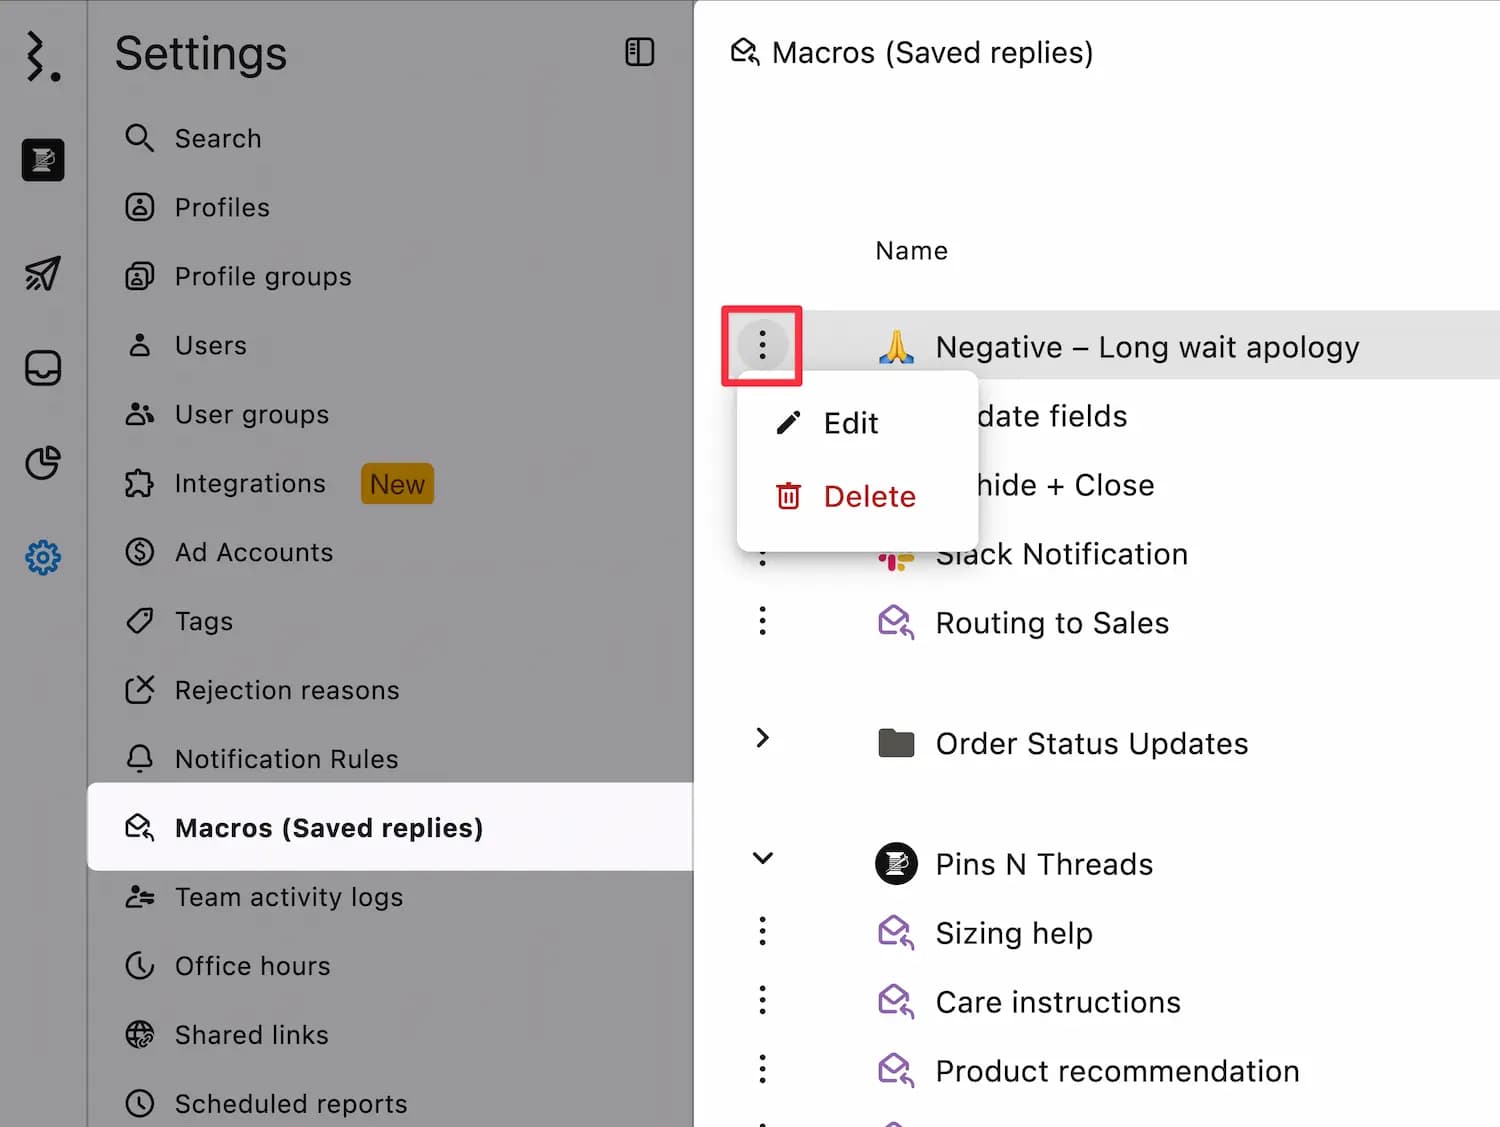
Via Settings
Go to Macros (Saved Replies) in Settings.
Click the three dots next to the Macro you want to manage.
Select Edit.
Make your changes and click Submit to update the Macro.
You can also Delete a macro using the same steps to clean up your list.
Via Engage
Open any conversation in Engage.
Click the Macros icon in the reply box.
Click
Managebutton.This will open Macros (Saved replies) settings page.
FAQs
Do macros override the automated action of the Rule Engine?
No, Macros will apply more actions to the message; it won't override any existing action. Also, you can remove any action while applying a Macro.
Why Can't I Create or Edit a Macro?
Only Primary Owners, Owners, and Admins can create, edit, or delete Macros. Regular Users can use Macros in Engage but cannot create or modify them, regardless of their Engage permissions.
If you need a Macro created or changed, ask an Admin, Owner, or Primary Owner to do it.
How Many Macros Can I Import At Once?
Up to 500 per upload. If you have more, split them across multiple CSV files and import them one at a time.
Can I Add Actions To Macros I Import?
Not during the import. The CSV contains only the macro name and reply text. Once imported, go to Settings → Macros (Saved replies), click the three dots beside the macro, and select Edit to add actions.