Shared Links For Reports
Share a live, view-only Statusbrew report with clients, stakeholders or anyone outside your team using a shared link. Viewers see the same widgets and data you see in Statusbrew, and they don't need a Statusbrew account, so you can share results and get feedback without adding clients to your account.
Who Can Do This
Shared report links are available on the Premium plan and above. Anyone with Edit access to a report can create, edit, notify, and delete its shared links. People who open the shared link can only view the report. They can't make any changes to it.
Getting Started
Here's what a shared link gives you:
Live data: changes to the report show up in the shared version when the viewer refreshes the page.
Several links per report: each link has its own title, description, date range, privacy setting and expiry date, so you can share one report with different audiences.
View-only access: viewers can switch between the report's sections, change the date range (unless you lock it) and download a PDF. They can't edit widgets, change data sources, add filters or change the layout.
View tracking: you can see how many times a link was opened and who opened it.
Creating Shared Links
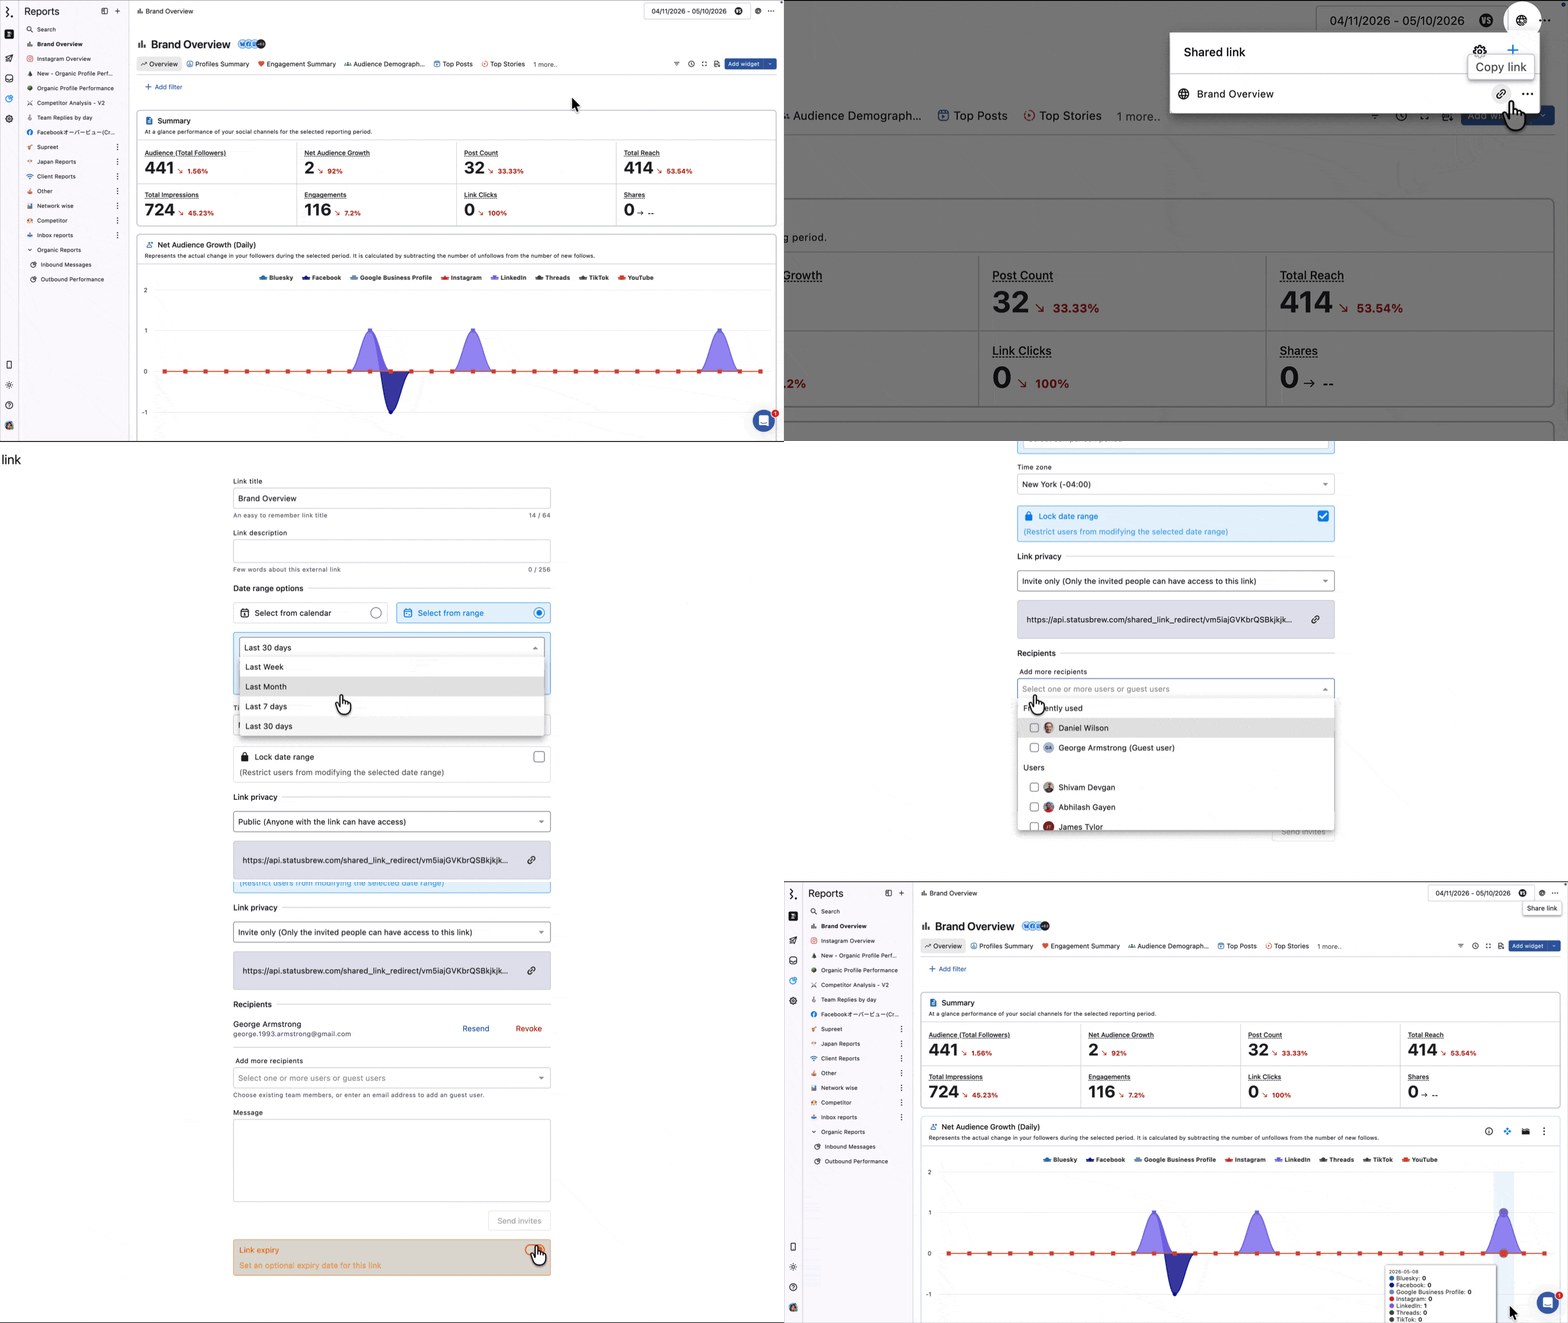
Go to Reports and open the report you want to share.
Click Share link (globe icon) at the top right, next to the date range.
In the Shared link popup, click Add.
The link is created right away and listed in the popup. It starts as a public link, with the title and description copied from the report.
Create More Than One Link
Click Add in the Shared link popup again. Each click creates a new link. Give each one its own title so they're easy to tell apart.
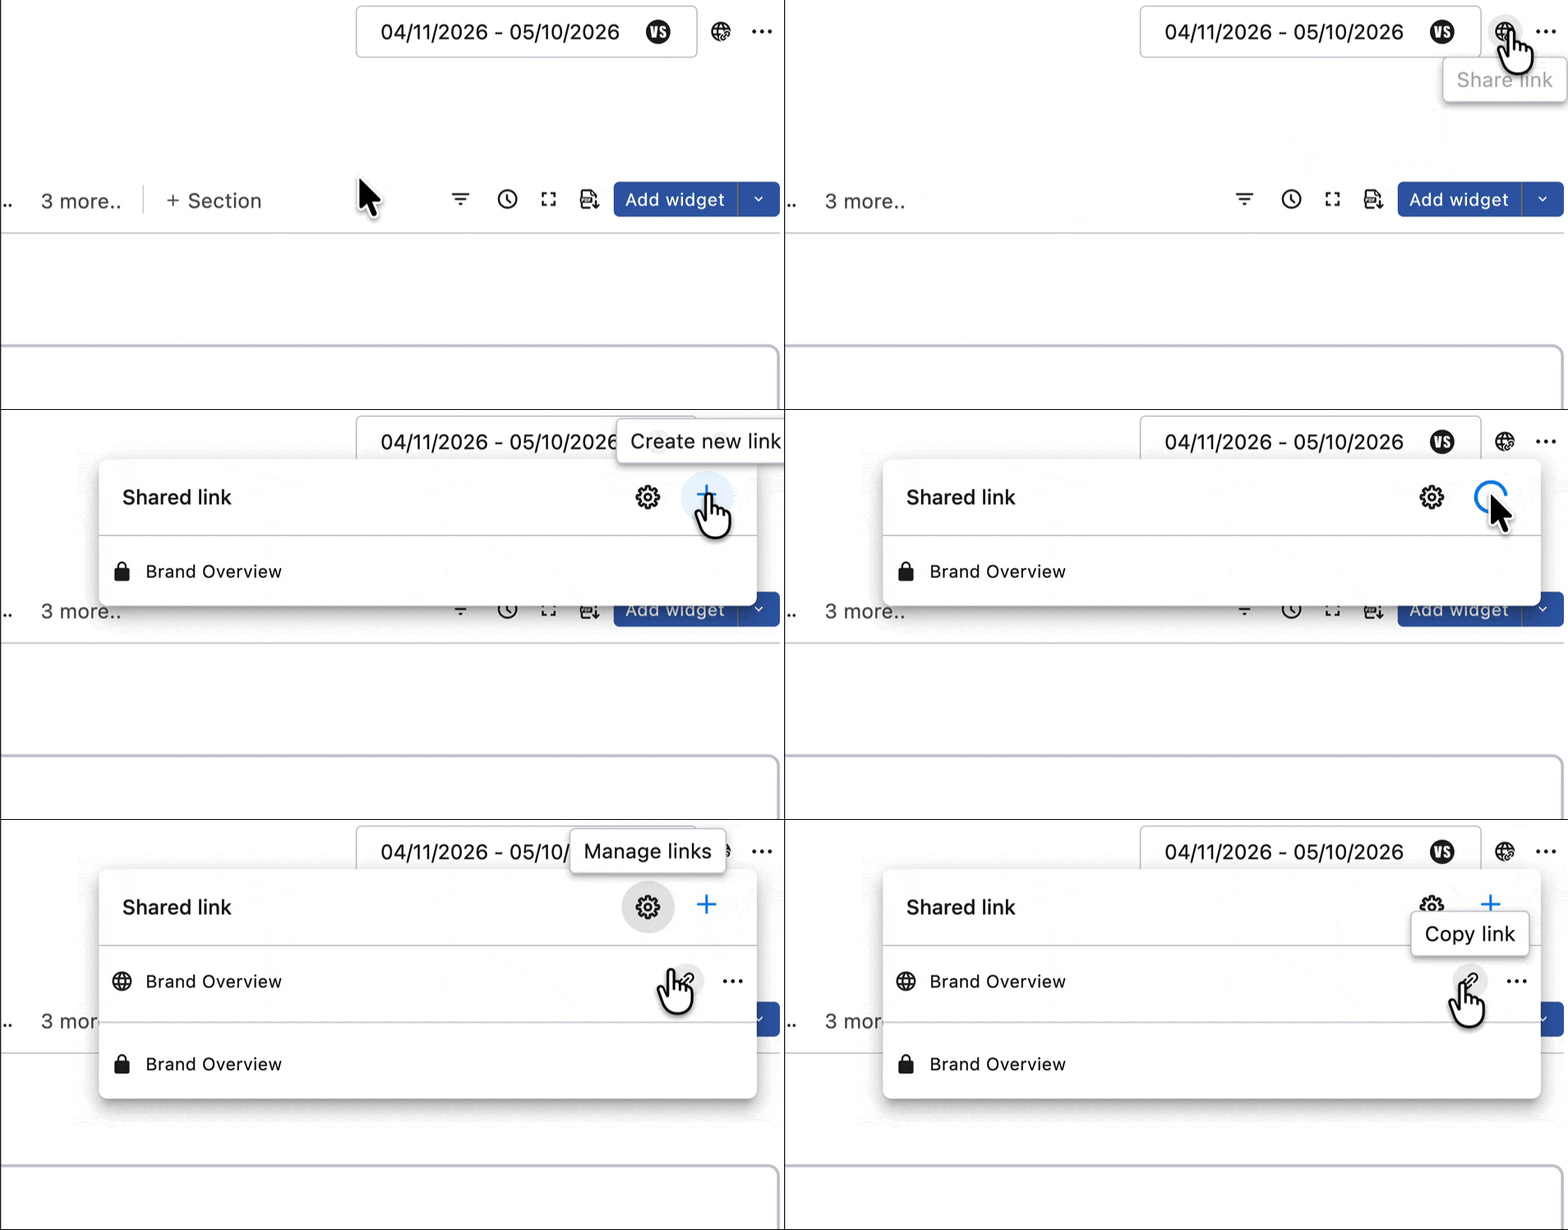
Configure Shared Link
The Edit shared link page is where you configure everything for a link.
Edit Shared Link Page
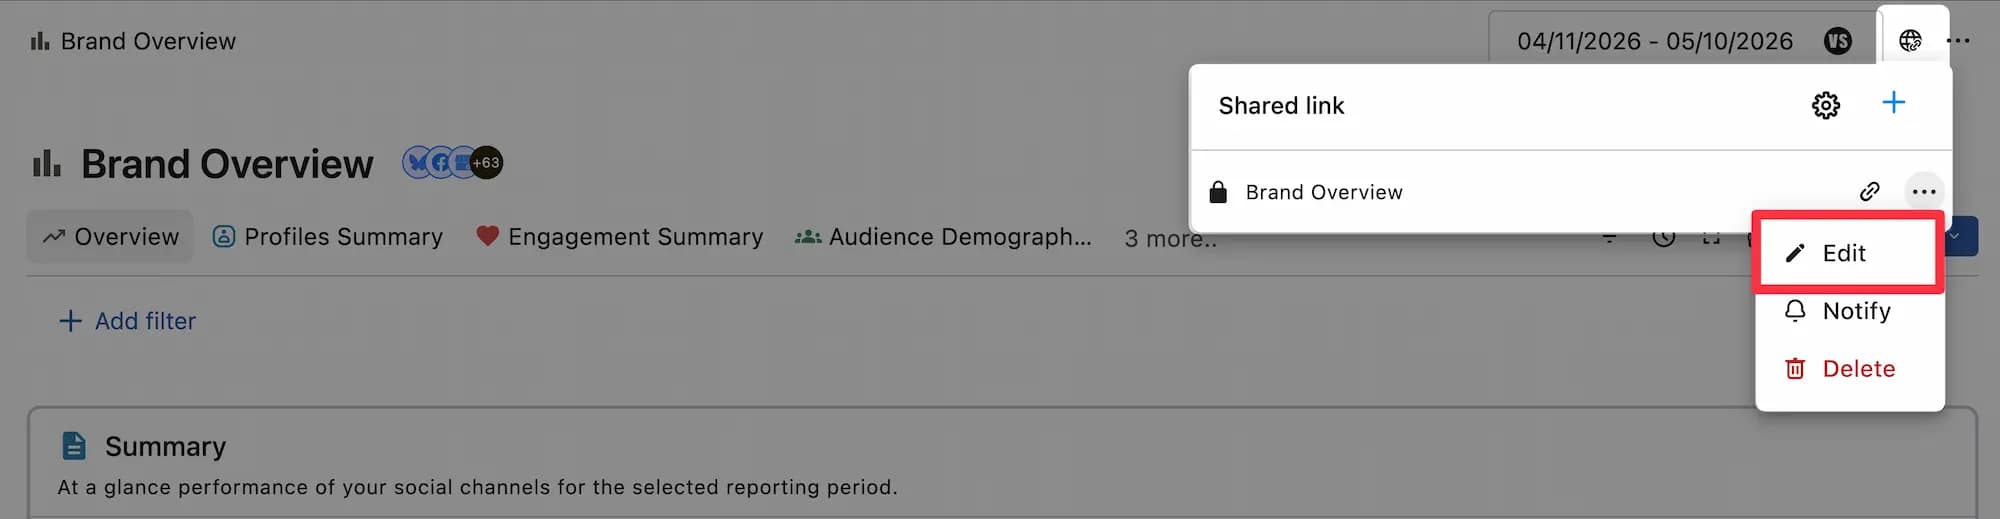
Open the report and click Share link.
Hover over the link and click More (three dots).
Click Edit.
Make your changes and click Done.
Changes only save when you click Done. If you close the page without clicking it, your changes are lost.
Setting Expiry
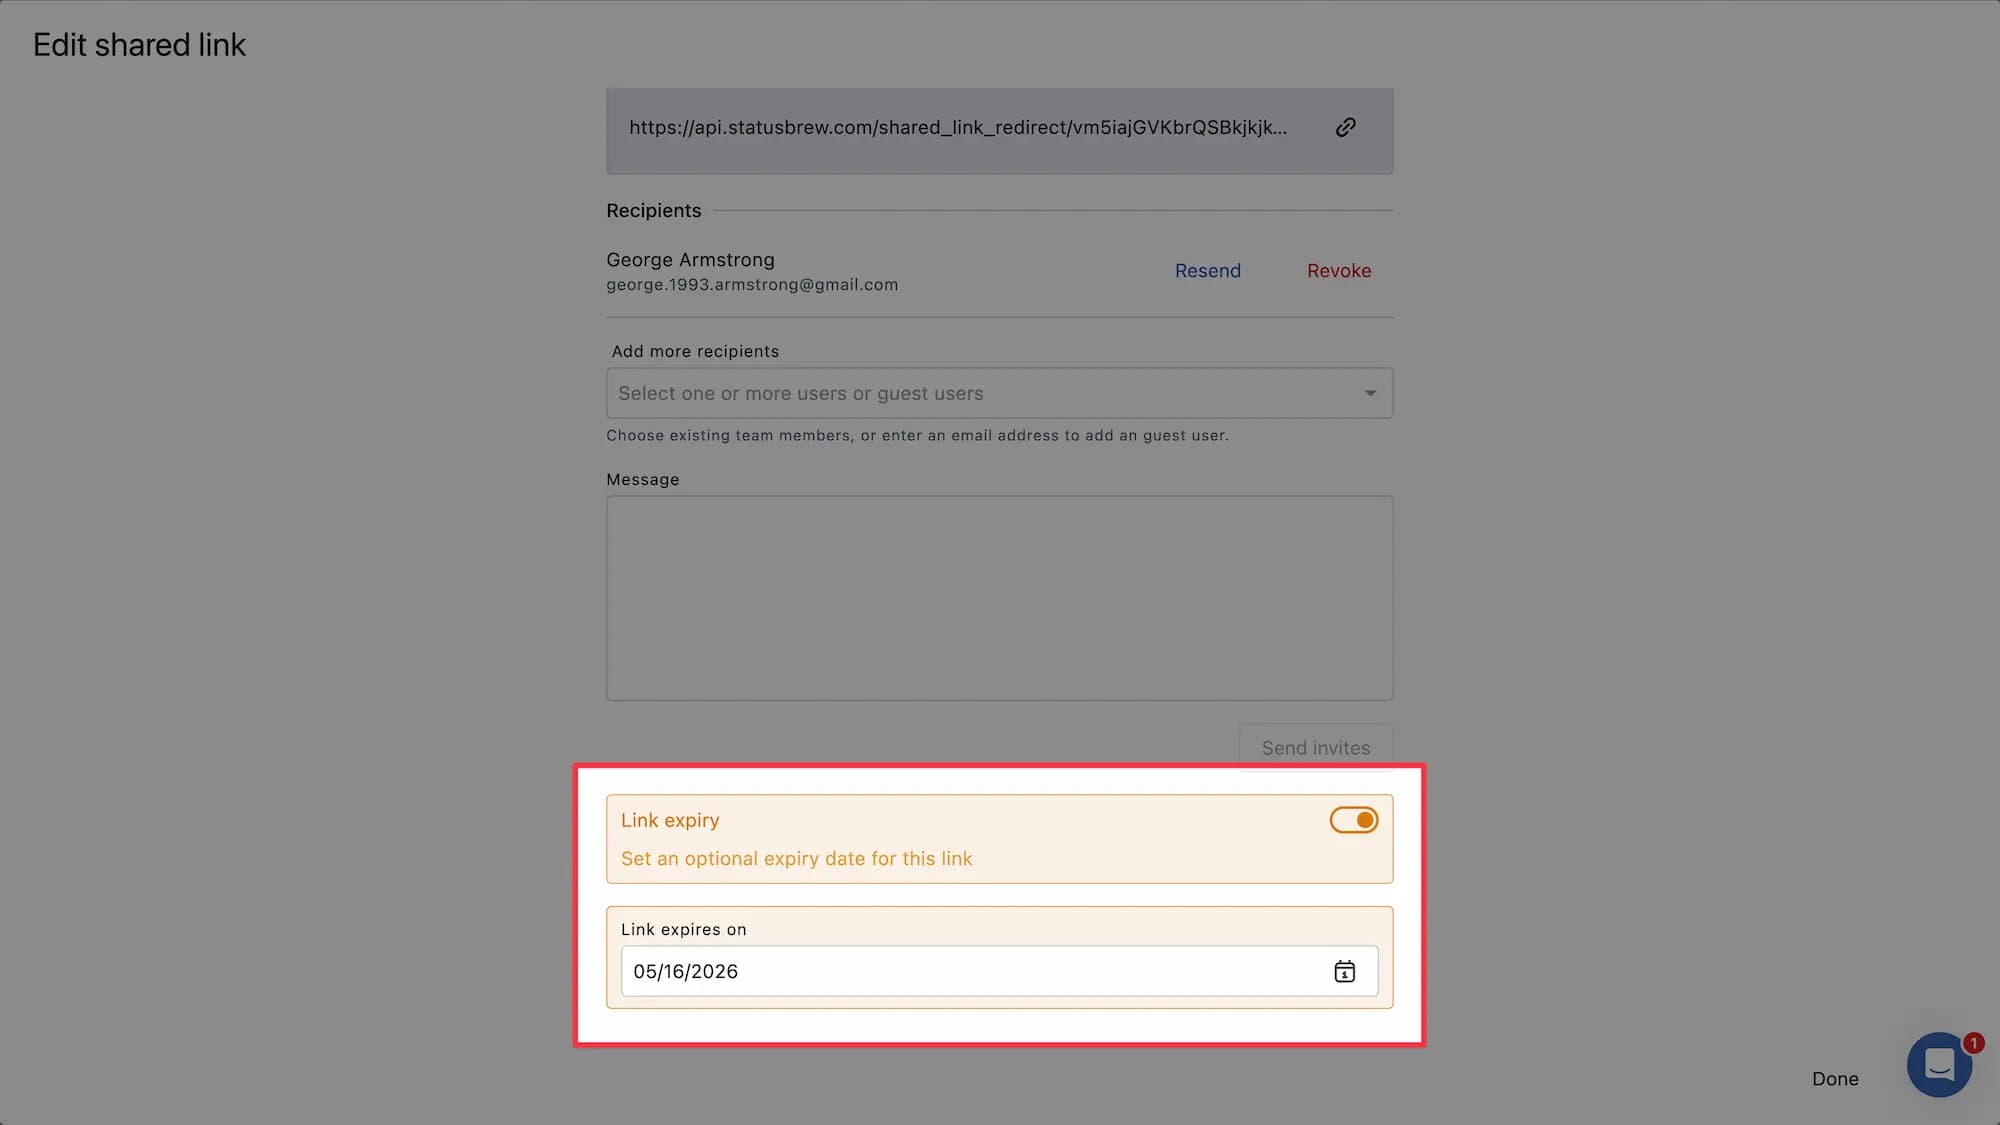
On the Edit shared link page, turn on Link expiry.
Under Link expires on, click the calendar icon and pick the date the link should stop working.
Click Done.
Once Link expiry is on, you have to pick a date. If you leave Link expires on empty, you'll see "Please select an expiration date for the link or choose 'No Expiration'." To keep the link with no expiry date, turn Link expiry off.
Once the link expires, nobody can open the report from it. The report stays available to you and your team in Statusbrew. We recommend an expiry date for any link you share outside your company.
Change Title & Description
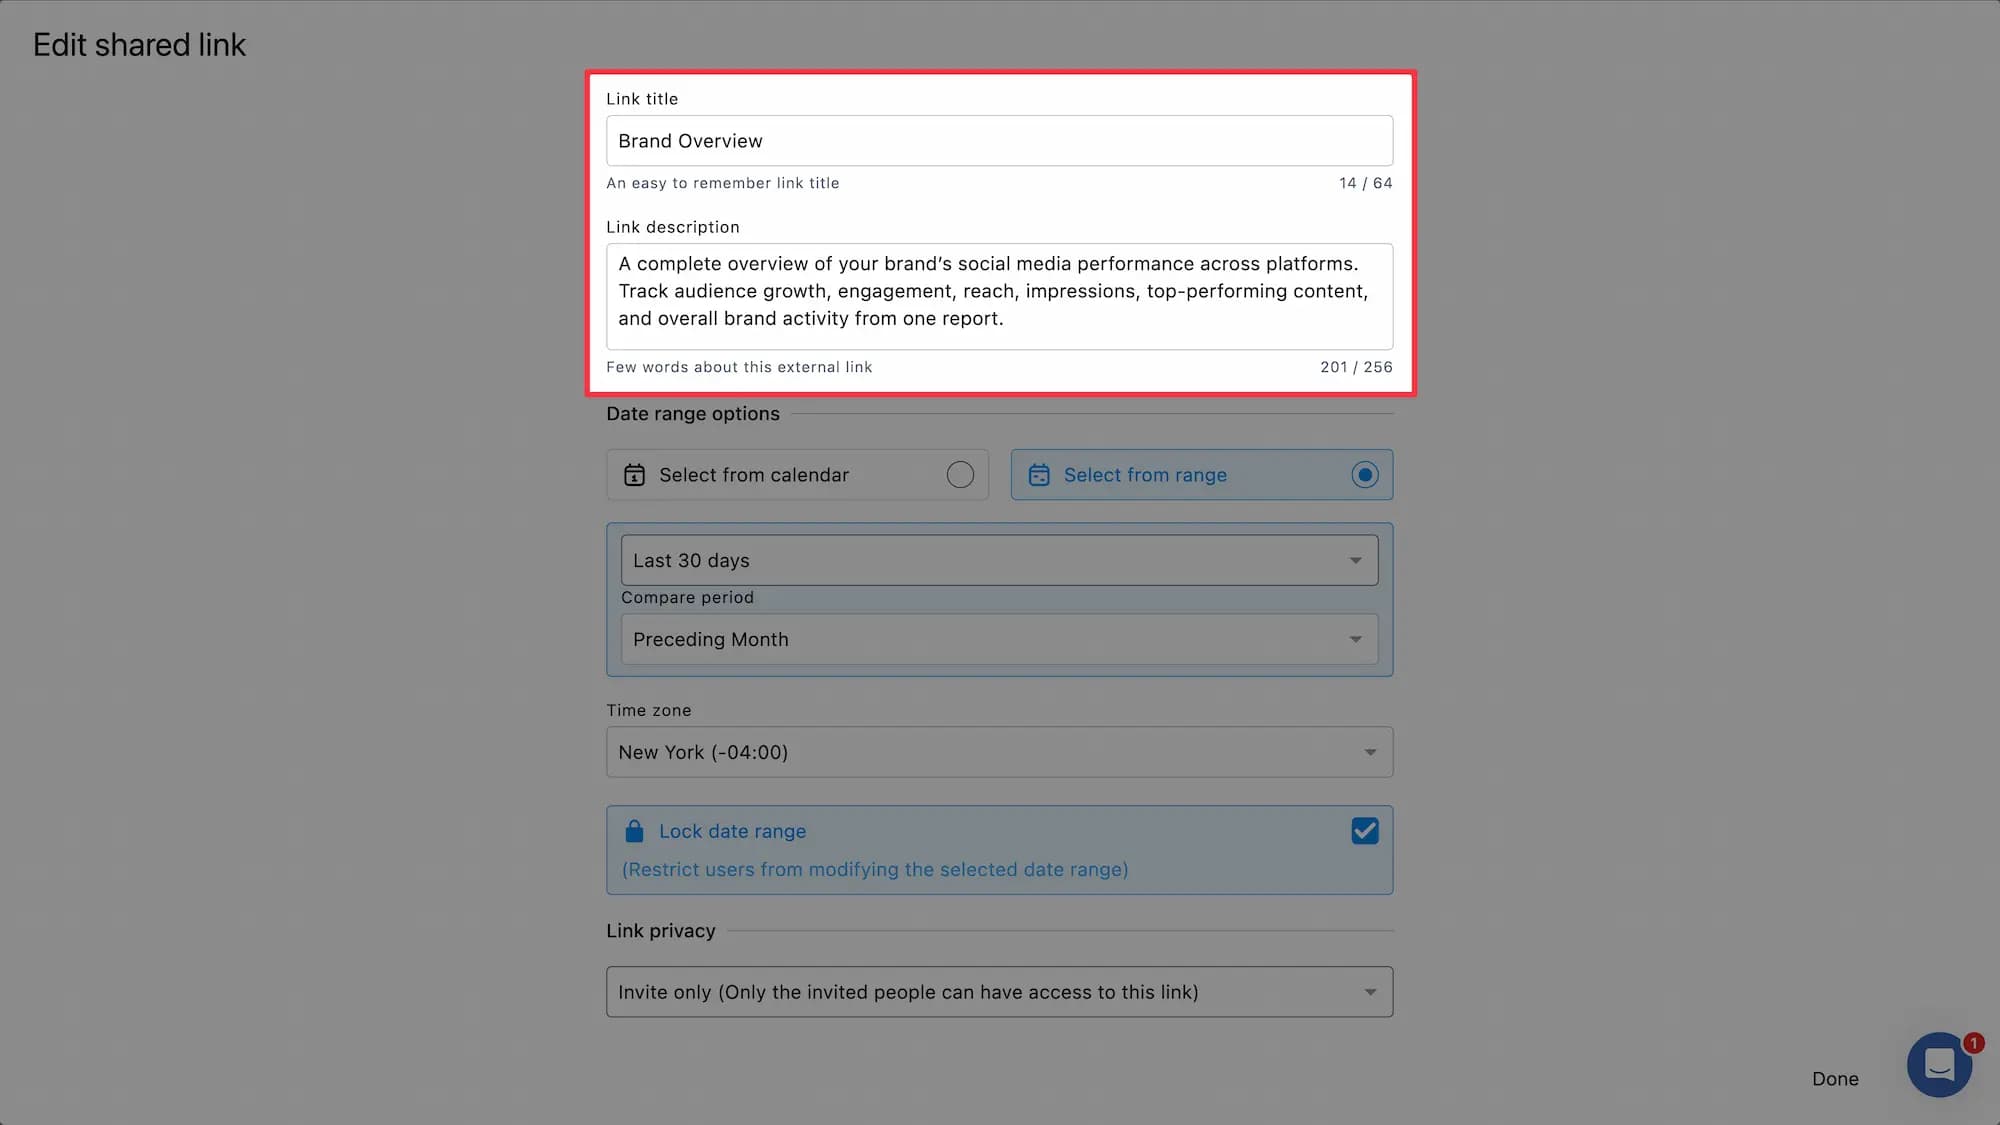
Update Link title (up to 64 characters) and Link description (up to 256 characters). Viewers see both at the top of the shared report.
Set Date Range
Under Date range options, pick one:
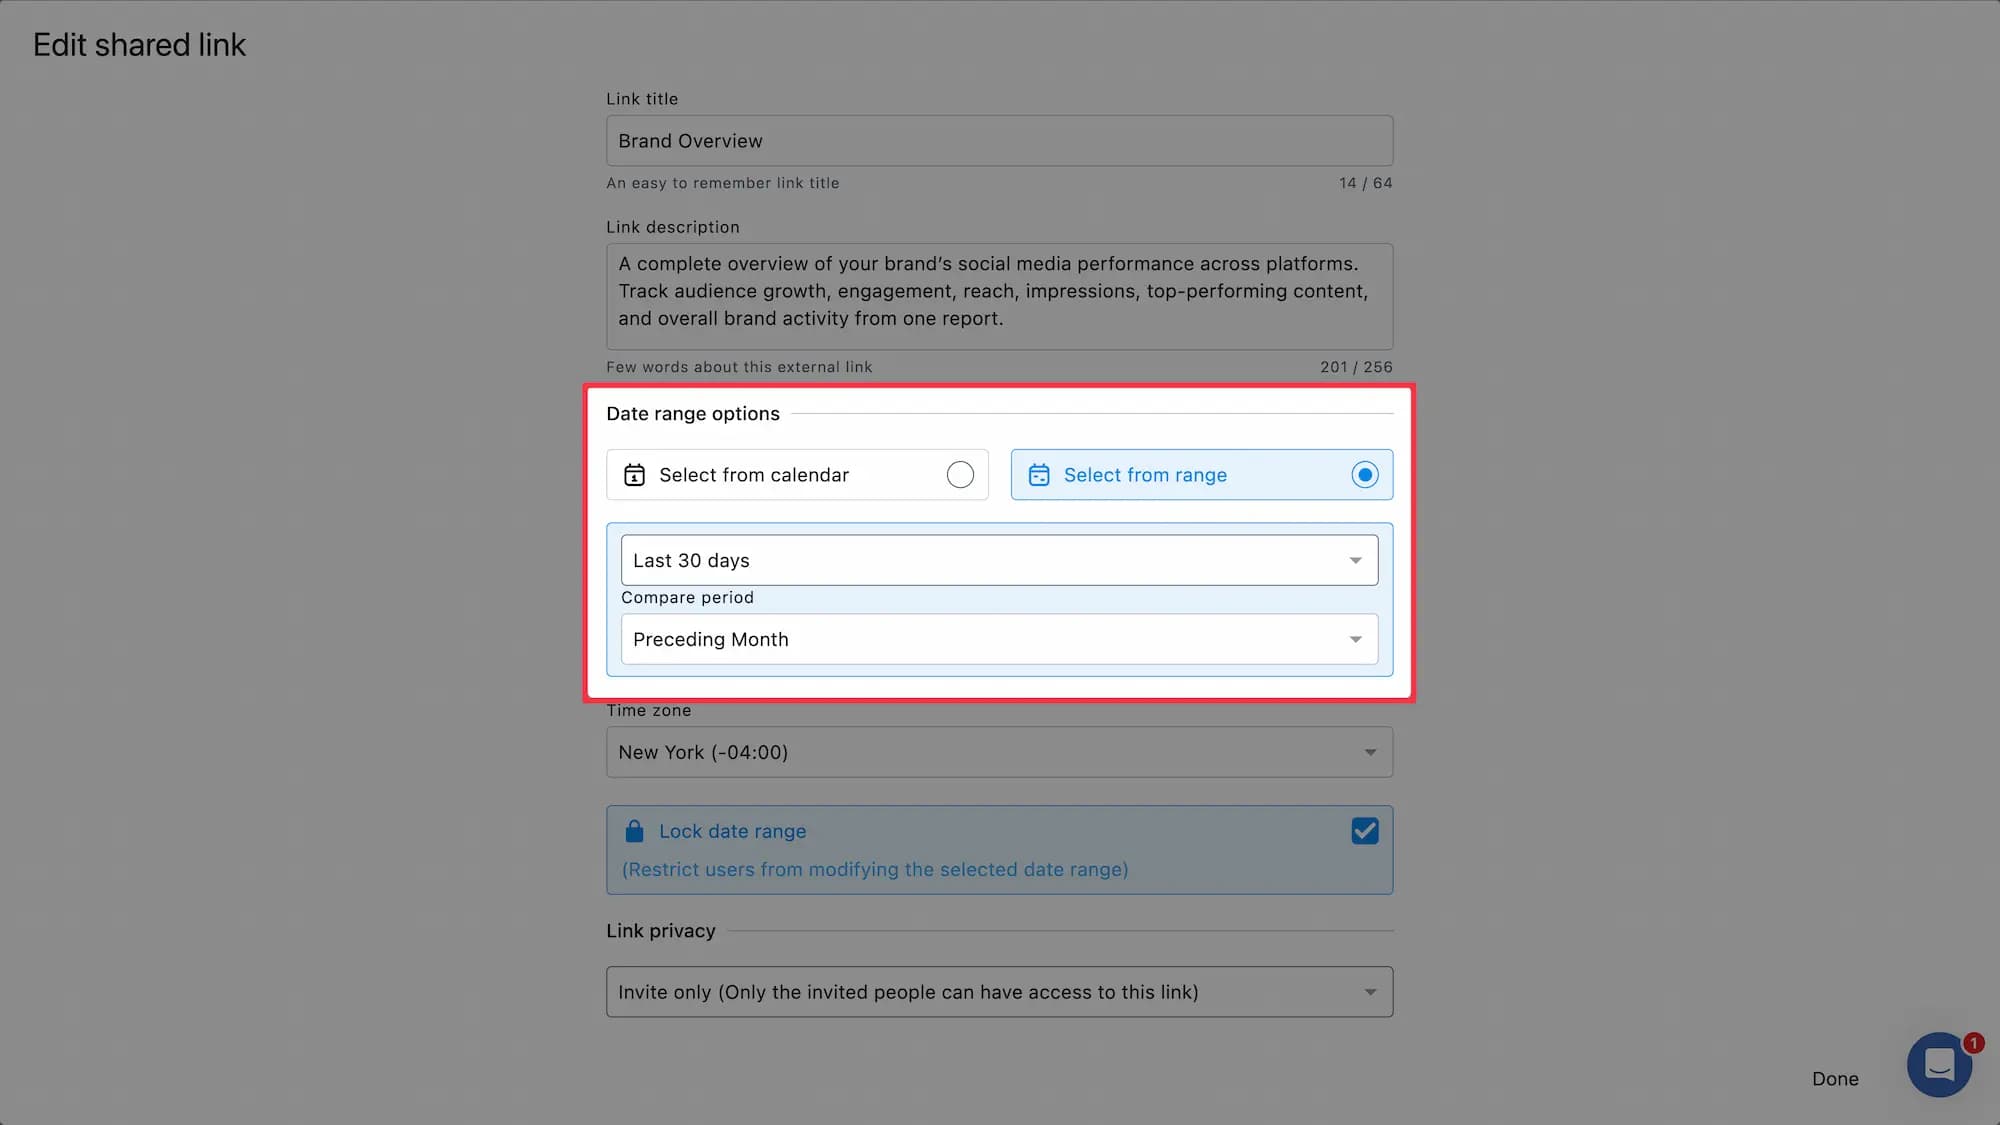
Select from calendar: a fixed start and end date. The report always shows the same period.
Select from range: a rolling period that moves with today's date. Options are Last Week, Last Month, Last 7 days and Last 30 days.
Set Time Zone
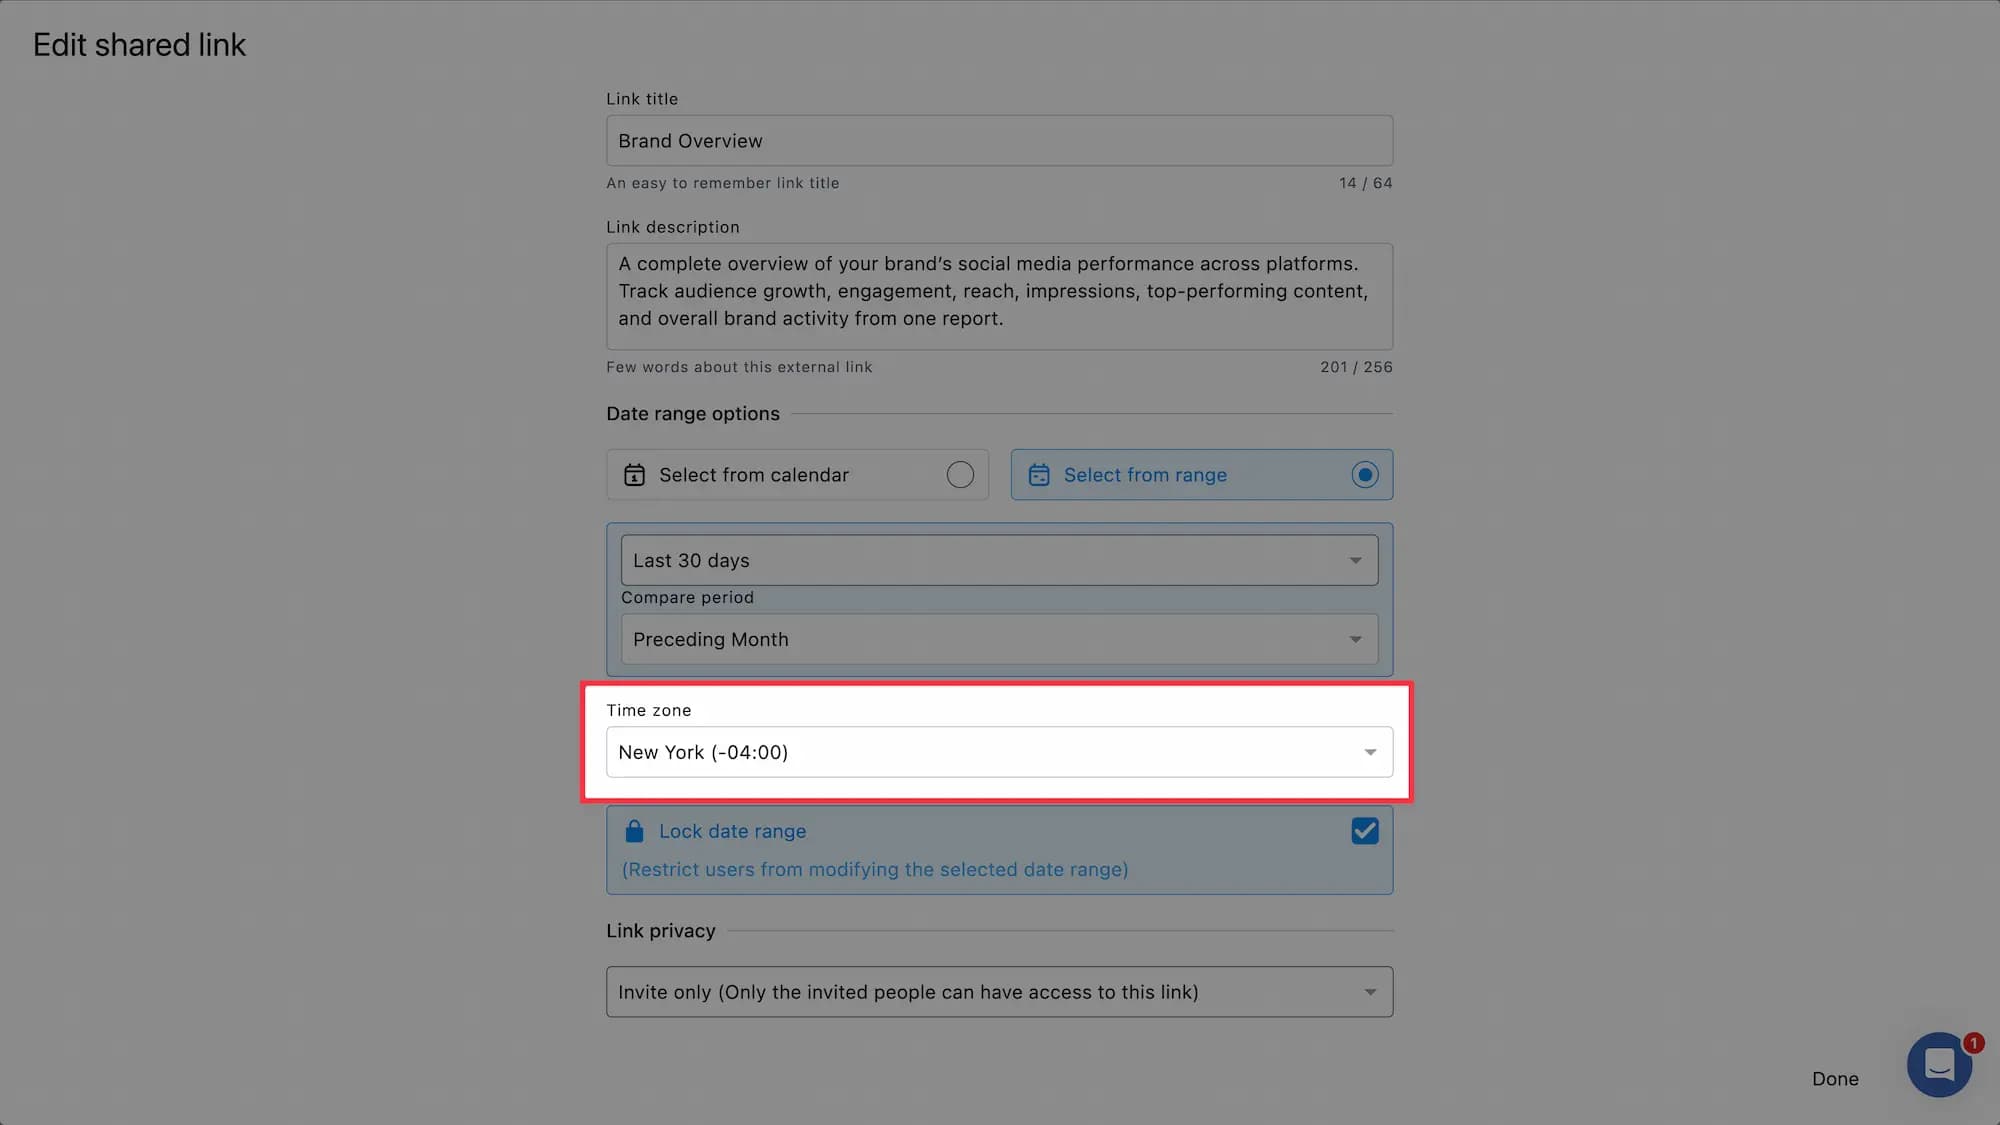
Choose the time zone the report's data should use. It defaults to the time zone in your Your Account preferences, so change it when your client works in a different time zone.
Lock Date Range
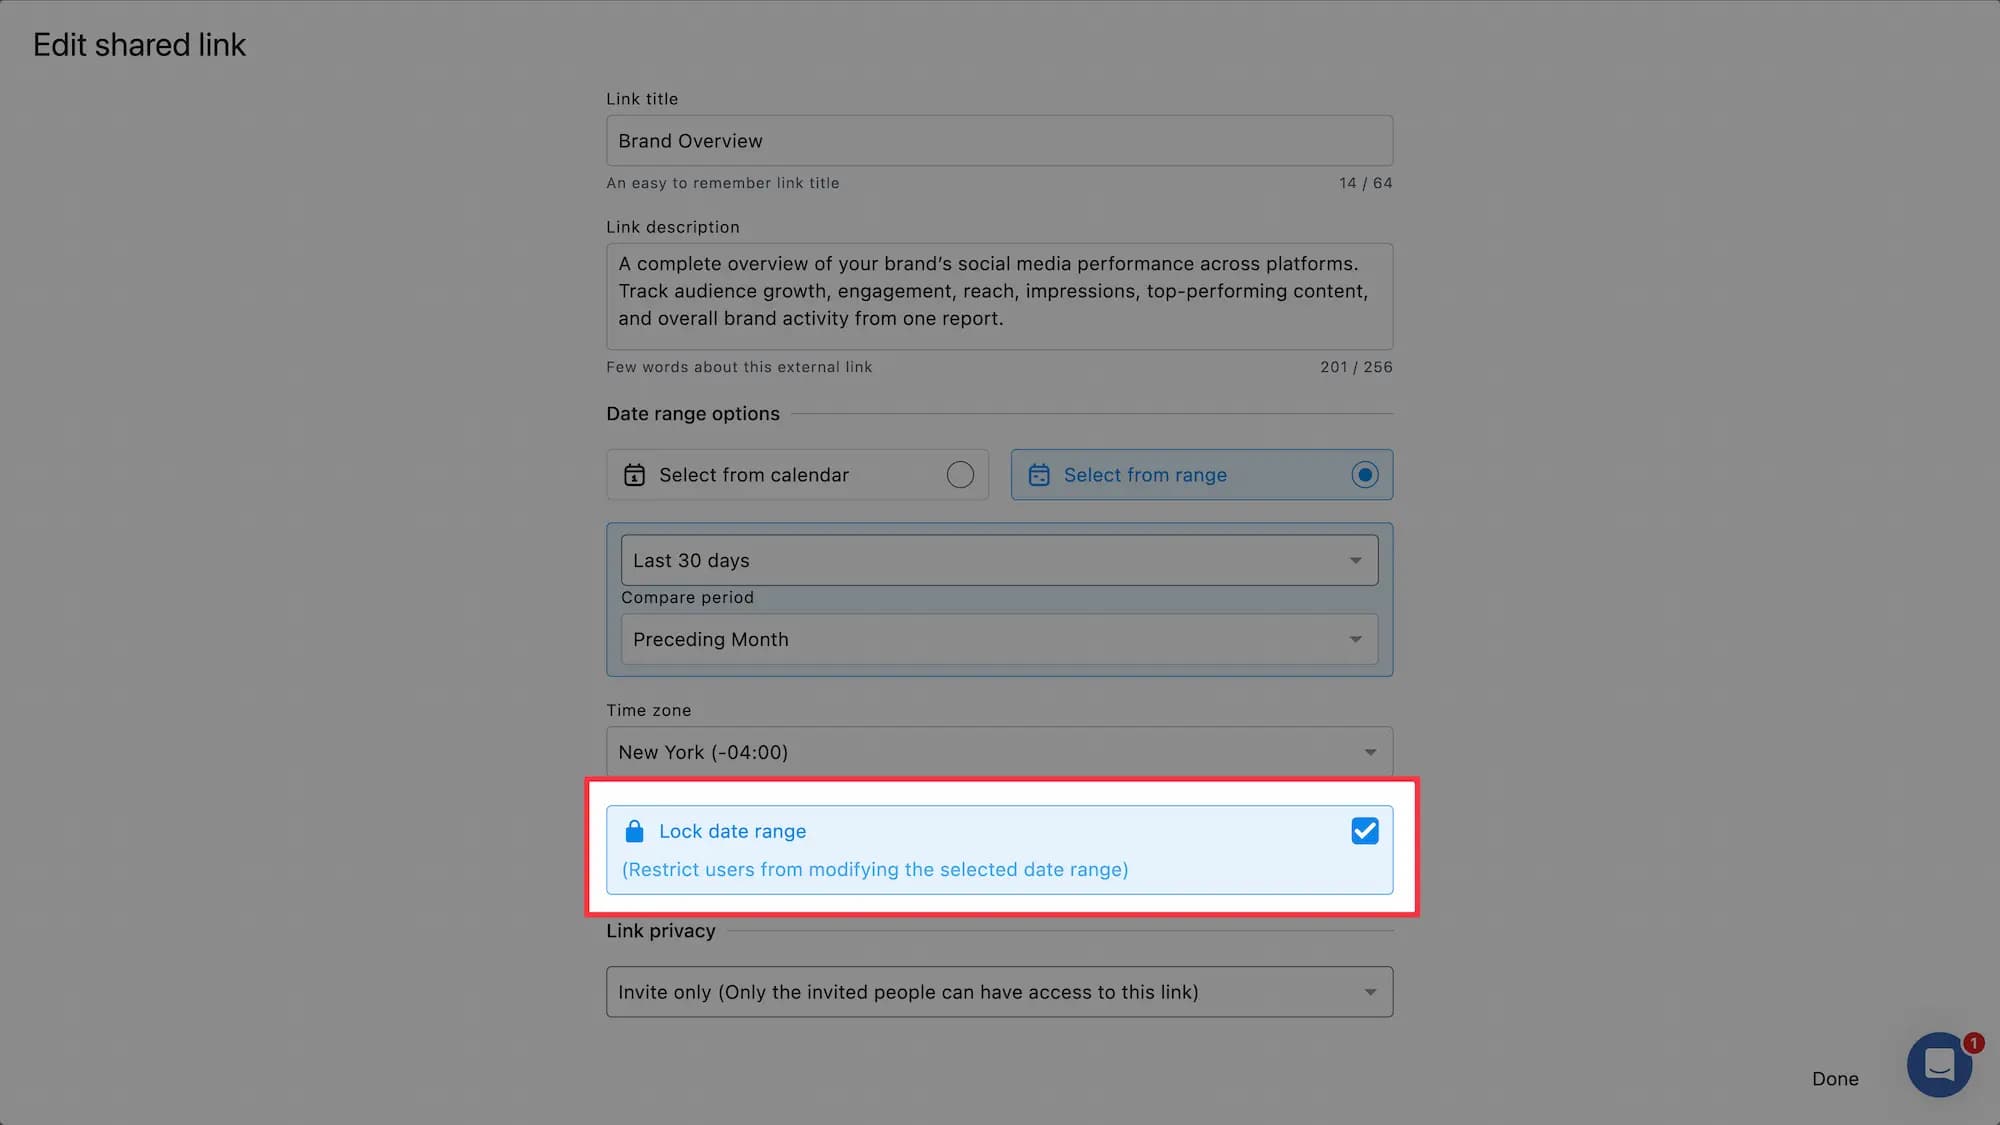
Tick Lock date range to stop viewers from changing the period. They can still pick a narrower period inside the range you set, but they can't go outside it.
Compare Period
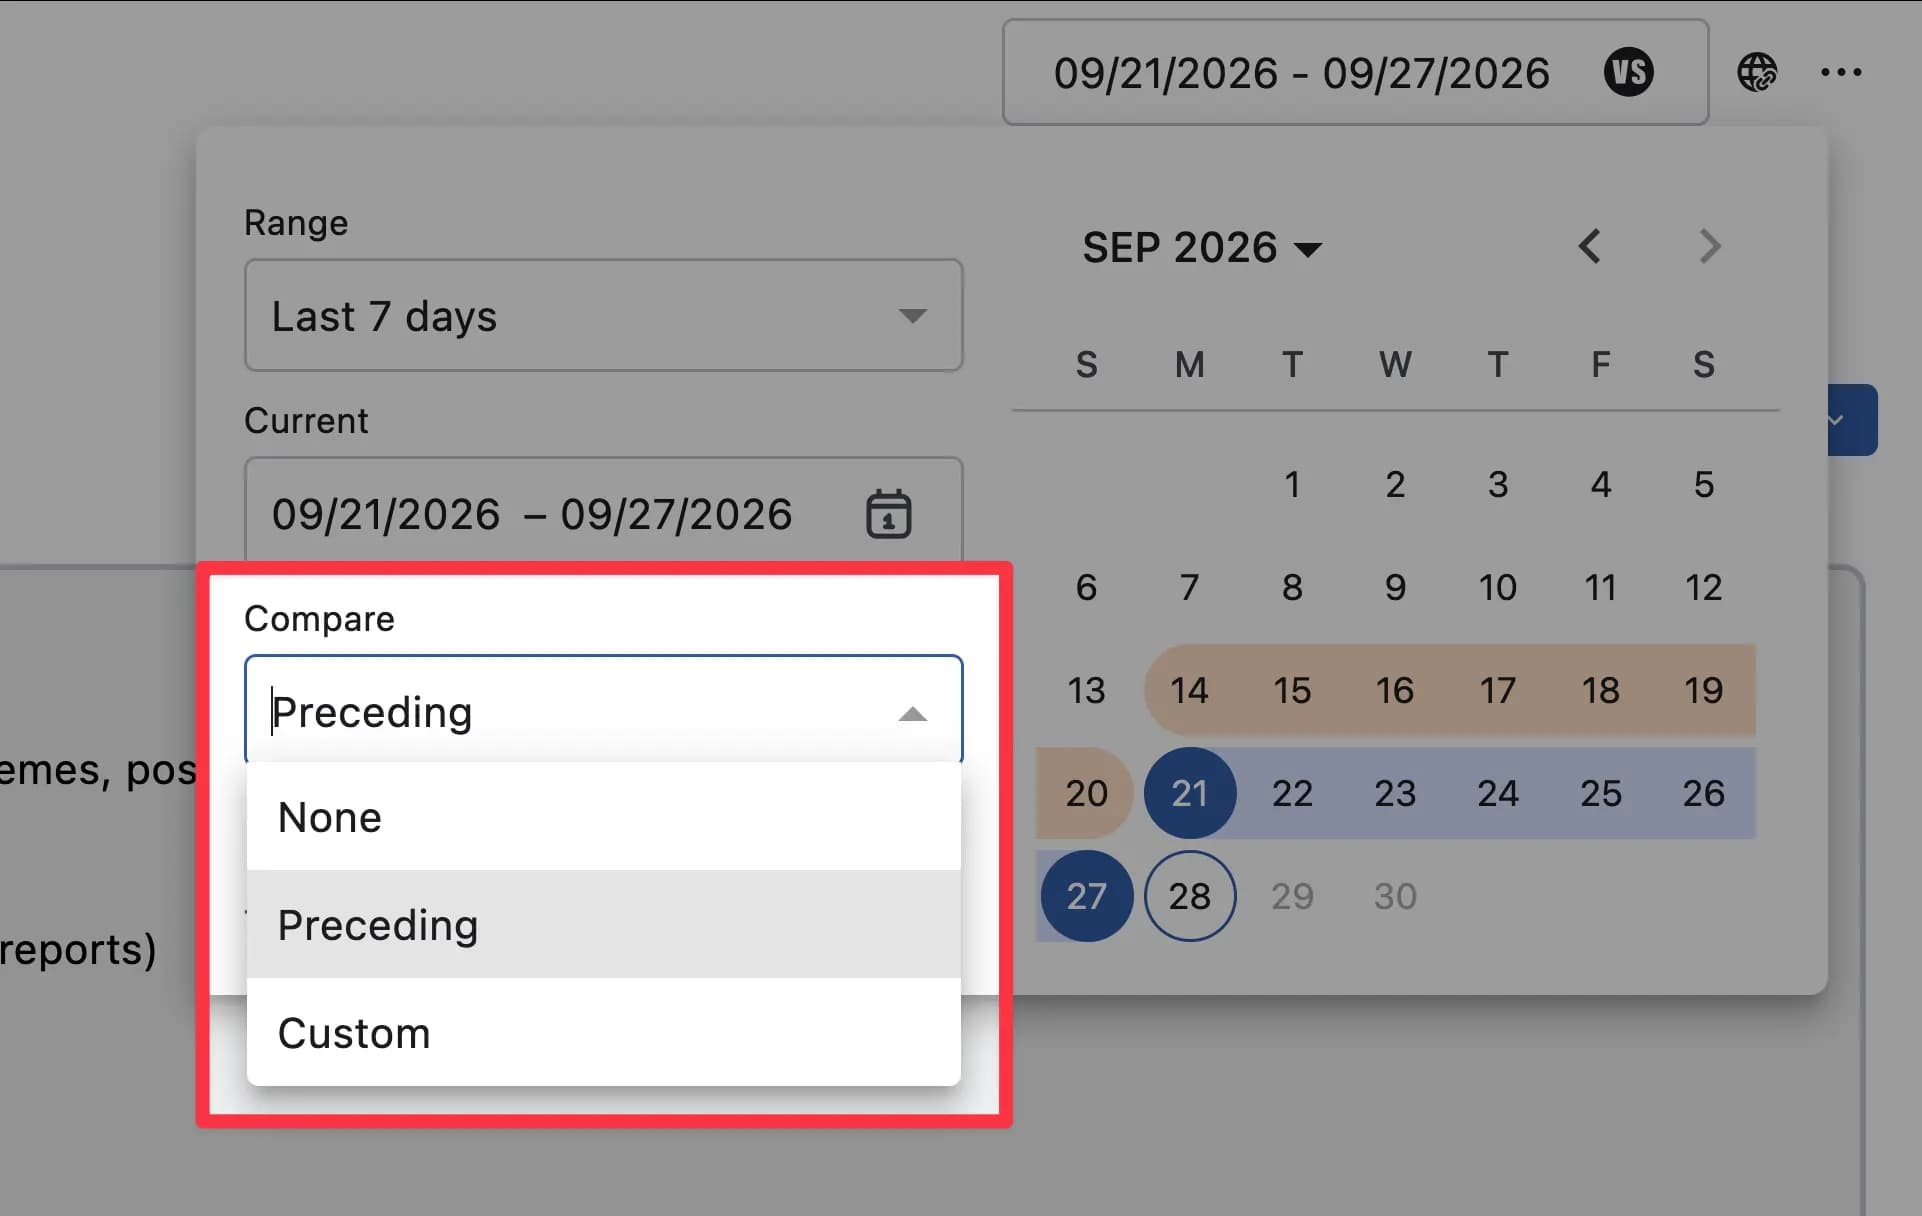
Under Compare period, choose Preceding Week, Preceding Month or Preceding Year to set which earlier period each metric is compared against.
Comparison stats always show on a shared link, even when you leave Compare period empty. You can't hide them.
Copy Link
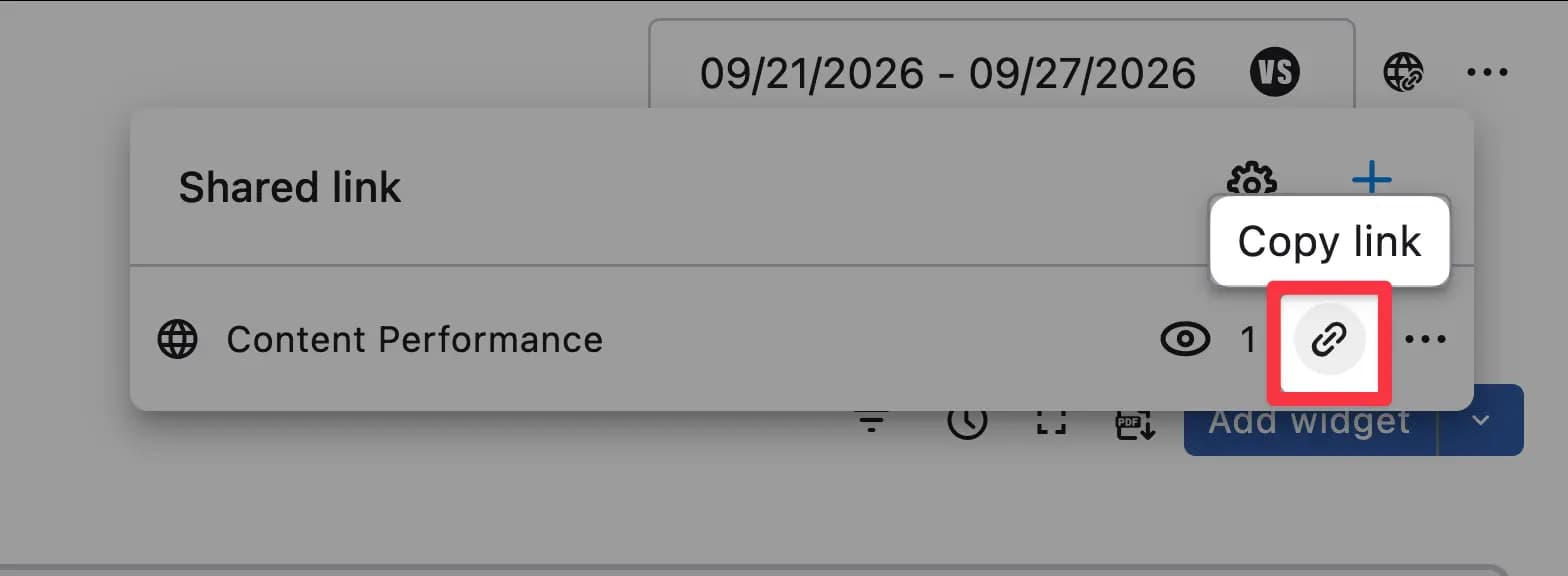
Click Copy link next to the link URL under Link privacy to copy it.
Change Privacy
Under Link privacy on the Edit shared link page, choose one:
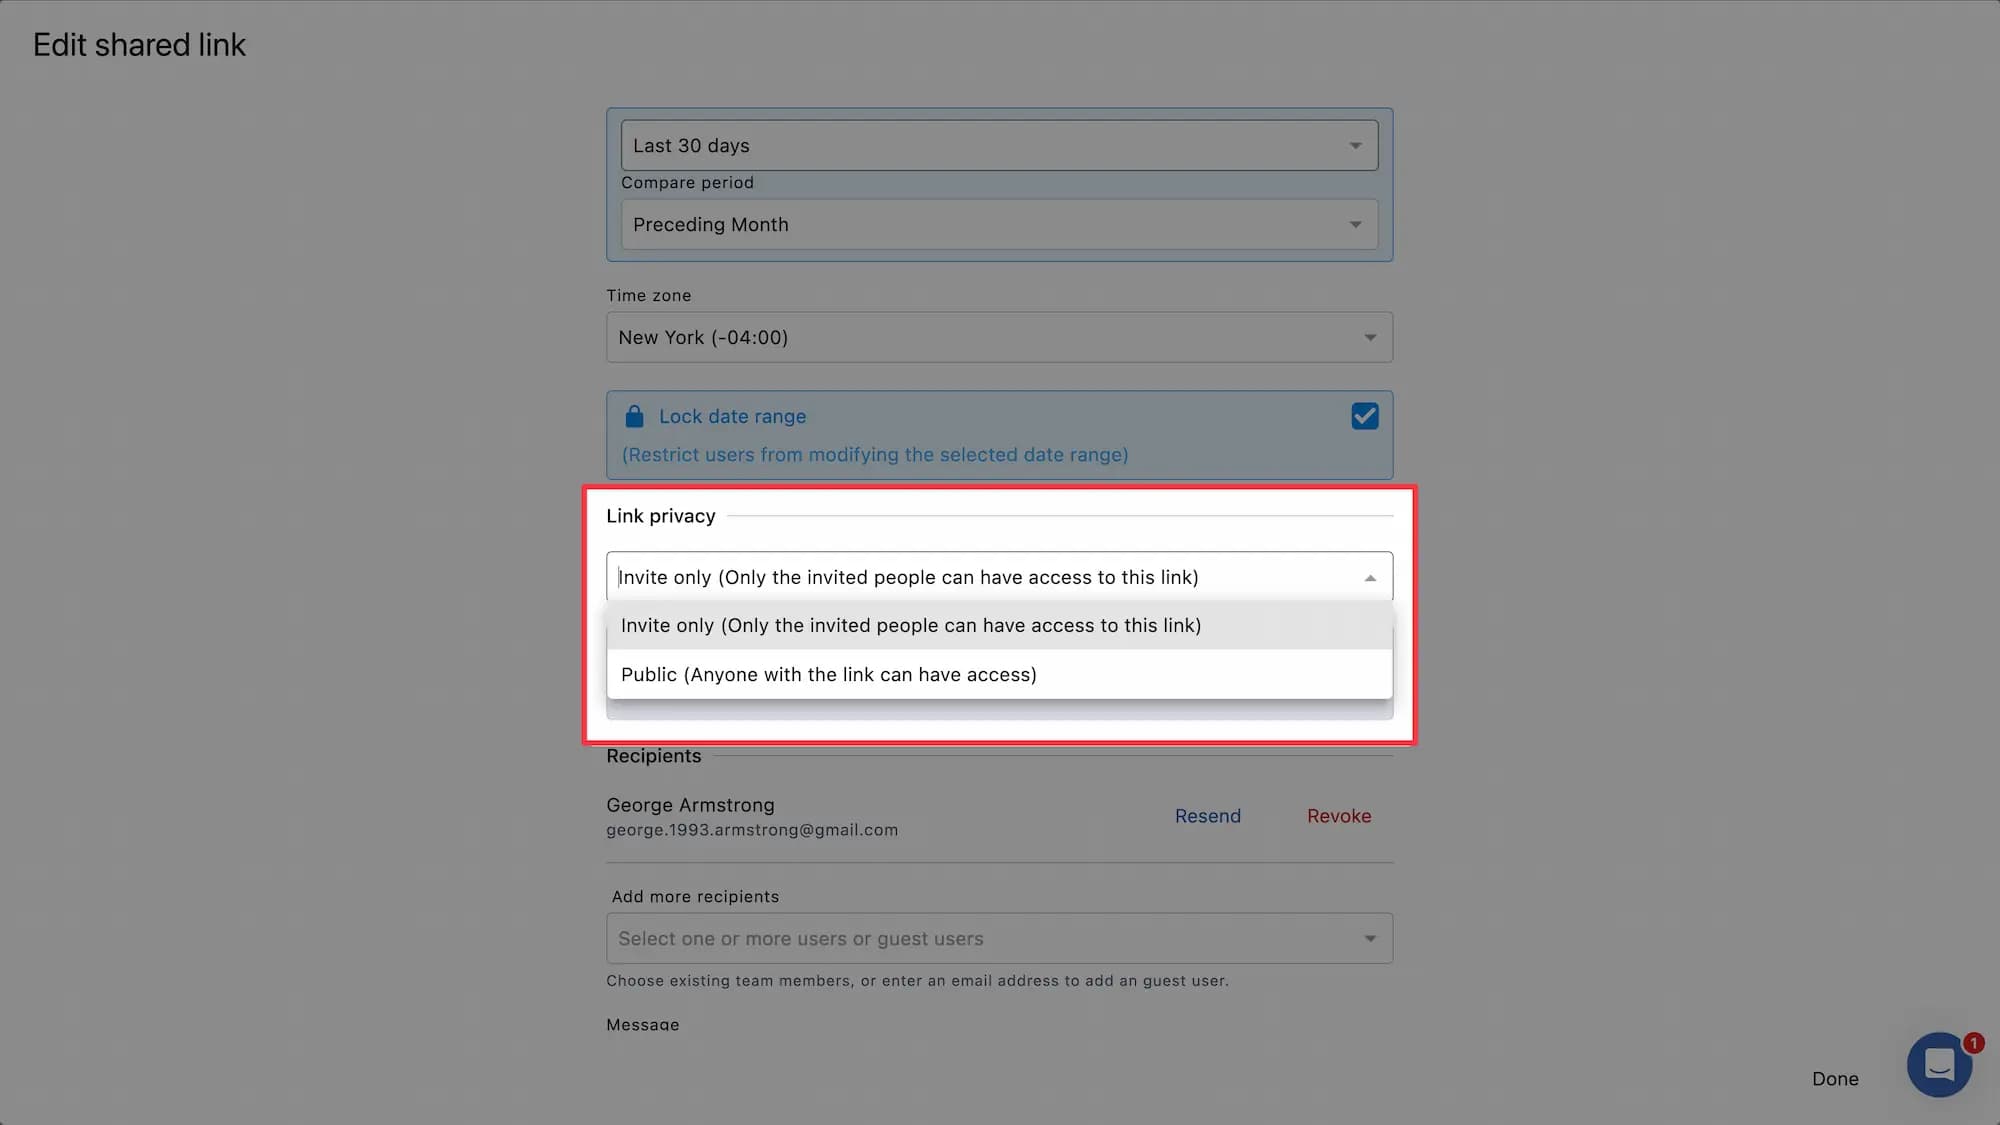
Public (Anyone with the link can have access): the default. Anyone who has the link can open the report.
Invite only (Only the invited people can have access to this link): only the recipients you add can open it.
With Invite only, even you can't open the shared link until you add yourself as a recipient.
Add Recipients
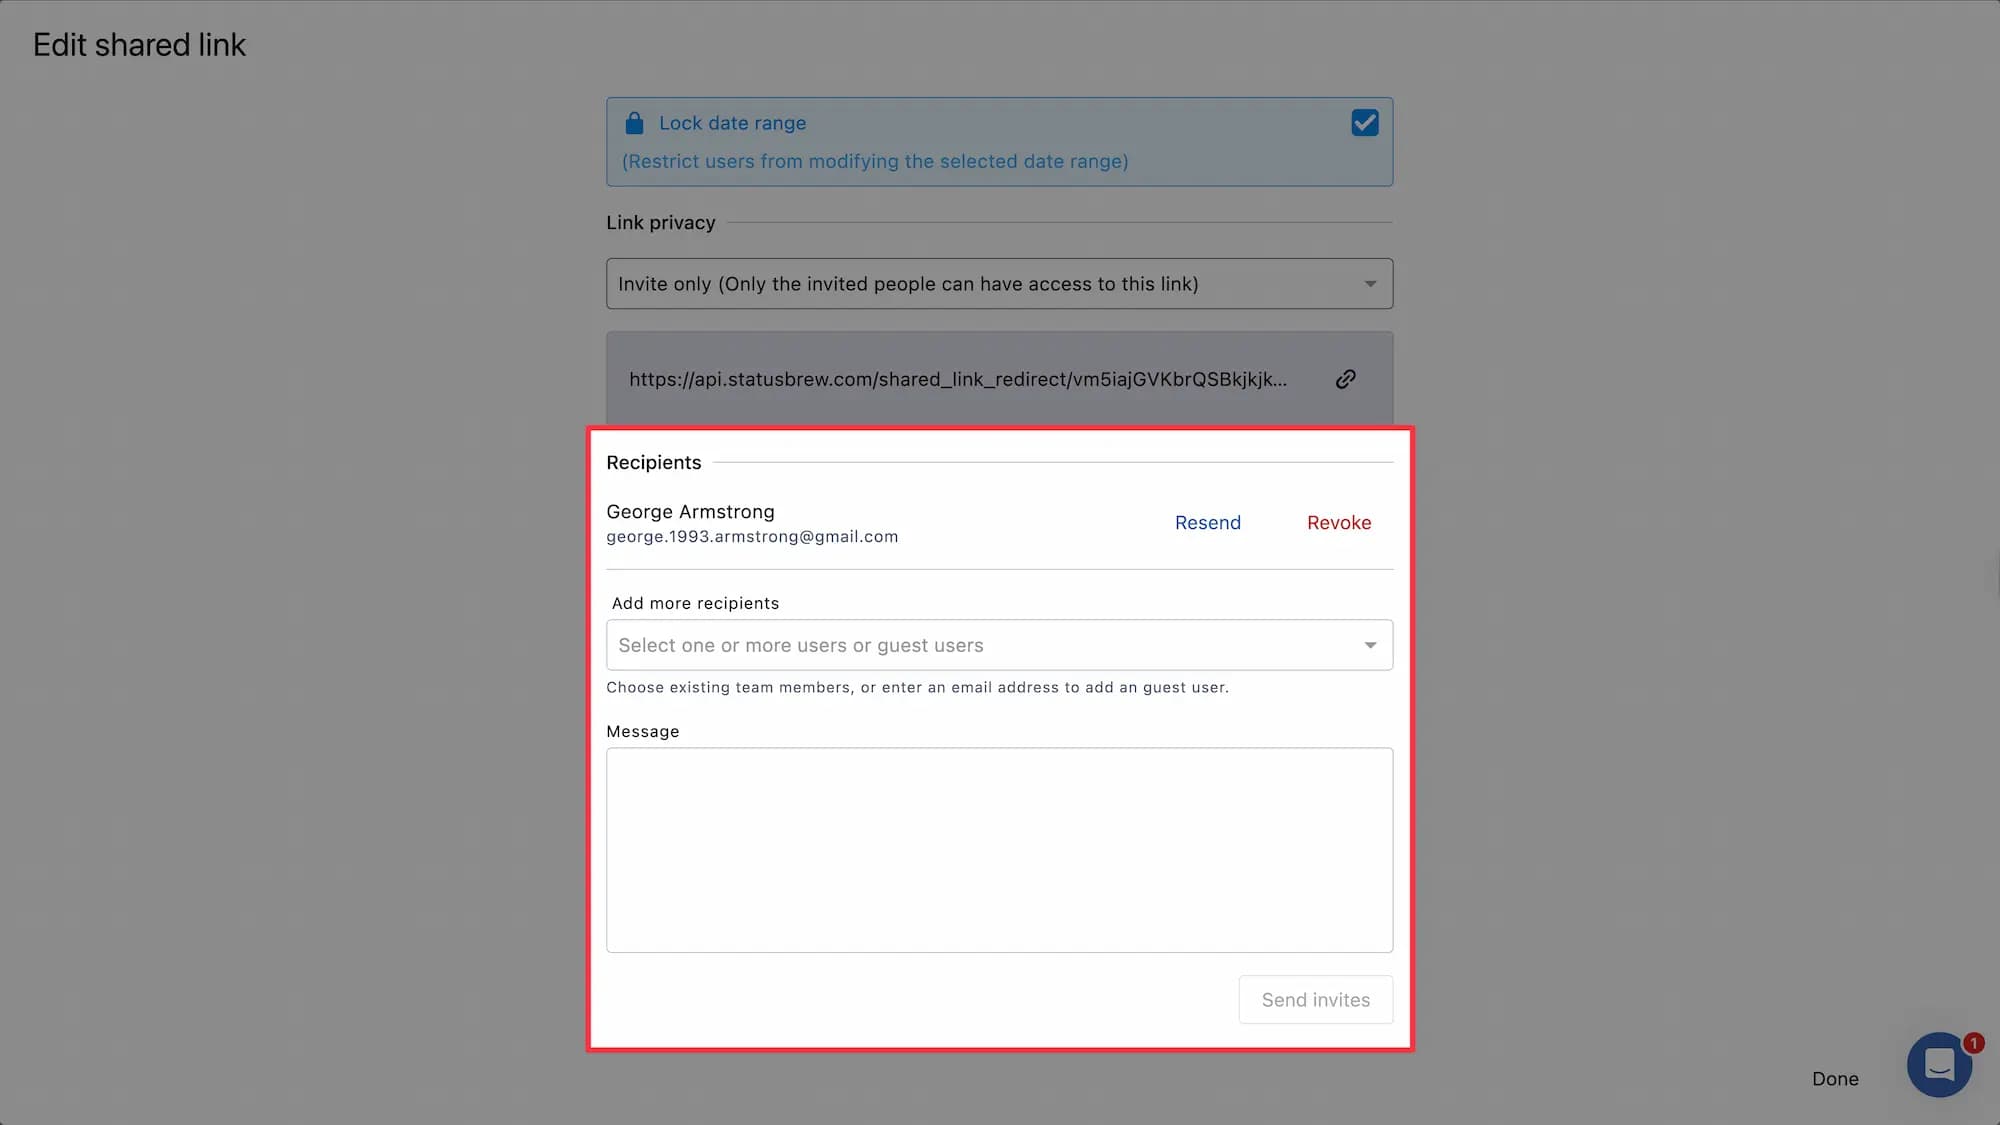
On the Edit shared link page, go to Recipients.
Under Add more recipients, select team members from the list, or type an email address to add a guest user.
Add an optional Message.
Click Send invites.
Recipients get an email with the link. If the link is Invite only, they are the only people who can open it.
Revoke Access
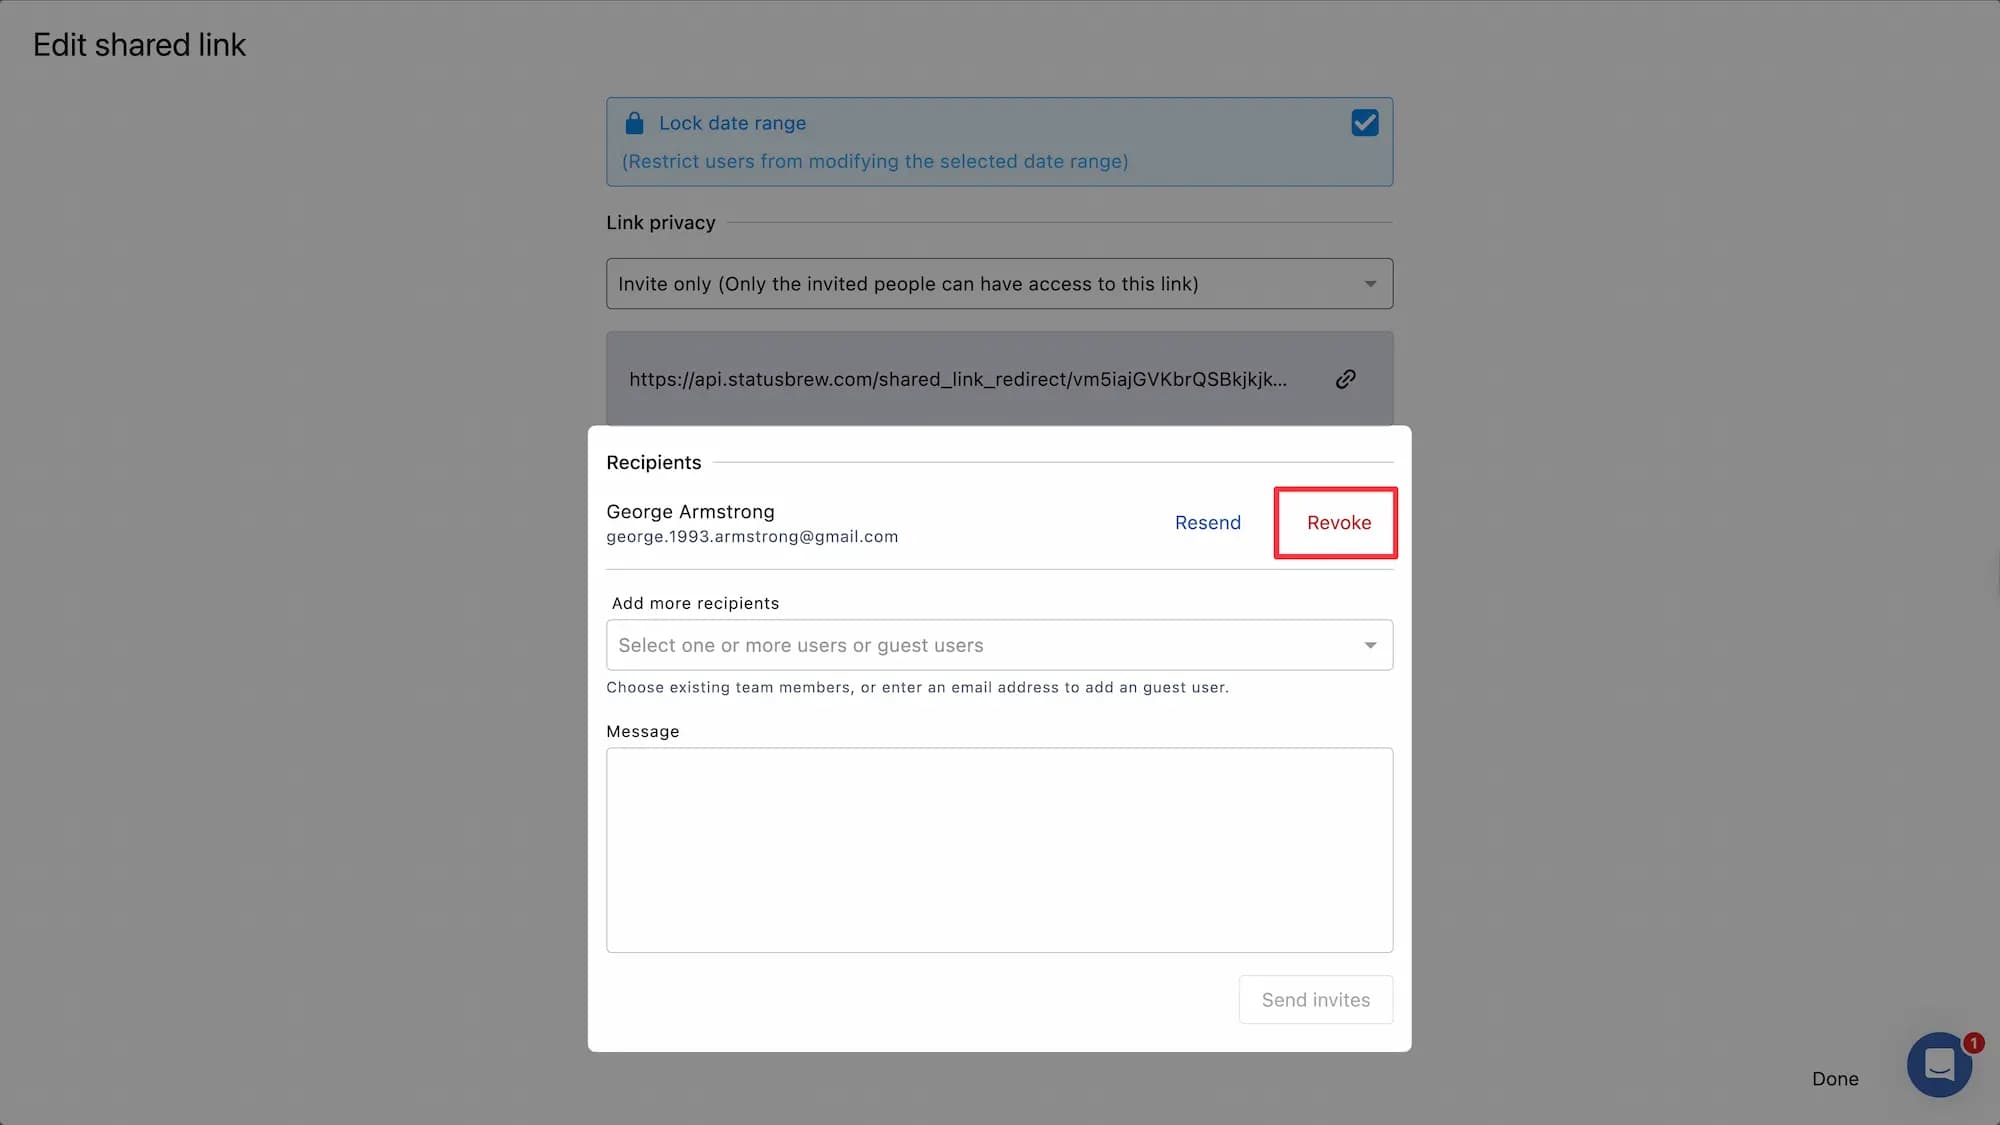
Under Recipients, click Revoke next to the person's email. They can no longer open the report from the link in their email.
Resend Email
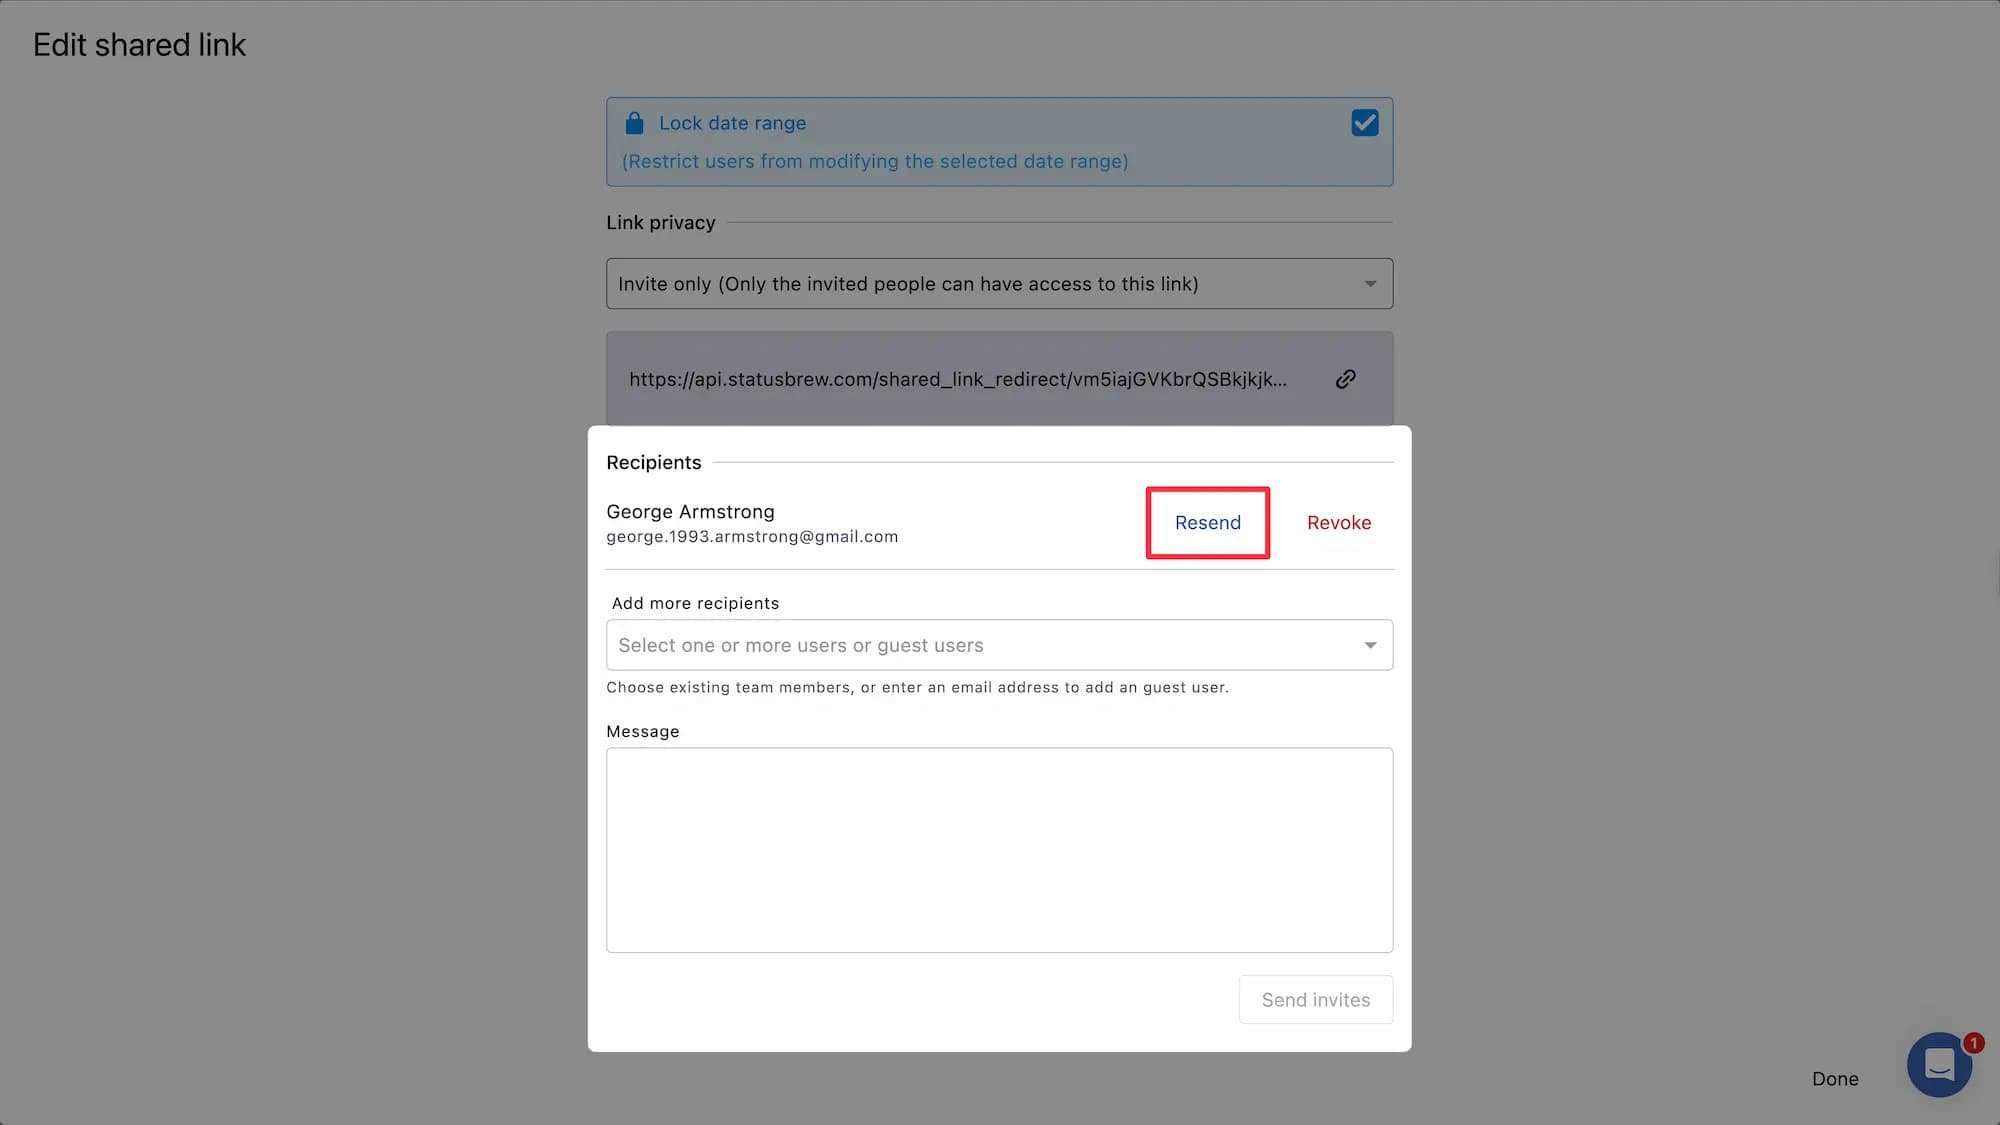
Under Recipients, click Resend next to the person's email. Use this when someone missed or lost the original email.
Notify Recipients
When you've updated a report, let people know with Notify.
Open the report and click Share link.
Hover over the link and click More (three dots) > Notify.
In Notify recipients, add the people to notify and a message about what changed, for example "New posts added".
Click Notify recipients.
Only the people you add in this window get the email. Existing recipients aren't notified unless you add them here, too.
Track Views
Every shared link tracks who opens it.
Go to Settings > Shared links and open the Reports tab. You can also use the Shared link pop-up on the report.
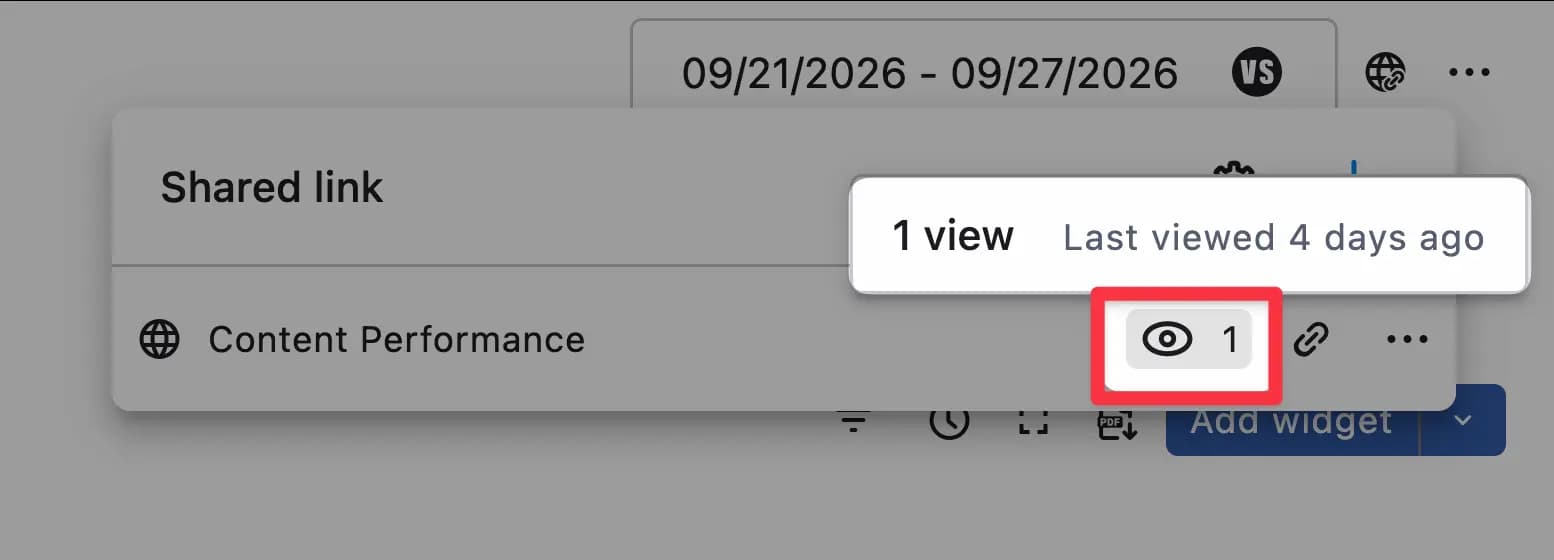
Hover over the link's Views count (eye icon).
The view details show:
Total views: for example, 5 views
Last viewed: how long ago the link was last opened, for example, Last viewed 11 hours ago
Who opened it: each viewer's name and email address, with how long ago they viewed the report
If a link has never been opened, the Views column shows - -.
Manage Shared Links
All your shared report links are listed in one place. Go to Settings > Shared links and open the Reports tab. You can also get here from any report: open the Shared link popup and click Manage links (gear icon).
Each link shows:
Title, Created time, and Created by
Permission: Public or Invite only
Status: Active, Expires on a date, or Expired on a date
Date range the link uses
Views: total views, with viewer details on hover
Each row has buttons to open the source report and to Copy link. Copy link is greyed out on expired links. Use Search to find a link by title.
Delete Shared Link
Click More (three dots) > Delete on the link. You can do this from the report's Shared link popup or from Settings > Shared links.
The link is deleted right away, with no confirmation, and it can't be restored. Anyone who has it can no longer open the report. Deleting a link doesn't delete the report.
Points to Remember
Live data: viewers see report changes and link setting changes after they refresh the page.
Save with Done: edits to a link only save when you click Done.
Notify is selective: only the people you add to the Notify window get the update email.
Deleting is permanent: a deleted link can't be restored. Create a new one to share the report again.
No sign-up needed: viewers don't need a Statusbrew account to open a public link.
FAQs
Why Can't I Access Shared Links?
Shared report links are available on the Premium plan and above. If your space is on a lower plan, the Share link button isn't available on your reports.
Can I Download A Shared Report As A PDF?
Yes. Viewers click the PDF icon at the top right of the shared report and choose a layout:
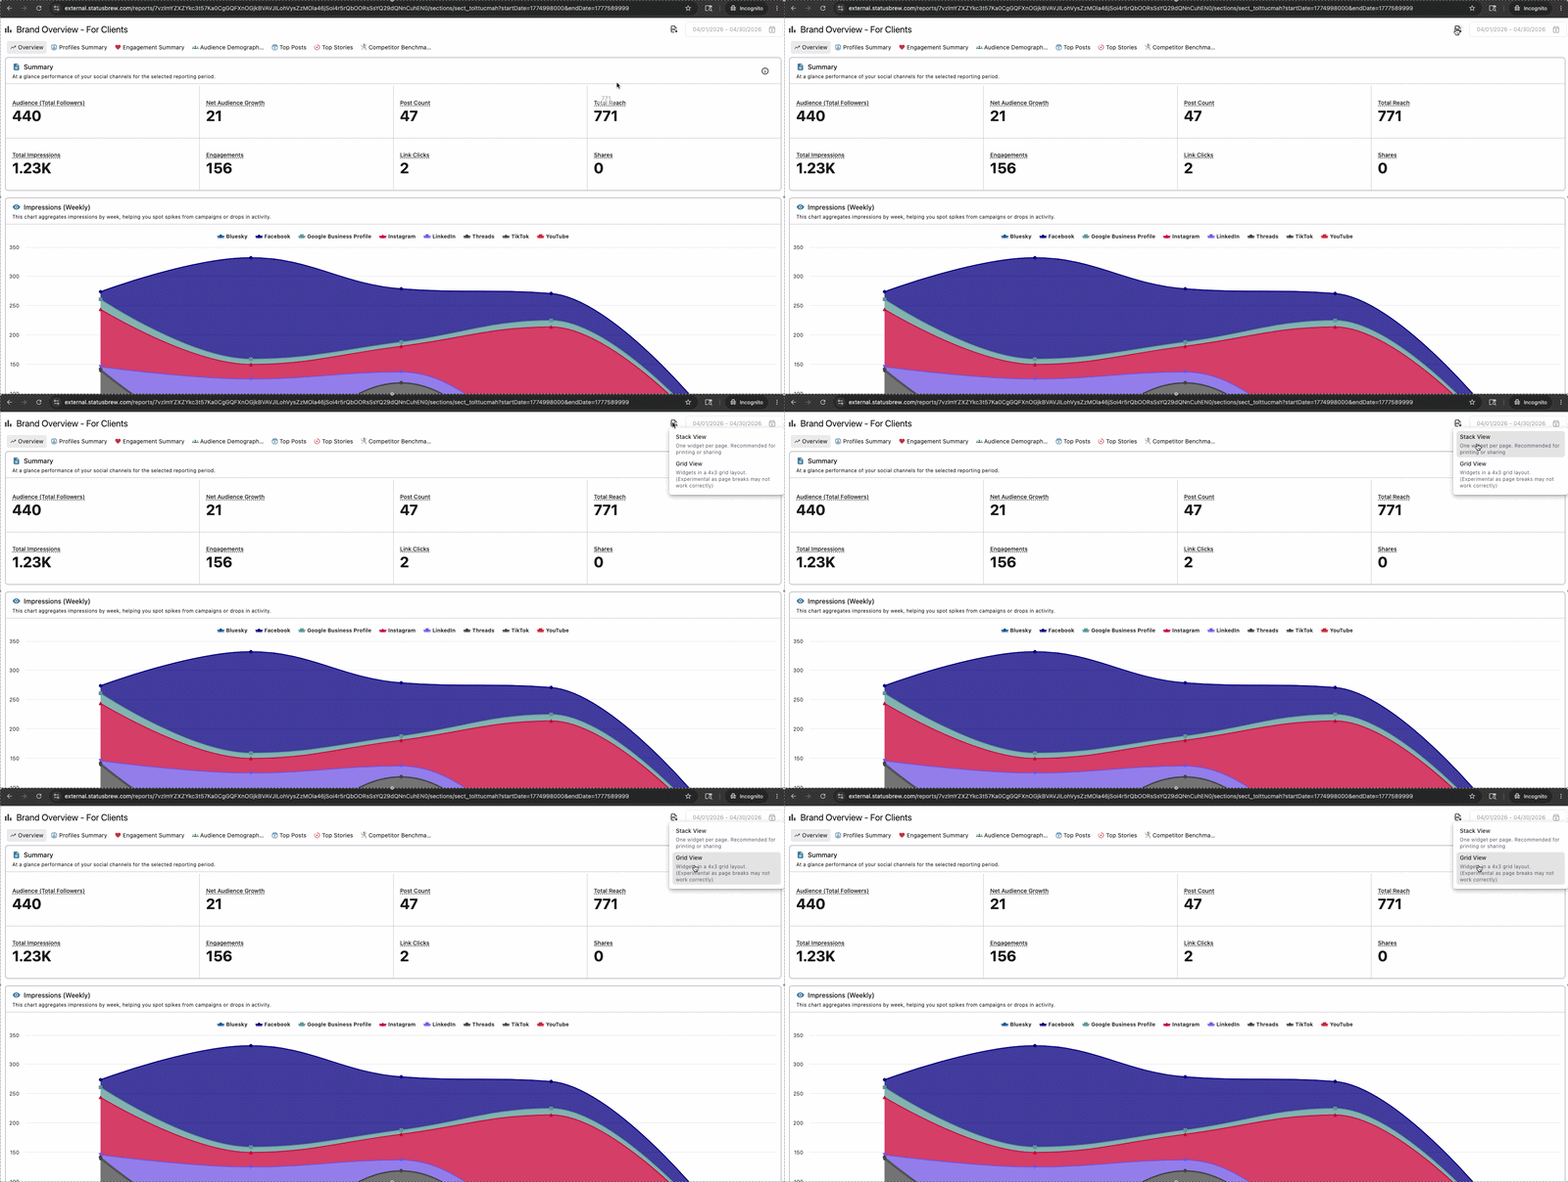
Stack View: one widget per page. Best for printing or sharing.
Grid View: widgets in a 4x3 grid. Shorter, but still experimental, so page breaks may not line up.
Large reports with a long date range can take longer to generate.