Publish Plans
You have an idea for a social media campaign, an idea for the type of content you want to create, and an idea for what you want to achieve, but where do you start?
You need a workflow, powerful tools, and a well-crafted plan.
Well, that's it, you need a Plan. Introducing Statusbrew Plans.
This will be your one-stop shop to put down ideas, collaborate with your team, create content & measure your marketing efforts across social all in a single place.
Your content, assets, and performance will be visible to your entire team in a single place.
What's a Plan?
With Plans, teams can now manage every aspect of a social media marketing campaign in the easiest way. Teams can collaborate, create & measure the performance of their campaigns all in one place.
Here's how the team can make the best use of Plans in Statusbrew:
Managers can lay down the instructions, objectives, goals & deadlines.
Creators can communicate and list down the content & resource requirements.
Designers can then upload all the assets. Creators can share feedback in real-time.
Creators can start creating content and use the resources with a single click.
Managers can revisit from time to time and check if the campaign is on track.
At the end of the campaign, Managers get detailed insights and can share them with leadership.
Plans in Statusbrew comprise:
Overview - The Overview tab gives you a high-level view of what your Plan is about, along with the volume of:
Total posts
Scheduled posts
Posts needing approval
Drafts
Published posts
List - You can quickly view a stream of all your posts in the List tab. Click on a post to open a detailed view.
Calendar - You can quickly view your posts at a glance in the Calendar tab.
Assets - You can add and view assets associated with your Plan in the Asset tab.
Performance - Get detailed insights into published posts with various performance metrics.
Setting up a new Plan
To build your first Plan in Statusbrew:
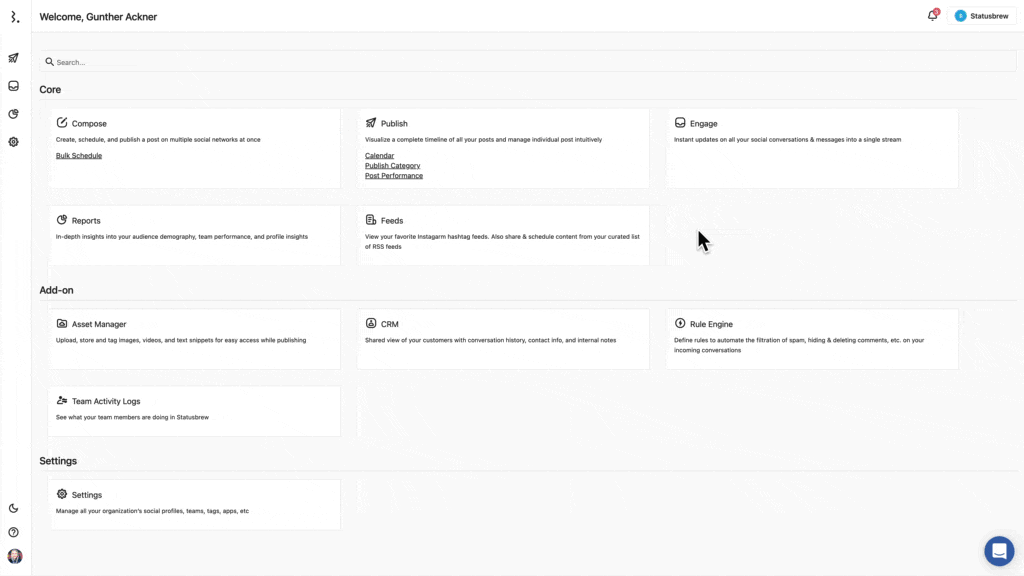
From your Statusbrew dashboard, click on Publish
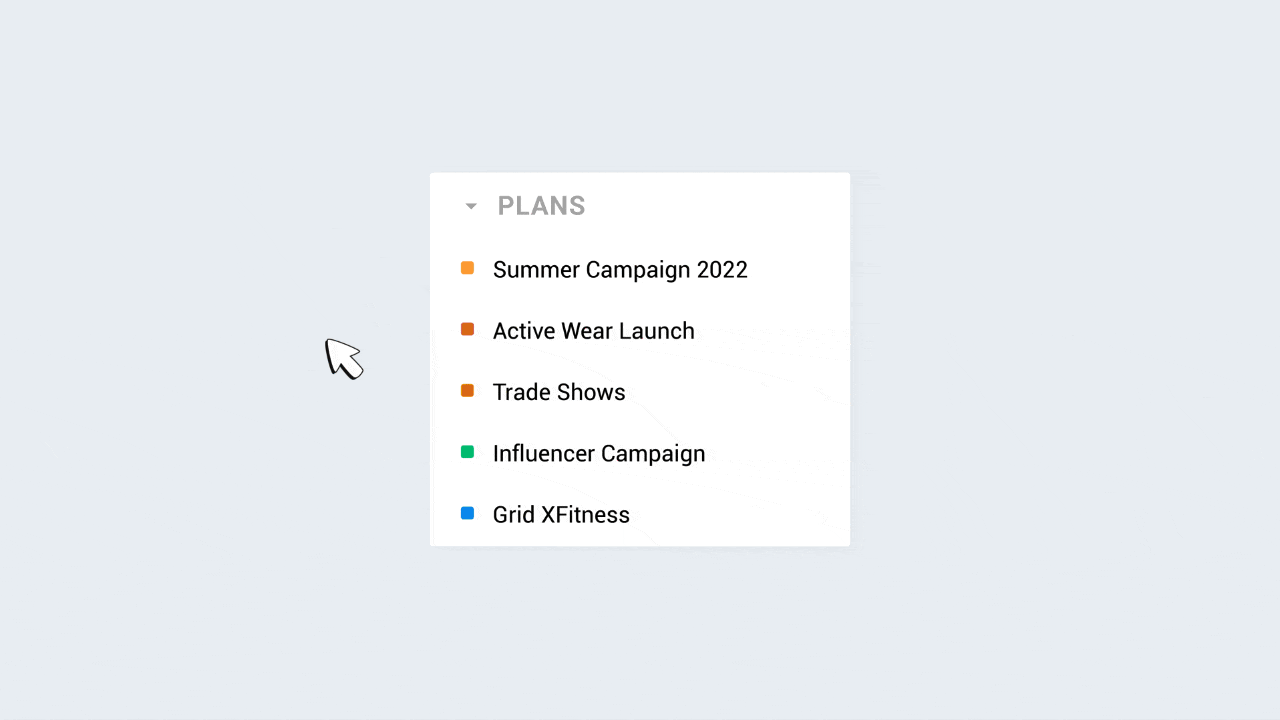
Now from the left side pane, hover your mouse over the Plans header in the left side pane and click on the (+) icon
Start by giving your Plan a name and adding a brief to it (you can add a summary, objectives, goals, links, etc. in brief)
Give it a color to quickly identify posts that belong to a particular campaign
Now select a start date and end date for your campaign (Plan)
You can then select the users/user groups who need the access to this Plan
Click on Save once you're done
Creating content for a Plan
Once you've created a plan, you're now ready to create posts for your Plan. We recommend creating posts under a Plan for better management and reporting.
To create posts for a Plan:
From your Statusbrew dashboard, click on Compose
Create your posts like you normally do
Now from the bottom left corner of your screen, click on the drop-down and select your desired Plan
Proceed to schedule or publish your post
Any posts with a plan attached to them appear with the selected color coding in the Statusbrew Planner and provide metrics in the Performance tab of your Plan.
Adding assets to your Plan
Once you've set up a Plan, designers can start adding assets to your Plan so that creators know what assets they should use.
To add a new asset to your Plan,
From your Statusbrew dashboard, go to Publish
Now click on your Plan from the left side pane
Switch to the Assets tab and click on the Add Asset button
Give it a title, description and add the media file
The Plan would be automatically selected in the drop-down
Click on Save once you're done
To add an existing asset to your Plan,
From your Statusbrew dashboard, go to Asset Manager

Navigate to Asset with the help of filters
Click on it to open Asset detail
Click on the pencil icon at the top to open the Edit menu
Select your desired Plan from the drop-down
Click on Update, once you're done
You can view all the assets associated with a Plan using the Plan Filter in the Asset Manager.
Tracking the performance of your Plan
You can easily track the overall performance of your Plan and even see detailed insights of all the published posts with performance metrics such as engagement, impressions, clicks, views, etc.
To view your Plan's detailed performance, switch to the Performance tab from the top of your screen.
…and more to come
We're excited to bring the first version of Plans, but this is just the beginning. We'll be bringing a lot more features in order to provide the best planning & collaboration experiences.