
Social media is an essential piece for any business. Social media platforms help brands connect with their customers, increase brand awareness, and bring them leads and sales.
Over 3.80 billion people are using social media around the world every month.
How much is 3.8 billion, you ask?
Well, sum of India and China's population is 2.82 billion, and these two are the countries with the highest population.
So yes, 3.8 billion is a considerable number.
Know more such interesting statistics about social media.
Simple fact: Your brand needs a social media presence!
While we always discuss the importance and benefits of having a business profile on social media, let us take a look on how to create a good social media profile.
You might be intimidated by the requirments to build a social media profile. If you wish to have an all-in-one guide for creating a social media profile for your business, this blog is for you!
Elements Of A Successful Social Media Profile
Display Name
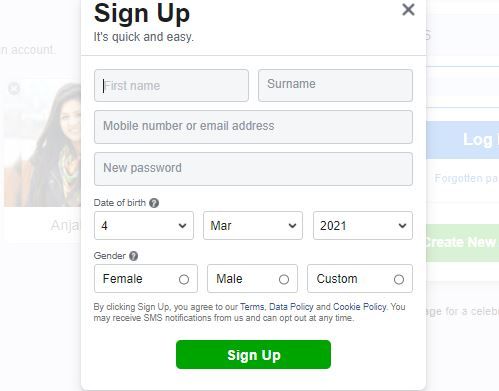
This seems relatively basic; the name that appears on social media profiles is the display name.
A display name can be your real name. Although, some networks like Twitter give you the option of using a pseudonym.
User Name
The user name on most social networks is in the URL and usually cannot be changed. So choose it wisely!
The best practice is to use the same name across all social networks.
@yourname on Facebook, @yourcompanyname on Twitter @yourmiddlename on Instagram can be confusing.
As an exception, if you have legal limitations or you are the company's face, you may choose otherwise.
Profile Picture
You can go with a picture of yourself or the company logo in case of company profile unless, of course, you are a brand yourself (ex. musicians, singers, politicians).
As per the best practice, use a headshot.
Also, it's a good practice and recommended to go for the same profile picture across all your social media profiles.
Company Link
For business profiles, it's the best idea to put your company link in front and center. It ensures you get maximum exposure, and people visit your company profile by clicking on the link.
You can create social media-specific landing page links so that you can keep track of which network brings you the most traffic.
You can even use these pages to offer special discounts to audiences who have found you on specific social networks. You can mention these offers in your Blog. That way, you get benefited both ways.
Profile Bio
It is an introduction to your brand. The length of the bio will vary depending on the limit given by different social media platforms. Usually, it includes a line or two about your business.
Pro tip: Finish your bio with a call to action.
Make sure to make an excellent first impression!
Cover Image Or Background
Some social media platforms allow you to have a background image just behind your profile picture.
Some brands choose a default cover photo, but that is an opportunity lost!
You can share additional information about your brand.
Make sure it is not too distracting or essential than your profile photo.
Privacy Setting
After you are done with the necessary information on your profile, take a look at your profile's privacy setting. It will be different for each network but make sure the information you want to share is open to the right audience.
Of course, if it's a business profile, you will want to keep information public, but you might want some information hidden for a personal profile.
Activity
The fun part - sharing exciting content.
Code Of Ethics For Social Media
Before we move forward with creating your social profiles, it's essential to know some social media ethics.
Proper Sourcing
Do not share content that you received from an unreliable source. Be skeptical about the information you read.
Errors And Deletions
Mention if you are editing a post that is published. Do not replace the images of the original article, especially if it's misleading.
Accountability
Take responsibility for the information you share. Apologize if someone is offended by your content.
Privacy
Respect the privacy of everyone. Please do not share any personal information of someone without their permission or consent.
Personal Bias
Do not alter facts to match your opinion; this can be misleading.
Apart from above listed points, if your business belongs to a regulated sector such as healthcare, finance, etc learn social media compliance for regulated industries.
General Requirements Before Creating Profiles On Social Media
Email Address
It is a digital address; just like your home address, all the essential information will be conveyed via email.
Make sure it is your work email.
Also, use one email address for all your social media profiles. It helps to retain ownership over accounts and keeps all accounts consistent and organized.
If you don't have a business email ID, create one.
Name Vs. Username
A name is your real name, while a username can be a pseudonym. The display name on your profile can be a username or real name, depending on different social networks. However, it is advisable to keep the same name throughout social networks for visibility and consistency.
In some cases, the display name cannot be changed once submitted. So be careful when you enter details.
In the case of Business profiles, the display name should be the name of your company or brand that you represent.
Password
Create a password which only you can remember easily. Please do not share it with anyone. It should not be a generic name.
Characteristics Of A Strong Password
- At least eight characters (more the merrier)
- Combination of both uppercase and lowercase
- At least one unique character
- At least one numeric value
Steps To Create A Profile
Facebook has been replacing traditional media channels ever since its founding in 2004.
It is a social media platform for sharing content with family and friends. Founded by Mark Zuckerberg, Facebook currently has over 2.80 billion monthly users.
Step 1: Go to facebook.com
To log in to Facebook, enter your email address and password to continue.
If you are not a member, you can create your profile by adding personal information, choosing an interest, and profile picture. Verify your email or phone number by clicking on the verification link that Facebook will send.
Do not worry about this personal information being displayed on your business page. You may choose not to show this information on the business page.
Step 2: Click on the 'plus' icon menu located on the top right corner. Scroll down and click on 'Create page.'
If you already have a page, you can select the options available or create a new page.

Step 3: Enter your 'Page name' and 'Category' that best describes your brand. Facebook will take you step by step through a setup wizard.
While filling out a description about your page, make sure to use relevant keywords so that the search engine picks up your page.

Customize your Facebook address as the default Facebook address is very long.
Step 4: Upload profile picture, which will be your logo sized at 180 x 180 pixels.
To know about specific dimensions of the image on social websites, read Social Media Size Guide for 2021.
Step 5: Get easy access to your company page by selecting 'Add to favorites.'
Step 6: Click on 'Promoted Posts' if you wish to spend money to reach out to more audiences or skip this step.
Step 7: Add a cover photo to your page. Update your first status and reach out to your audience.
Step 8: To pre-schedule, your post click on 'Publishing tools,' then select 'Schedule post' followed by 'Create.'
Alternatively, you can also use a third-party app like Statusbrew to manage multiple social media profiles. Using Statusbrew you can create, schedule, and publish multiple social media posts across Twitter, Facebook, Instagram, LinkedIn, and Google My Business at once.
Statusbrew is an all-in-one social media management tool that makes it simple for businesses and teams of all sizes to create content, manage marketing campaigns, monitor engagement, and analyze performance to drive effective social media results.
Twitter has over 353 million monthly active users ; your business needs to be here. Follow the steps below to create a business profile on Twitter.
Step 1: Download the Twitter app or go to Twitter.com, click on signup, enter your name (business name), work email address, and password. Twitter allows you only one profile per email.

Twitter will ask you for an email or phone verification.

Step 2: Select your unique username. The username can be different from the real name; however, it cannot exceed 15 characters. Tip: Avoid adding a year to the username as it would look outdated once the year is passed.
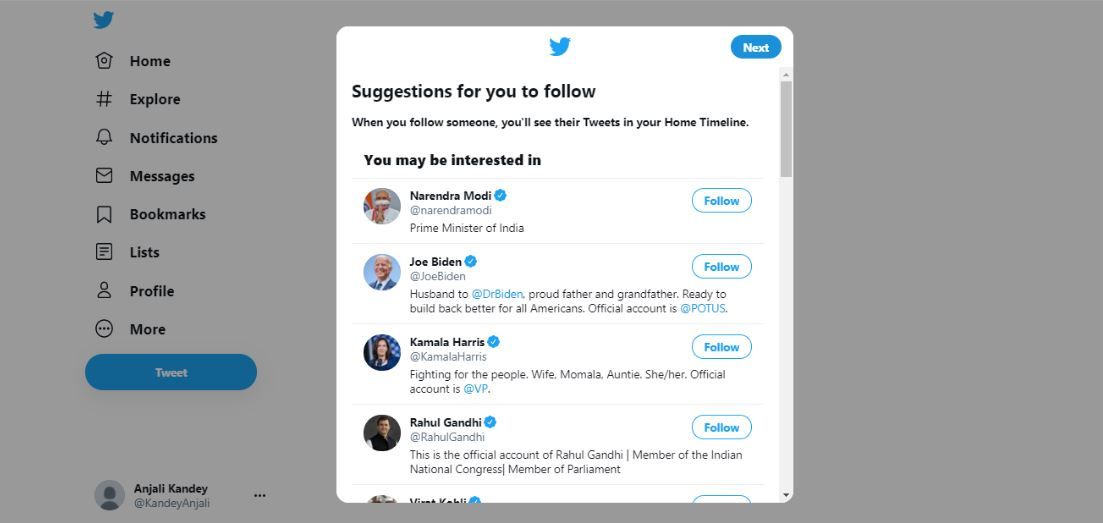
Step 3: Twitter will ask you to follow the people of your interest. You can choose to Skip this step.
Step 4: Upload Image and Upload header (max size 5MB) of your choice, depending on how you want your brand to be represented. It is advisable to use your brand logo.
Add brand website so that your audience can directly go on the company page for more information
Add bio but be succinct as you have only 160 words to describe your brand
Step 5: Twitter will now direct you to the home page. You can click on your profile and choose to edit it if required.
Pinterest is an image sharing and social media service. Pinterest was designed to enable saving and discovering information using images, GIFs, and videos like a pinboard. Formed in 2009, Pinterest has 459 million monthly active users.
Digital versions now replace traditional office or home pinboards with visual search engines.
Get your hands on creating a Pinterest account by following these simple steps:
Step 1: Go to pinterest.com and click on create account
The login credentials can be the same as Facebook or Google, or you may have a separate account for Pinterest for the personal account.

Step 2: Link up to four business accounts to a personal account. You can also have a business account that is not linked to any personal account.
Step 3: Fill in the demographic information.
The next page will ask you to choose the topic of interest. This will create your home feed.

Step 4: Click the plus sign on the bottom right of your home page to start pinning.

Snapchat
Snapchat, founded in 2011, now has a base of 498 million active users. Snapchat lets users exchange pictures and videos which are meant to disappear after they are viewed.
Snapchat is also called a 'new type of camera' as its essential function is to add filters, lenses, and other effects to the picture taken.
You can create a business profile with Snapchat. Let's get started to create the account.
Step 1: You can access Snapchat's business profile here. Click sign up

Step 2: Fill in User details like birthday, phone number, and username (make sure it has your business name). Username is a unique value and cannot be changed.

Step 3: Click 'Continue' and then add your business name (legal business name)
Step 4: On the next page, fill up information about your business. Click on 'Get Started'

Step 5: After you are done filling the form, Snapchat will send a verification code to your business email. Then you can access the Snapchat business account.
Step 6: Snapchat ads manager page will appear, which will help you find relevant features you want to use to promote your business.
If you are planning to make a social media strategy hope that this article helps you to take first step.
If you haven't created an Instagram account for your business, now is the best time to start.
Instagram has seen a meteroic rise in the last few years and offers an unmatched oppurtunity for businesses to promote their services and connect with fans.
Here are the steps for creating an Instagram account:
Step 1. Download the Instagram app. There are two ways to download the Instagram app: on your Android/iOS smartphone or through a web browser on your Mac or Windows PC.
Step 2. Open the app and click/tap on Sign up
Step 3. Now enter your business email address

If you plan to grant access to multiple users or you want to connect your Instagram business account to your Facebook Page, make sure to use an admin email address to sign up or tap Log in with Facebook.
Step 4. Choose your username and password and fill in your profile info. If you logged in with Facebook, you may be asked to sign in.
Step 5. Tap Next and you've successfully created your personal Instagram account
You can now easily switch from a personal account to an Instagram business account. An Instagram business account gives you more tools to manage and grow your brand.
Here are some benefits of an Instagram Business Profile:
- Adding brand contact information (i.e., phone number, email, and business location)
- Business advertisements
- Built-in eCommerce features
- Access to analytics
Here are the steps to switch from a personal account to an Instagram business account:
Step 1. Open the Instagram account and go to your profile From your profile
Step 2. Tap the hamburger menu in the upper-right corner.
Step 3. Tap on Settings
Some accounts may see Switch to Professional Account from this menu. If you do, tap it. Otherwise, proceed to the next step.
Step 4. Tap Account & choose business
Step 5. If you plan to connect your Instagram and Facebook business accounts, follow the steps to connect your account to your Facebook Page.
Step 6. Select your business category and add relevant contact details.
Step 7. Tap Done.
Before your company can start LinkedIn marketing, it needs a LinkedIn page.
Here are the steps to create a LinkedIn profile.
Step 1: Visit the LinkedIn Pages section of LinkedIn Marketing Solutions website & click on create your Page
Step 2: Now choose the appropriate category for your business & fill in the company details

A page preview displays how it looks as you add content. Choose a good URL for your brand. If you can, make it the same as your handle (username) on other social sites
Step 4: Upload your company logo and add your tagline & click create page
Step 5: Complete your Page
To add information click the pencil icon on your profile under your company name.
Adding more details to LinkedIn Page
Step 6: Company description - Include a description of your products and services in two to three short paragraphs
Step 7: Location - Include your store or corporate office locations. Multiple addresses can be added by selecting +Add Location button
Step 8: Hashtags - You can add up to three hashtags to make your profile more searchable
Step 9: Cover photo - You can enhance your profile with a background photo. Choose an image that showcases your business.
Step 10: Custom button - Add a button to your profile to encourage action. Options include visit website, contact us, learn more, register, and sign up.
Now that your business page is all set up, it’s time to start sharing content.
Statusbrew is a social media engagement tool that unifies your social inbox, brings your team together, and creates automated workflows.


Explore the Statusbrew range of social media tools
Cancel anytime!