What Is A User?
In Statusbrew, a user is anyone who has an account to log in and collaborate within the Statusbrew workspace.
A user can be an individual team member, manager, stakeholder, or client — anyone who needs to plan content, engage with audiences, monitor conversations, or track results.
Adding users allows your team to work together in one place while also ensuring that your team members have access to only the features they need.
What Is A User?
A user in Statusbrew is anyone who has login access via a seat on your plan. Users are organized through Groups and are assigned Permissions either through individual settings or Groups. This structure helps you securely control who sees and does what across your social profiles.
Learn about Inviting Users To Statusbrew.
Types Of Users In Statusbrew
Every Statusbrew Space includes different user types, each with a specific level of access:
Primary Owner
Owner
Admin
Regular Users
Depending on your organization’s structure, Primary Owners and Owners can add users to User Groups and manage their access to specific profiles or profile groups within Statusbrew.
For details on how to assign and manage permissions, see Managing Access Permissions.
Owners
An Owner holds the highest level of access in your Statusbrew organization.
When you first sign up for Statusbrew, you automatically become the Primary Owner of the organization. This role gives you full control over administrative areas such as:
Access to all spaces within the organization
Ability to add or remove other users
Control over billing settings and subscriptions
Authority to edit space settings
⚠️ There can be multiple Owners in a single Statusbrew organization, but there is only one Primary Owner at a time.
If needed, the Primary Owner can transfer ownership to another team member at any time—helpful when organizations restructure or when a different person takes over administrative responsibilities.
Who should be an Owner?
Team leads responsible for billing and subscription management
Department heads overseeing workspace structure and user access
Administrators and stakeholders who need full visibility across all teams and spaces
Admins
Admins are one level below Owners, with two primary differences:
They cannot manage billing settings.
They cannot invite, remove, or manage user access
This makes Admins ideal for managing day-to-day operations without granting them full organizational control.
Unlike Owners—who can access all workspaces—Admin access is workspace-specific. When assigning an Admin role, you can choose which workspace(s) they’ll have access to.
Within their assigned workspaces, Admins can:
Manage all connected social media profiles
Access and manage the Engage Inbox
Create and view reports
Who should be an Admin?
If you want someone to fully manage a workspace without affecting your organization's structure or billing, assigning them as an Admin is the most appropriate option.
Typical examples include:
If your agency, Admin access is ideal for Client Account Lead who are responsible for managing the client’s social presence across all of the client’s connected profiles.
For a brand having differencet social presence for each product line Admin access should be assigned to Product Marketing Manager who oversees entire social prence for that product line. They need full operational control within the workspace, but don’t require access to other product lines or organization-level settings like billing.
Regular Users
Regular Users are the most common and flexible user type in Statusbrew. When you invite a user to your organization and do not assign them as an Owner or Admin, they are added as a Regular User by default.
Unlike Owners or Admins—who have broader, predefined permissions—Regular Users can be granted customized access to specific social profiles and tasks.
Workspace access is not automatic. You choose which workspace(s) a Regular User can access.
Bulk invitations are supported. You can invite multiple users at once or upload a CSV to add them in bulk.
Grant access to one or more specific social profiles. Define what they can do for each profile (e.g., create post, view conversations, respond to them)
Optionally assign them to Profile Groups for easier permission management when multiple profiles are involved. When a user needs access to several social profiles across the same platform or region, it’s recommended to create Profile Groups and assign permissions at the group level.
Who should be a Regular User?
Regular Users are ideal for:
Team members with specific responsibilities (e.g., content creators, community managers, designers)
Freelancers or agency partners working on limited projects or campaigns
How To Change User Permissions In Statusbrew?
Here is how you can change admin, owner, or regular user level permissions:
Go to Settings.
Select Users.
Click (three-dots) besides the user whose permission you want to edit and choose Edit.
Edit the permission. You can add (or remove) them as the organization owner, add (or remove) them to a space, or add (or remove) them as an admin for a space.
Click Save.
Here is how you can change access level permissions for a specific profile or profile groups:
Go to Settings > Profiles/ Profile groups
Click (three-dots) beside the profile/profile group
Select Edit.
Click Add permission
Select the permission you want to set for the profile/profile group. Add the user(s)/user group(s) to whom you want to provide the selected permission.
You can also set additional permissions for the same profile or profile group by clicking Add permission.
Transferring Primary Ownership
The Primary Owner can transfer the ownership to any user at any time.
To transfer Primary Ownership, the Primary Owner has to -
Go to Settings > Users
Click (three-dots) beside your user profile (user profile of the Primary Owner)
Click Transfer ownership
Add the appropriate user, complete the confirmation and click Submit

Internal Collaboration
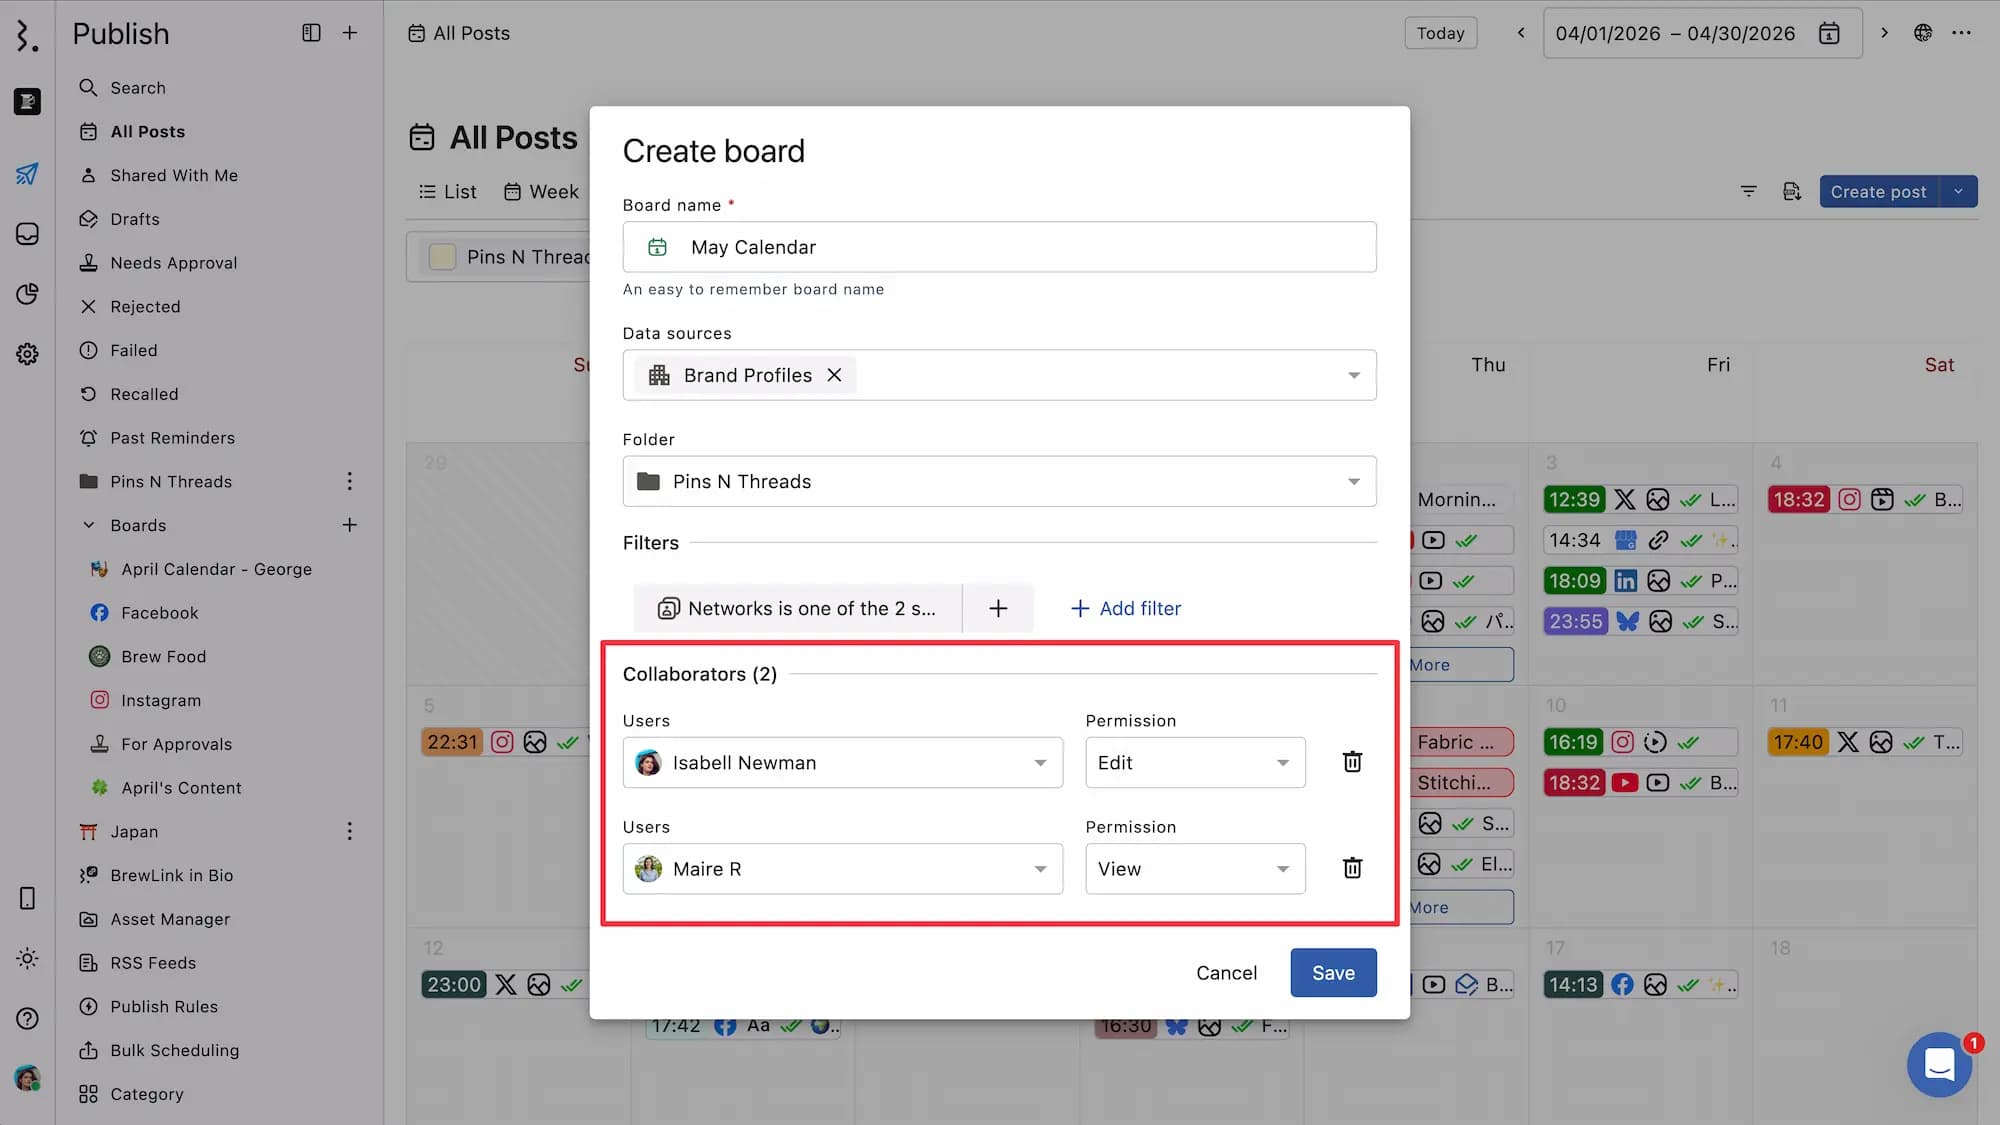
In Statusbrew, any personalized entity you create, such as a calendar board, reporting dashboard, or custom inbox folder, can be explicitly shared with other users. Statusbrew gives you control over visibility and editing rights, especially when managing sensitive information.
When you want to share a private entity with your team members, you can manually add them as collaborators. You can assign a permission level to each user:
View Only – Allows the user to see the board, inbox, or report, but they cannot edit or take action with it.
Full Edit – Grants full editing rights. Users can modify the content, adjust filters, add or remove items, and collaborate with other users.
These permissions are applied per entity. If a user has edit access to one calendar board, they won’t automatically get access to other boards or inboxes unless added.
Example: You’ve built a content planning board for an upcoming campaign. You want your creative team to view the plan but not change it, and your campaign manager to update dates and post descriptions. You’d assign “View Only” to the creative team and “Full Edit” permission to the campaign manager.
Using the "All Users" Group for Teamwide Access
If you want to make a dashboard or calendar board available to everyone on your team, you can add the All Users group as a collaborator instead of adding individuals one by one.
This group includes:
All active users in your Statusbrew workspace
Any users added in the future
This is especially useful when:
You’re building shared resources, like a centralized reporting dashboard
You want to ensure visibility without micromanaging access for each new hire
External Collaboration (via Links)
Statusbrew lets you share your entire calendar, a specific calendar board, or even one post externally by creating a shared link. This is helpful if you want to share your content calendar with your clients or managers, or if you need feedback on specific posts. People viewing externally can share their feedback via notes.
The same applies to reporting dashboards—you can share any reporting dashboard via a shared link. For privacy, you can even control what data is visible to external collaborators.
To learn more, refer to our articles on:
External Collaboration (via Emails)
You can share any posts or conversations externally by sending them to any email address. The recipient gets a rich preview of the shared item, and if they reply, their response is automatically added as an internal note in Statusbrew.
You can also automate email sharing for all posts or specific types of conversations via rules.
Learn more about How To Use Engage Consult.
FAQs
I would like to remove myself as a user as I'm leaving the company, and add someone else. How can I do this?
You can have an owner remove you and invite the new team member.