Content Editorial Calendar - List, Week And Month View
The Statusbrew Planner gives you a clear, structured view of all your posts and events. It offers five layouts, List, Week, Month, Grid & Preview, so you can choose the format that best suits your needs. In this article, we will discuss about the List, Week, & Month view.
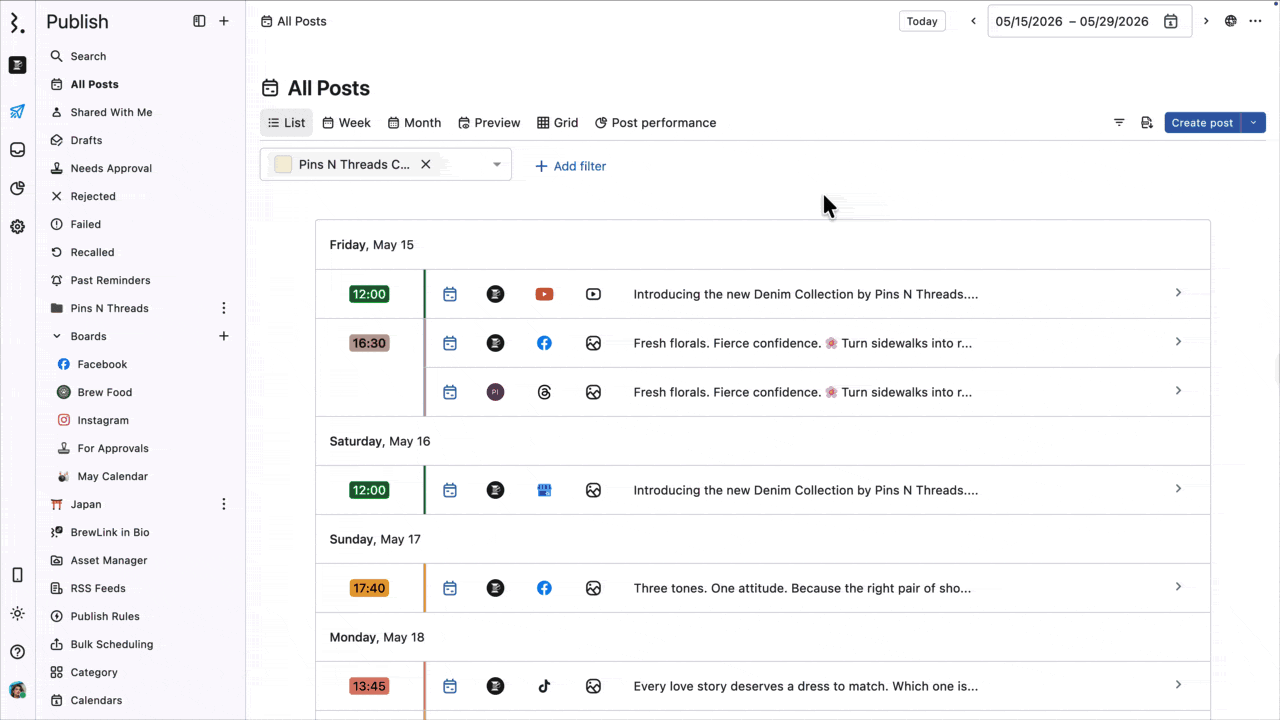
To access your posts in List, Week, and Month view, navigate to the Publish > All Posts from the sidebar. Toggle between these three views using the top bar.
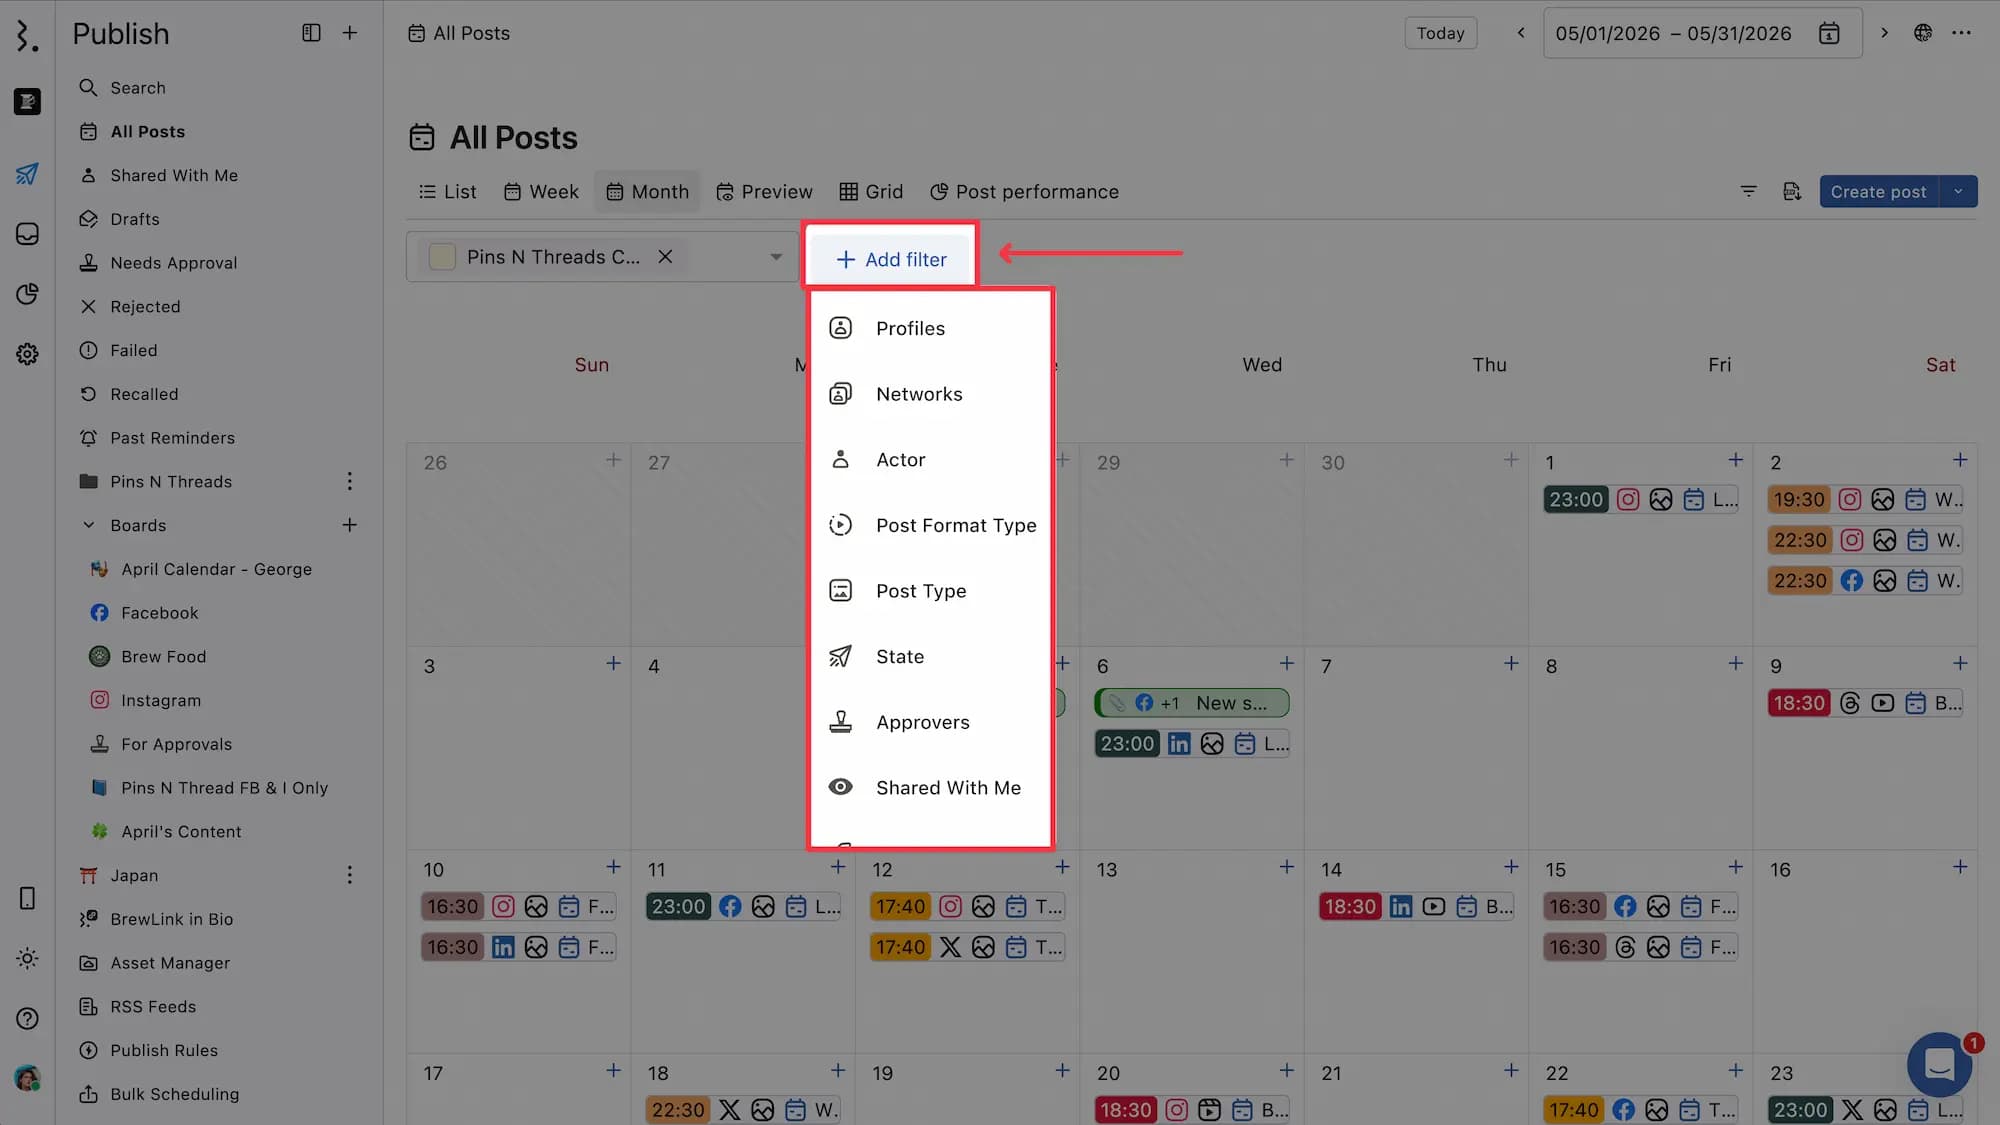
Filters Bar
The Filters Bar gives you control over the content displayed in the Planner.
Today: Clicking the Today button will set the date range to start from the current day and display all posts and events within the next 15 days from today.
Date Range Picker: Clicking on the date range picker lets you manually select a custom date range. The Planner will then display all posts and events within the selected time period. The two arrows beside the date range selector help you navigate through dates quickly:
Left Arrow (Previous): Clicking this arrow shifts the start and end date range backward by one complete interval (15 day window frame in list view, week in week view, or month in month view).
Right Arrow (Next): Clicking this arrow moves the start and end date range forward by one complete interval.
This allows you to browse through previous or upcoming time periods without manually selecting dates from the picker.
Calendar Selector: Use the calendar selector dropdown to choose which calendar(s) you want to view posts and events from.
Planner Filters: Click Add filter to apply Planner filters and narrow down your Planner view to specific criteria so you can focus on the posts that matter most to you.
Share link: Create, view, and manage shared calendar links to securely share your publishing calendar with anyone outside your organization.
Export options: If you wish to export posts in the Planner view, click (Export options) at the top right corner and select Export CSV. Only the displayed (filtered) data is exported.
List View
This view is best when you want an idea of the order in which your posts will be released. It provides a linear, date-wise breakdown of all posts.
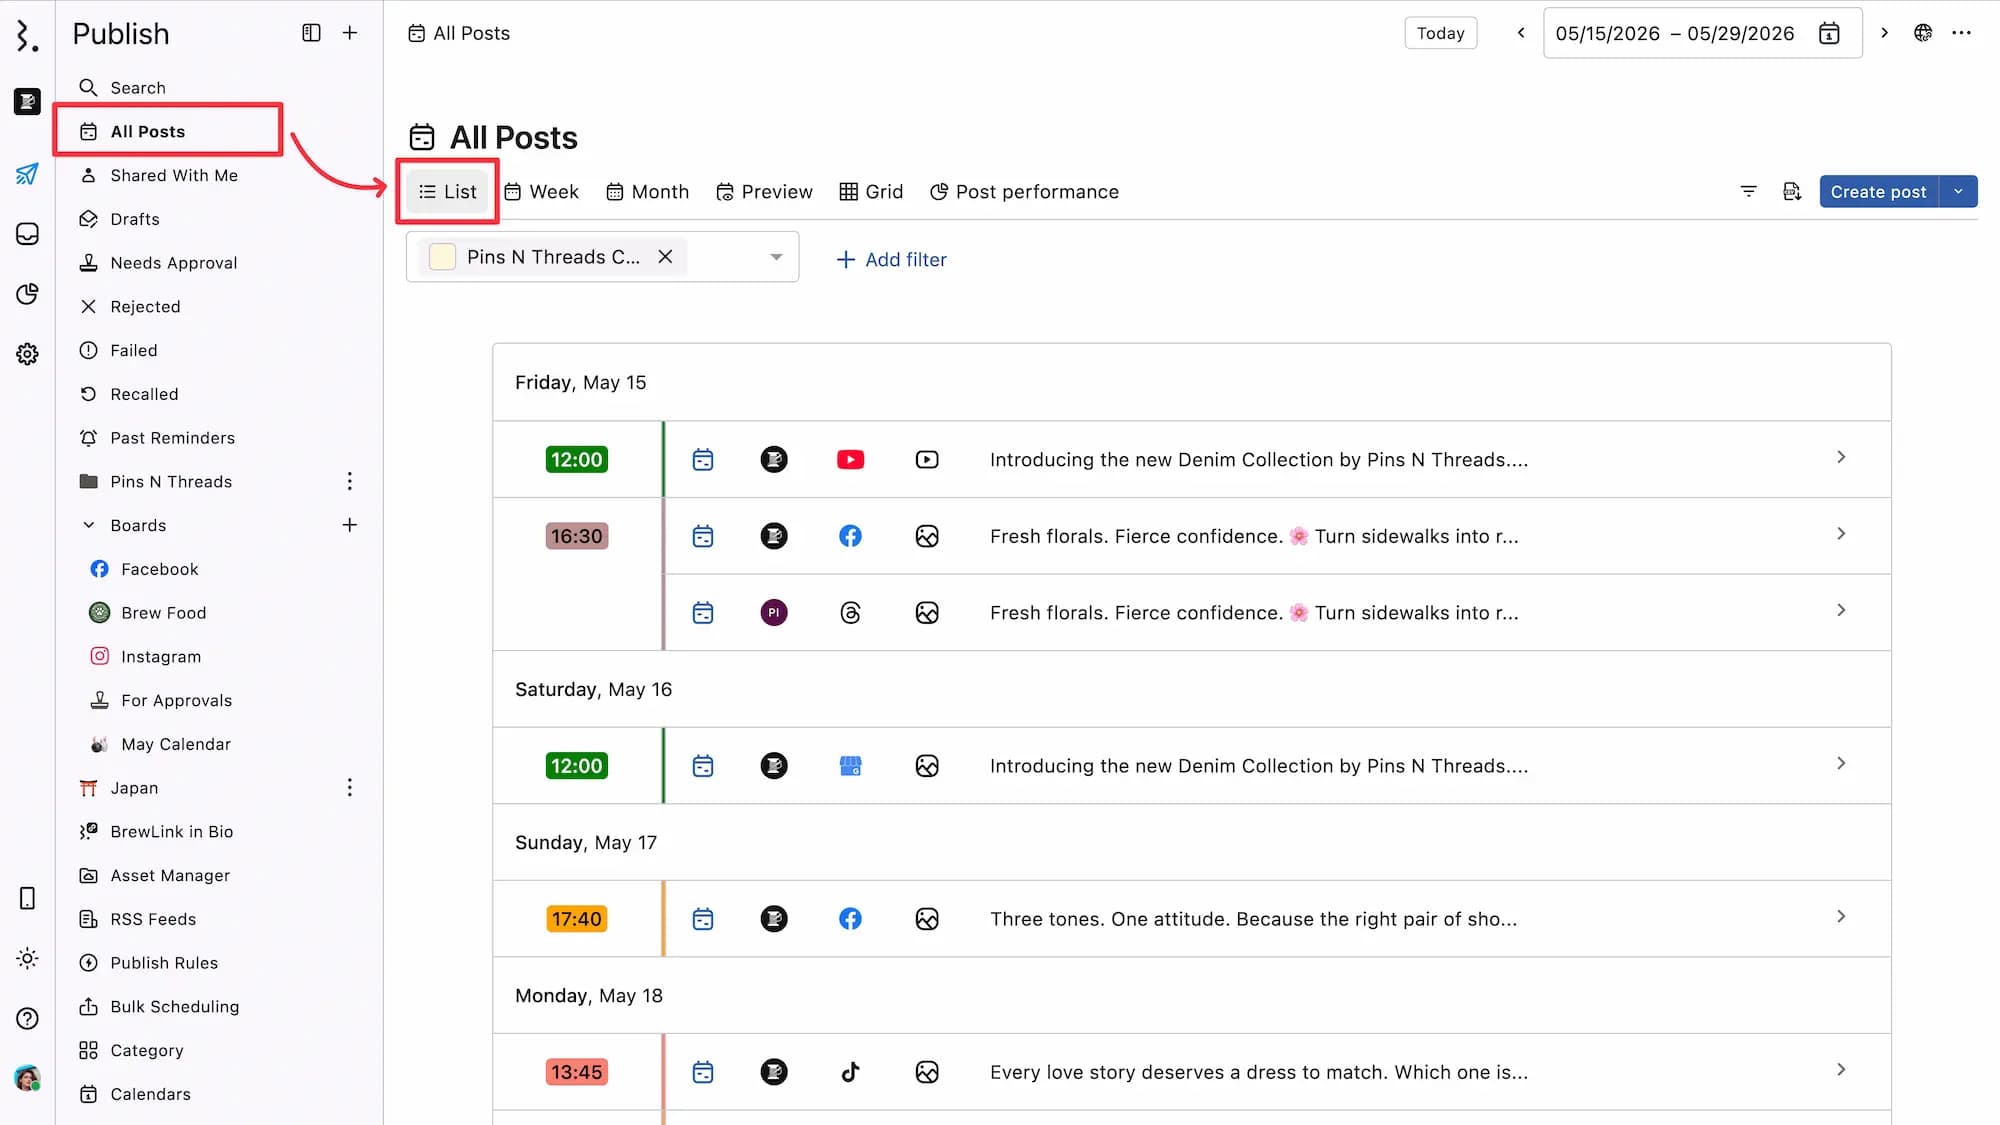
Posts are organized chronologically under each date heading. Posts are grouped by date. Within each date, posts are arranged by their scheduled time from earliest to latest (e.g., 1:00 AM, 12:00 PM, 11:30 PM). All-day events appear at the top of the date.
Each post entry contains:
The post state icon.
The profile picture of the profile to which the post belongs
The social network icon of the profile
The post type
The post title
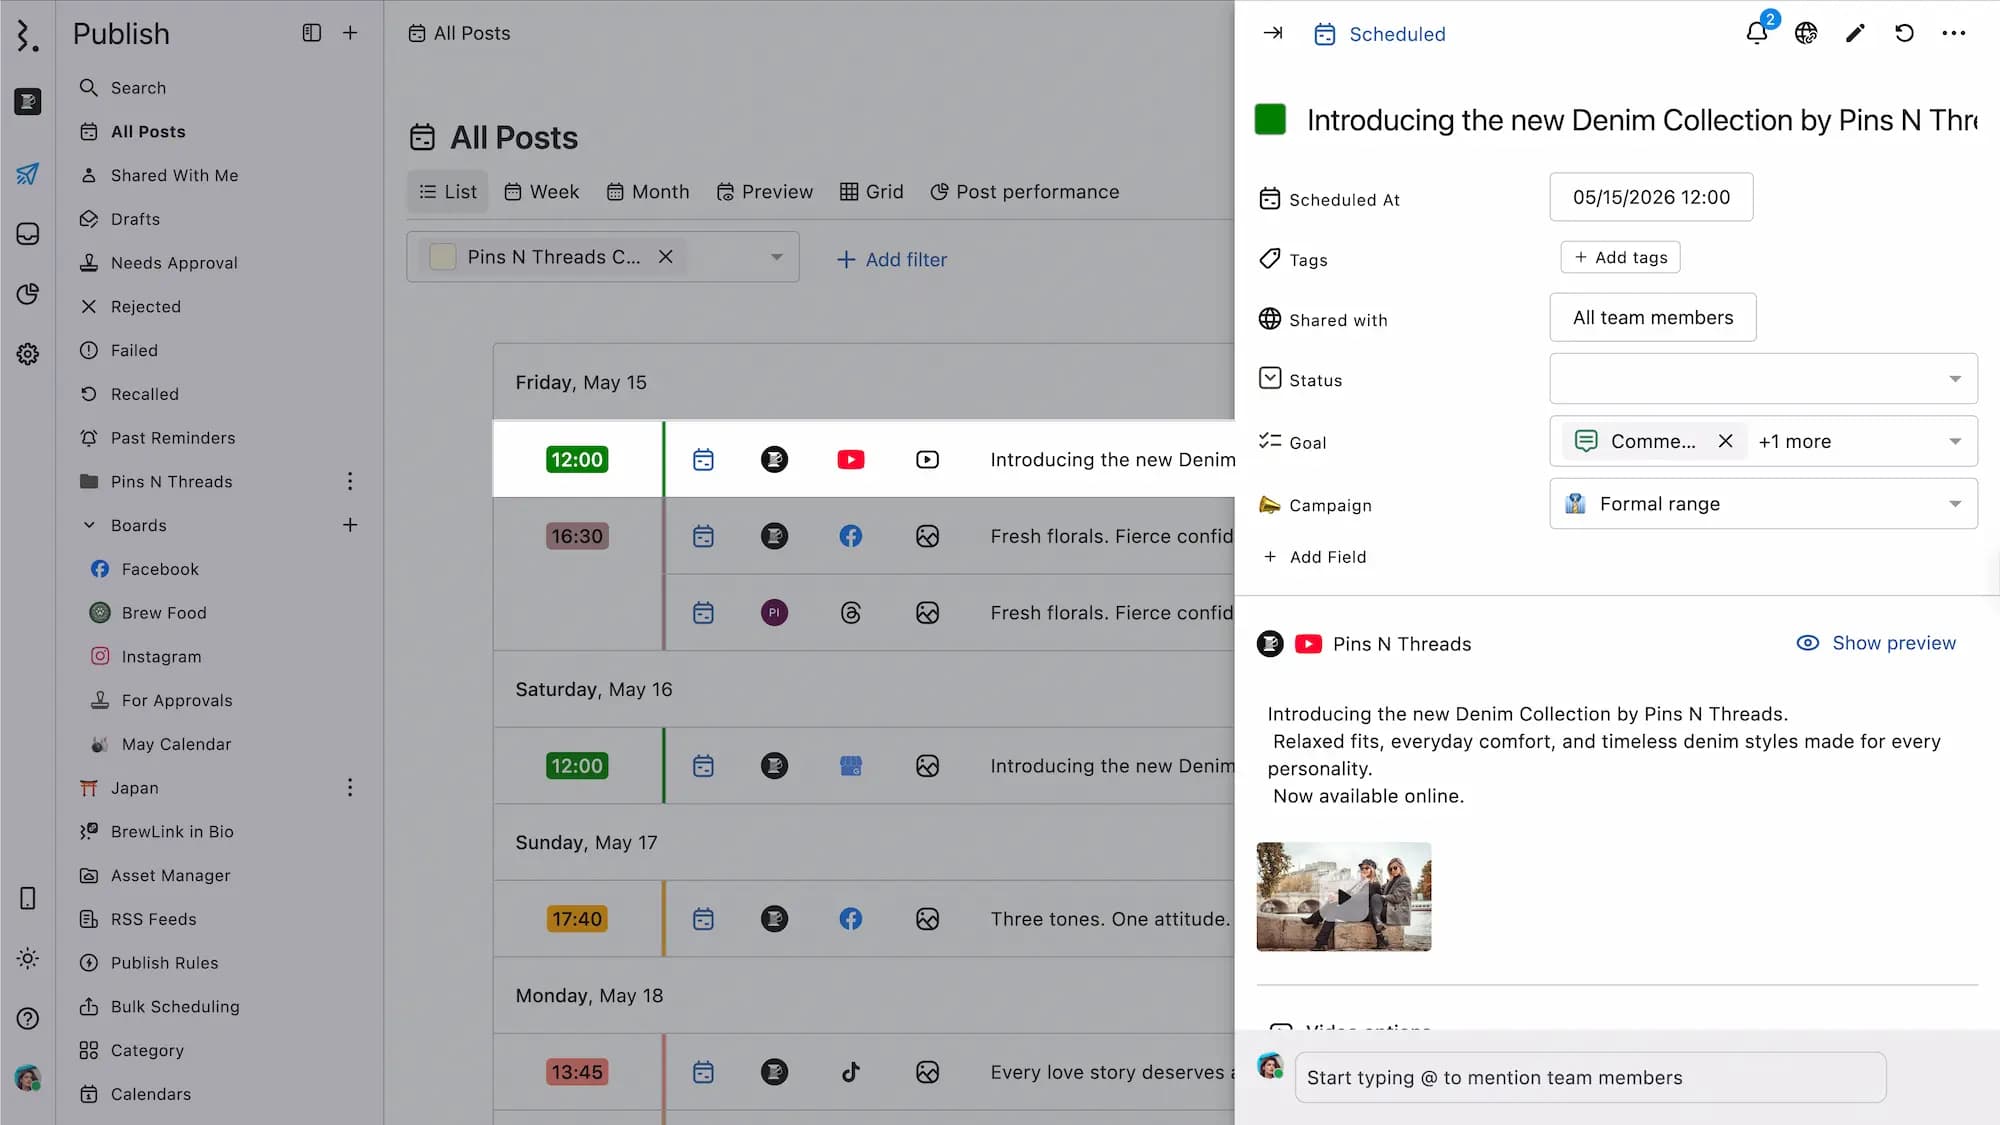
Clicking on a post or event will open its Detail View.
When you hover over a date, you will get options to Create post, Create story, Create X(Twitter threads), Create event.
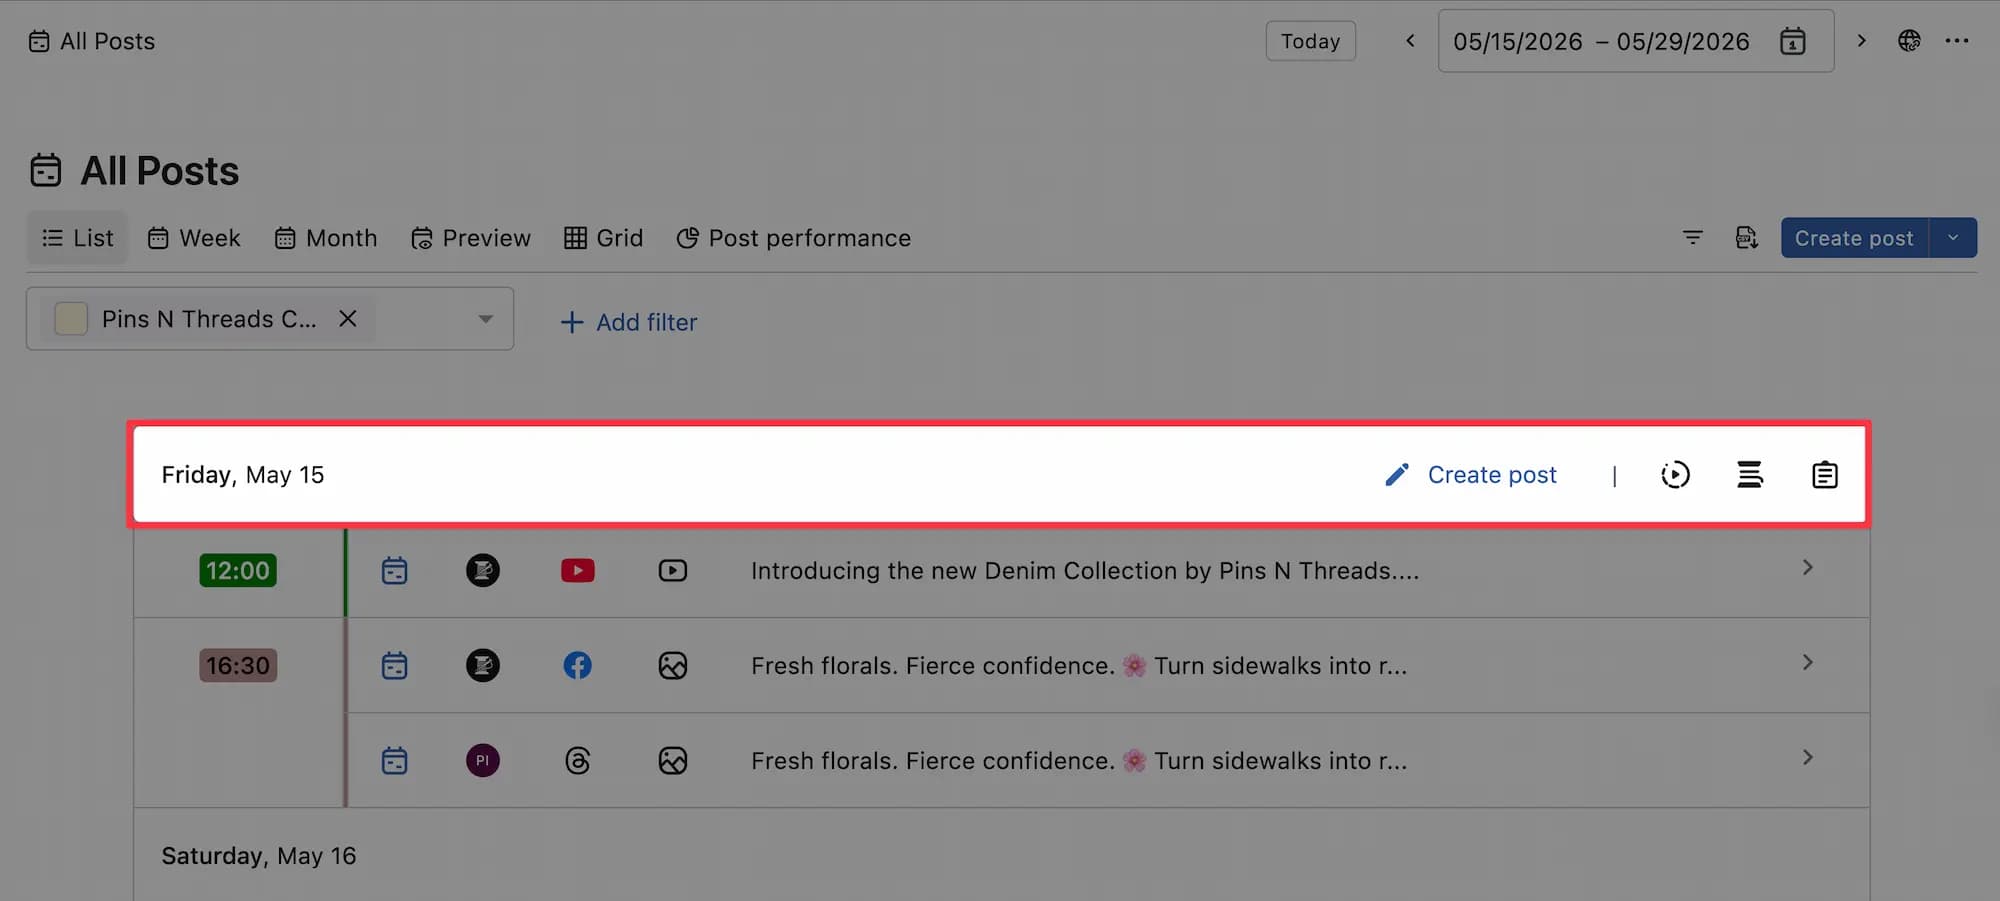
Clicking on any of these options will open the respective composer with the selected date pre-filled as the scheduled date, and the scheduled time set to 15 minutes ahead of the current time. This makes it quicker to plan content for the date.
You can also perform bulk actions on posts in List view.
Week View
The week view makes it easy to identify gaps on a day-by-day basis within your calendar.

Each column represents a single day, and all posts/events for that date are displayed in vertical sequence based on their scheduled times. All-day events appear at the top of the date.
Each post entry contains:
The schedule time of the post
The social network icon of the profile
The post type
The post state icon.
The post title
The media/link preview.
Clicking on a post or event will open its detail view.
Clicking on the (Create post) icon in front of a date, will give you the options to Create post, Create story, Create X(Twitter threads), Create event.
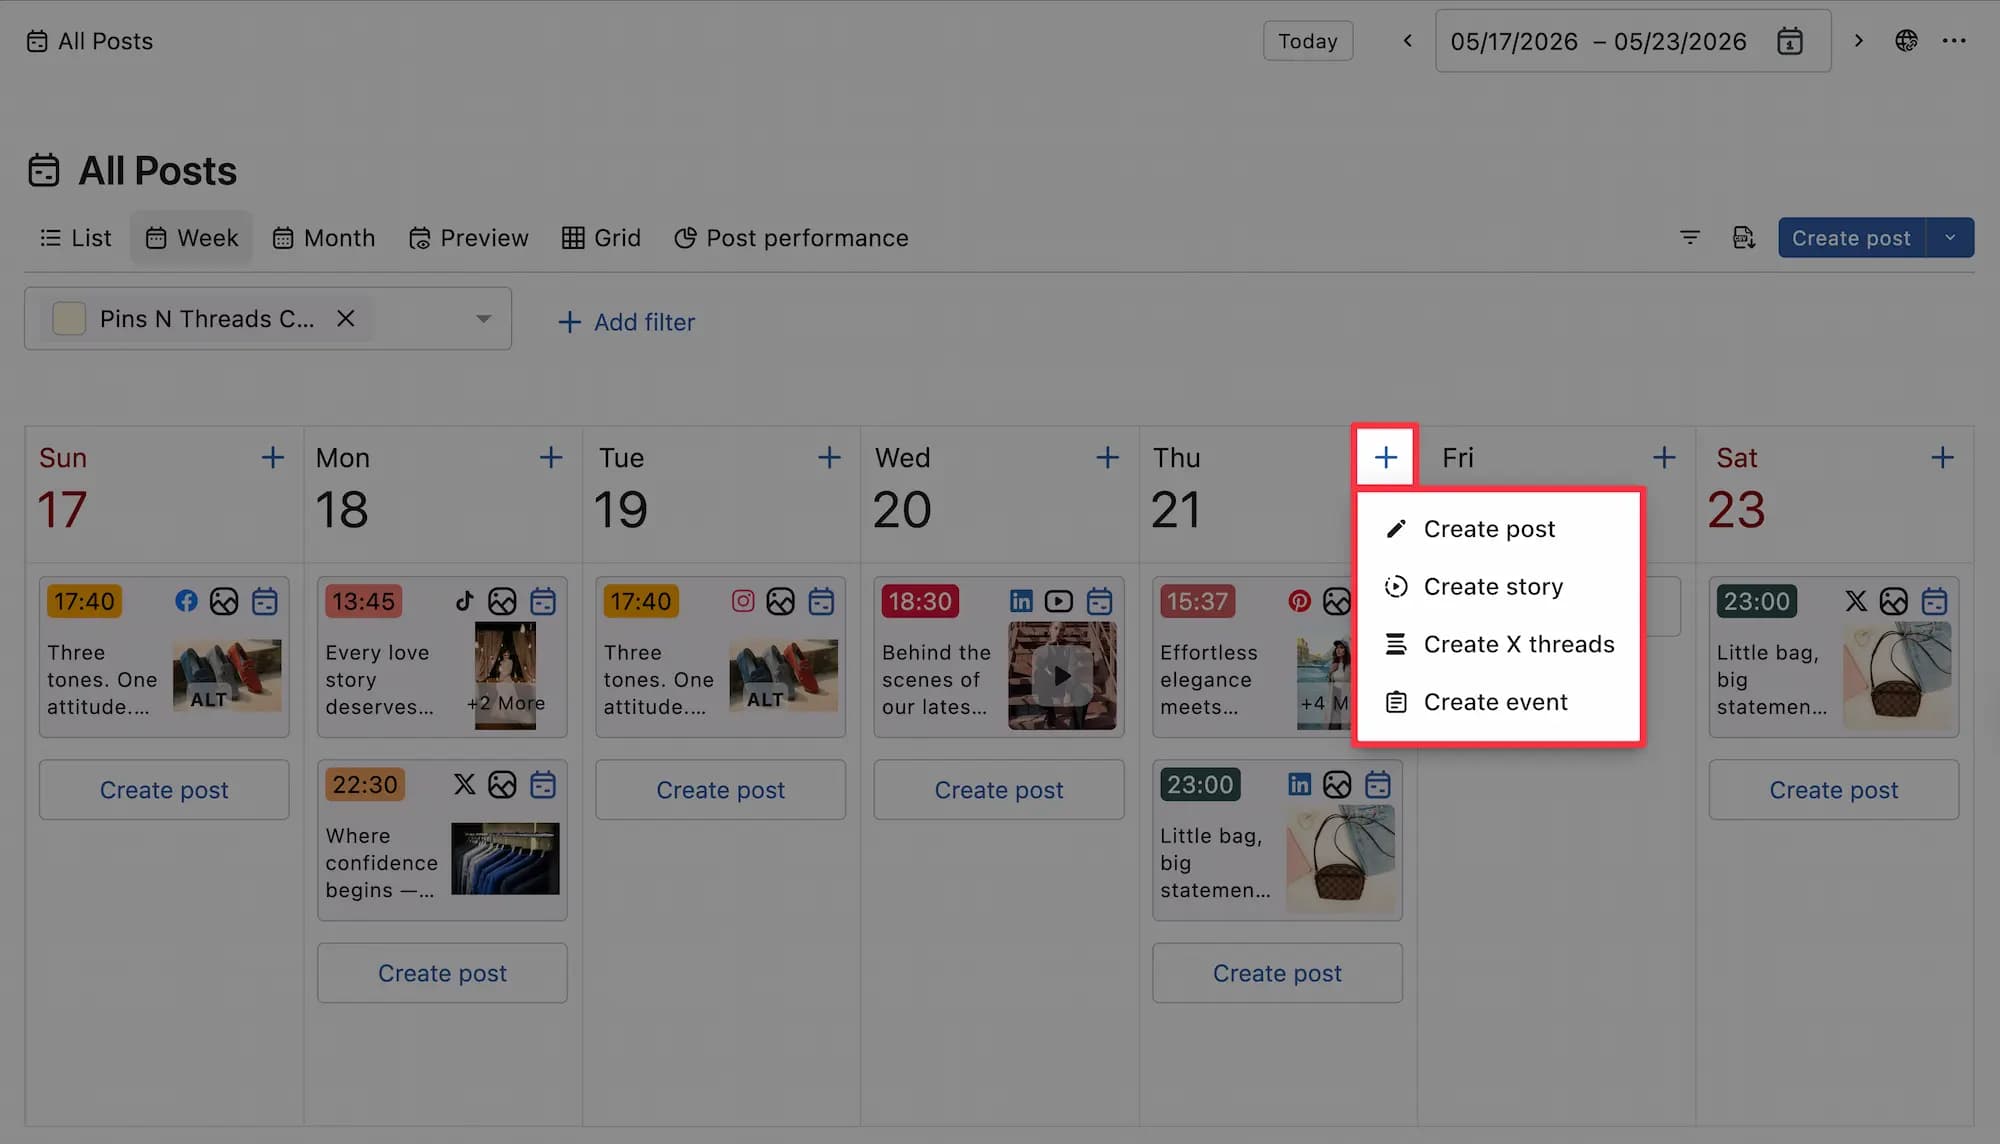
Clicking on any of these options will open the respective composer with the selected date pre-filled as the scheduled date, and the scheduled time set to 15 minutes ahead of the current time. This makes it quicker to plan content for the date.
Each day column ends with a Create post button. Clicking this button opens the post composer with the corresponding date automatically selected as the scheduled date. The scheduled time defaults to 15 minutes ahead of the current time.
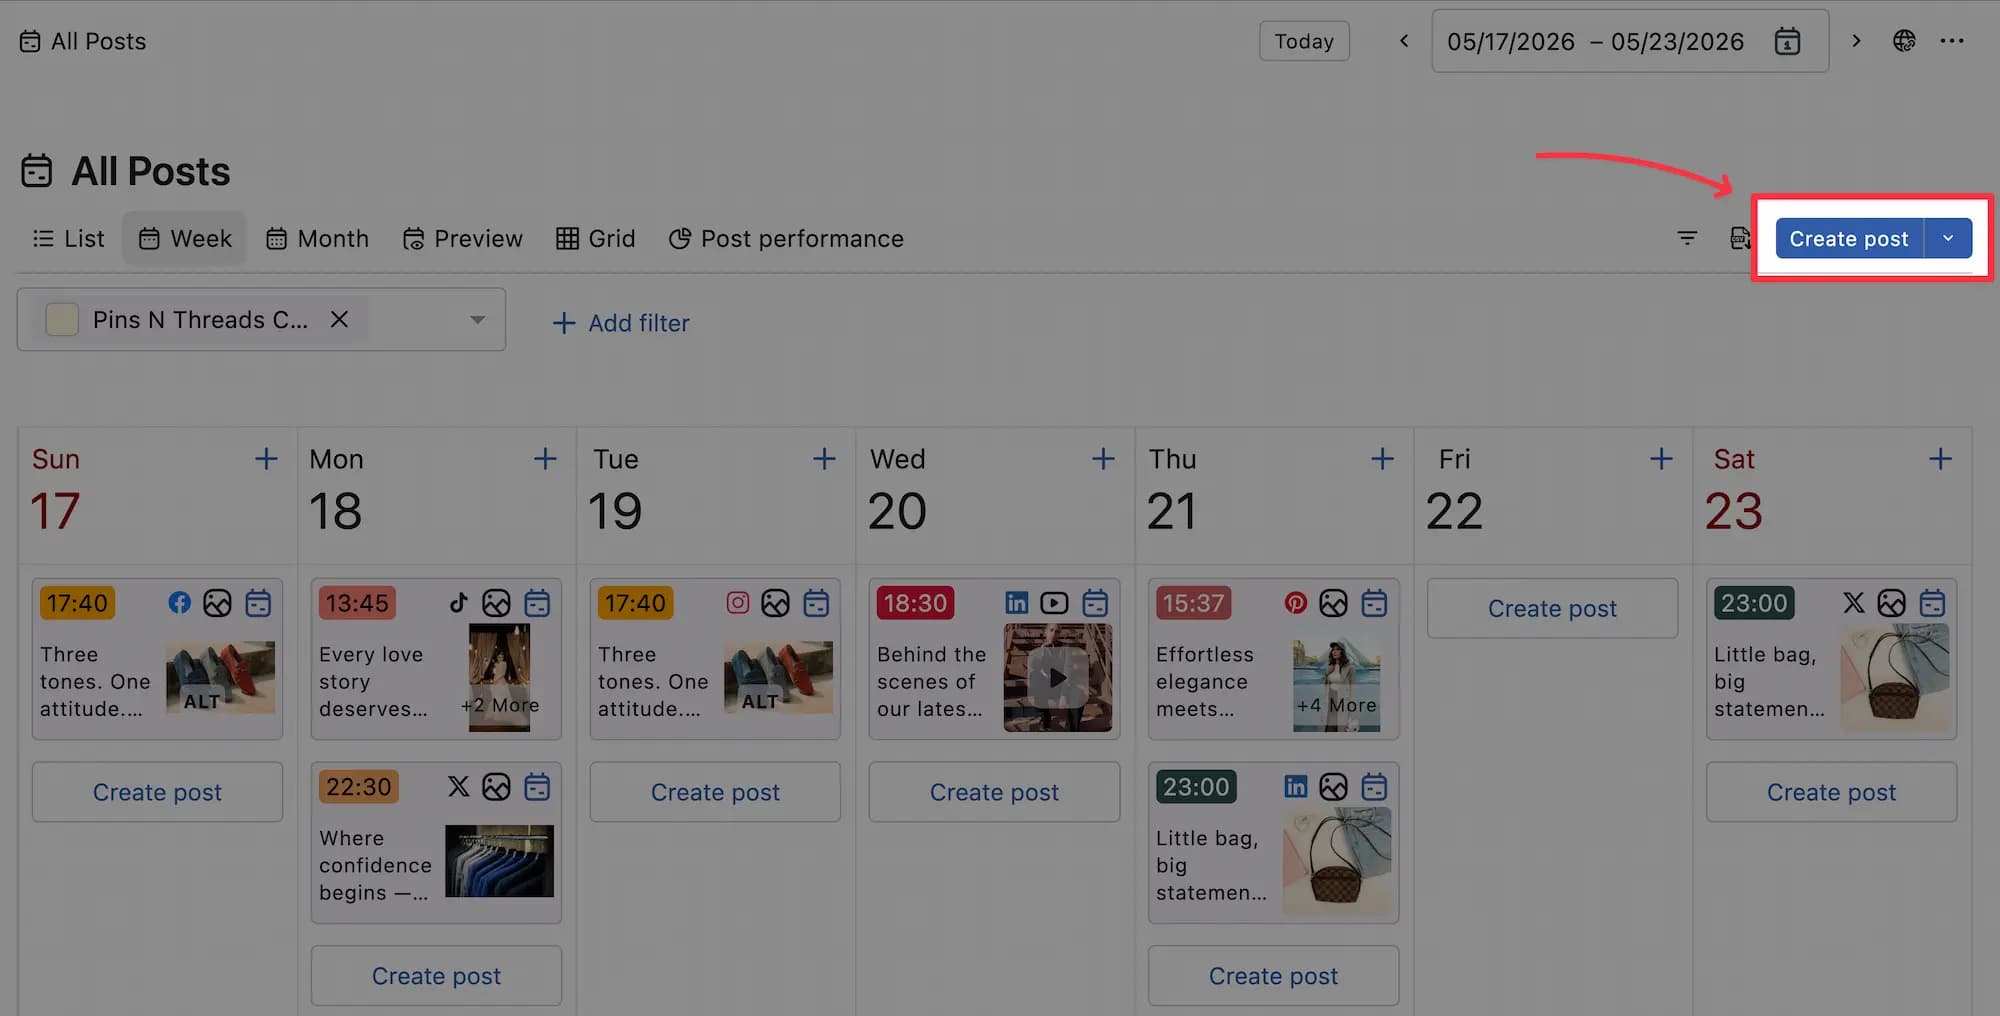
If there are no posts scheduled for a particular day, this Create post button appears at the top of that day’s column, allowing you and your team to quickly begin composing a post from the Planner itself.
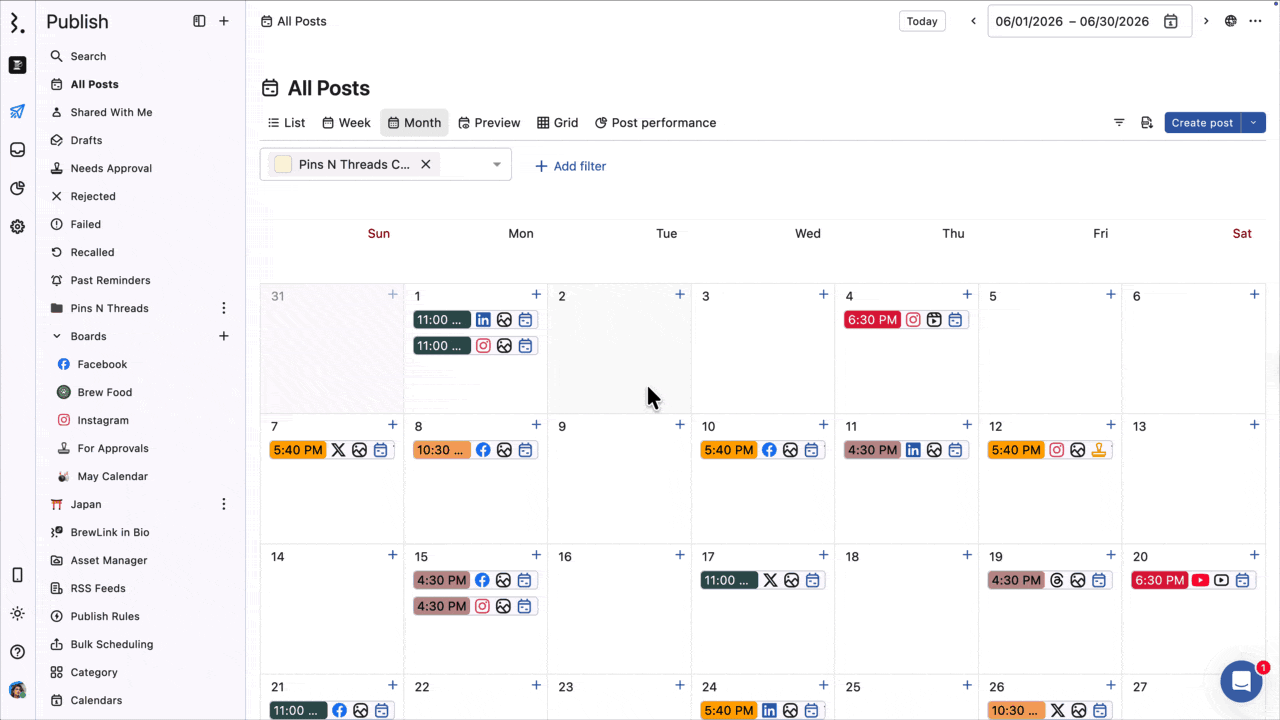
Month View
For insight into your broader content strategy, use the Month view to see posts and events for each day of the month.
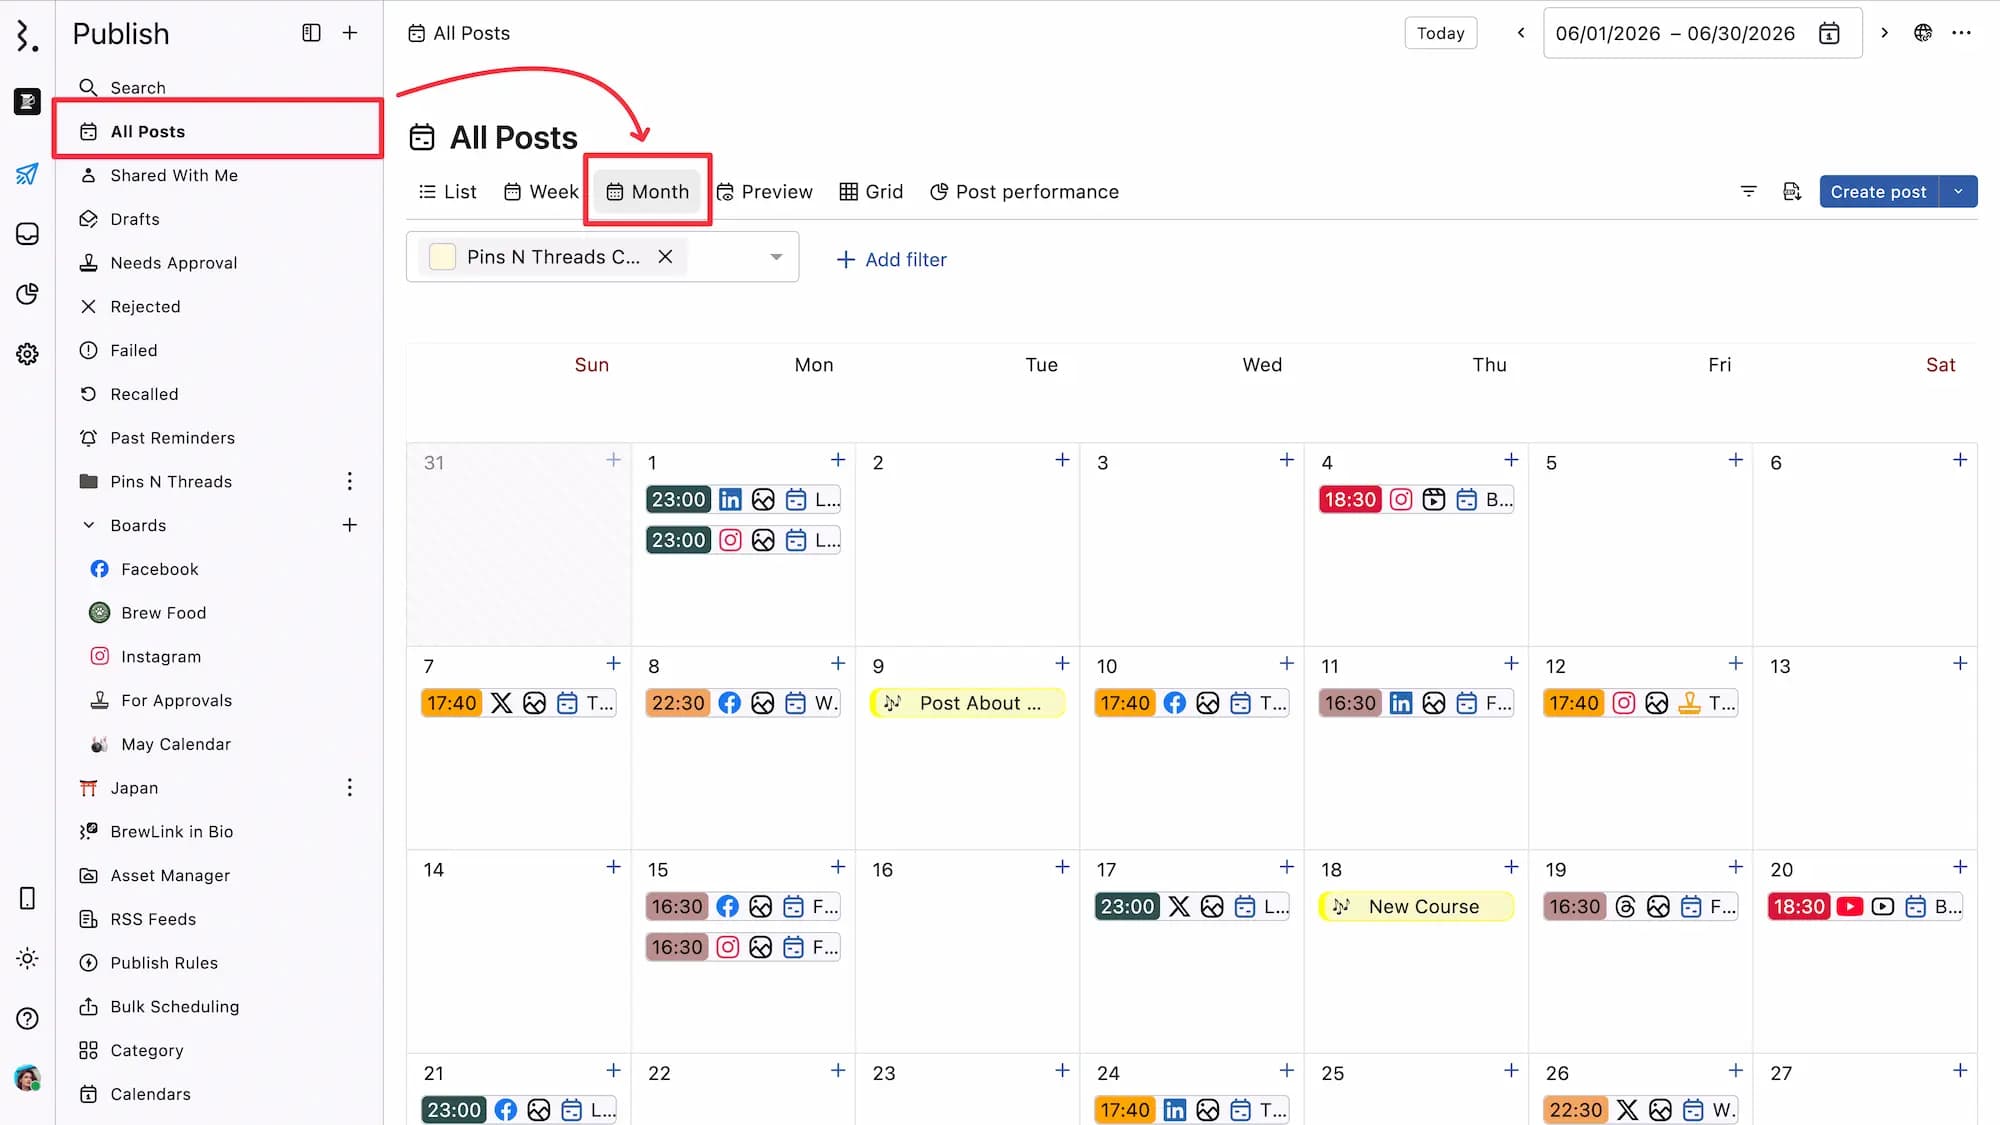
Each date shows the first four posts/events of the day. If there are more posts/events for a given date, a “+n More” (n=the number of additional posts/events of the day) indicator appears below. Clicking on it expands a detailed pop-up showing the complete list of posts and events for that day, helping you quickly view and manage high-volume days without cluttering the calendar view.

Each post entry contains:
The schedule time of the post
The social network icon of the profile
The post type
The post state icon.
The post title
Clicking on a post or event will open its detail view.
Clicking on the (Create post) icon in front of a date, will give you the options to Create post, Create story, Create X(Twitter threads), Create event.
Clicking on any of these options will open the respective composer with the selected date pre-filled as the scheduled date, and the scheduled time set to 15 minutes ahead of the current time. This makes it quicker to plan content for the date.
Rescheduling Post/Events
You can reschedule a post or event in Week and Month view by dragging and dropping it to a different date or time slot. Once you drop the post, the Reschedule Post dialog will appear, allowing you to fine-tune the exact time. You can set the hour, minute, and AM/PM before confirming with Update.
Similarly, you can reschedule events by dragging and dropping them to a different date or time slot. Once you drop the event, the Reschedule Event dialog will appear. From there, you can adjust the Start date, End date, or mark/unmark it as an All day event before clicking Update to confirm the changes.