Understanding Statusbrew Planner
View and manage your content calendar in Statusbrew with Planner. Planner provides one place to visualize and manage social posts across all connected profiles.
Statusbrew not only keeps a record of all posts sent through the platform but also pulls in posts published outside of Statusbrew.
Certain Planner features are restricted to certain plan types. Visit our pricing page to see if it is included in your plan.
Accessing Planner
To access Planner, go to Calendar in Publish section from the Statusbrew dashboard.
Or
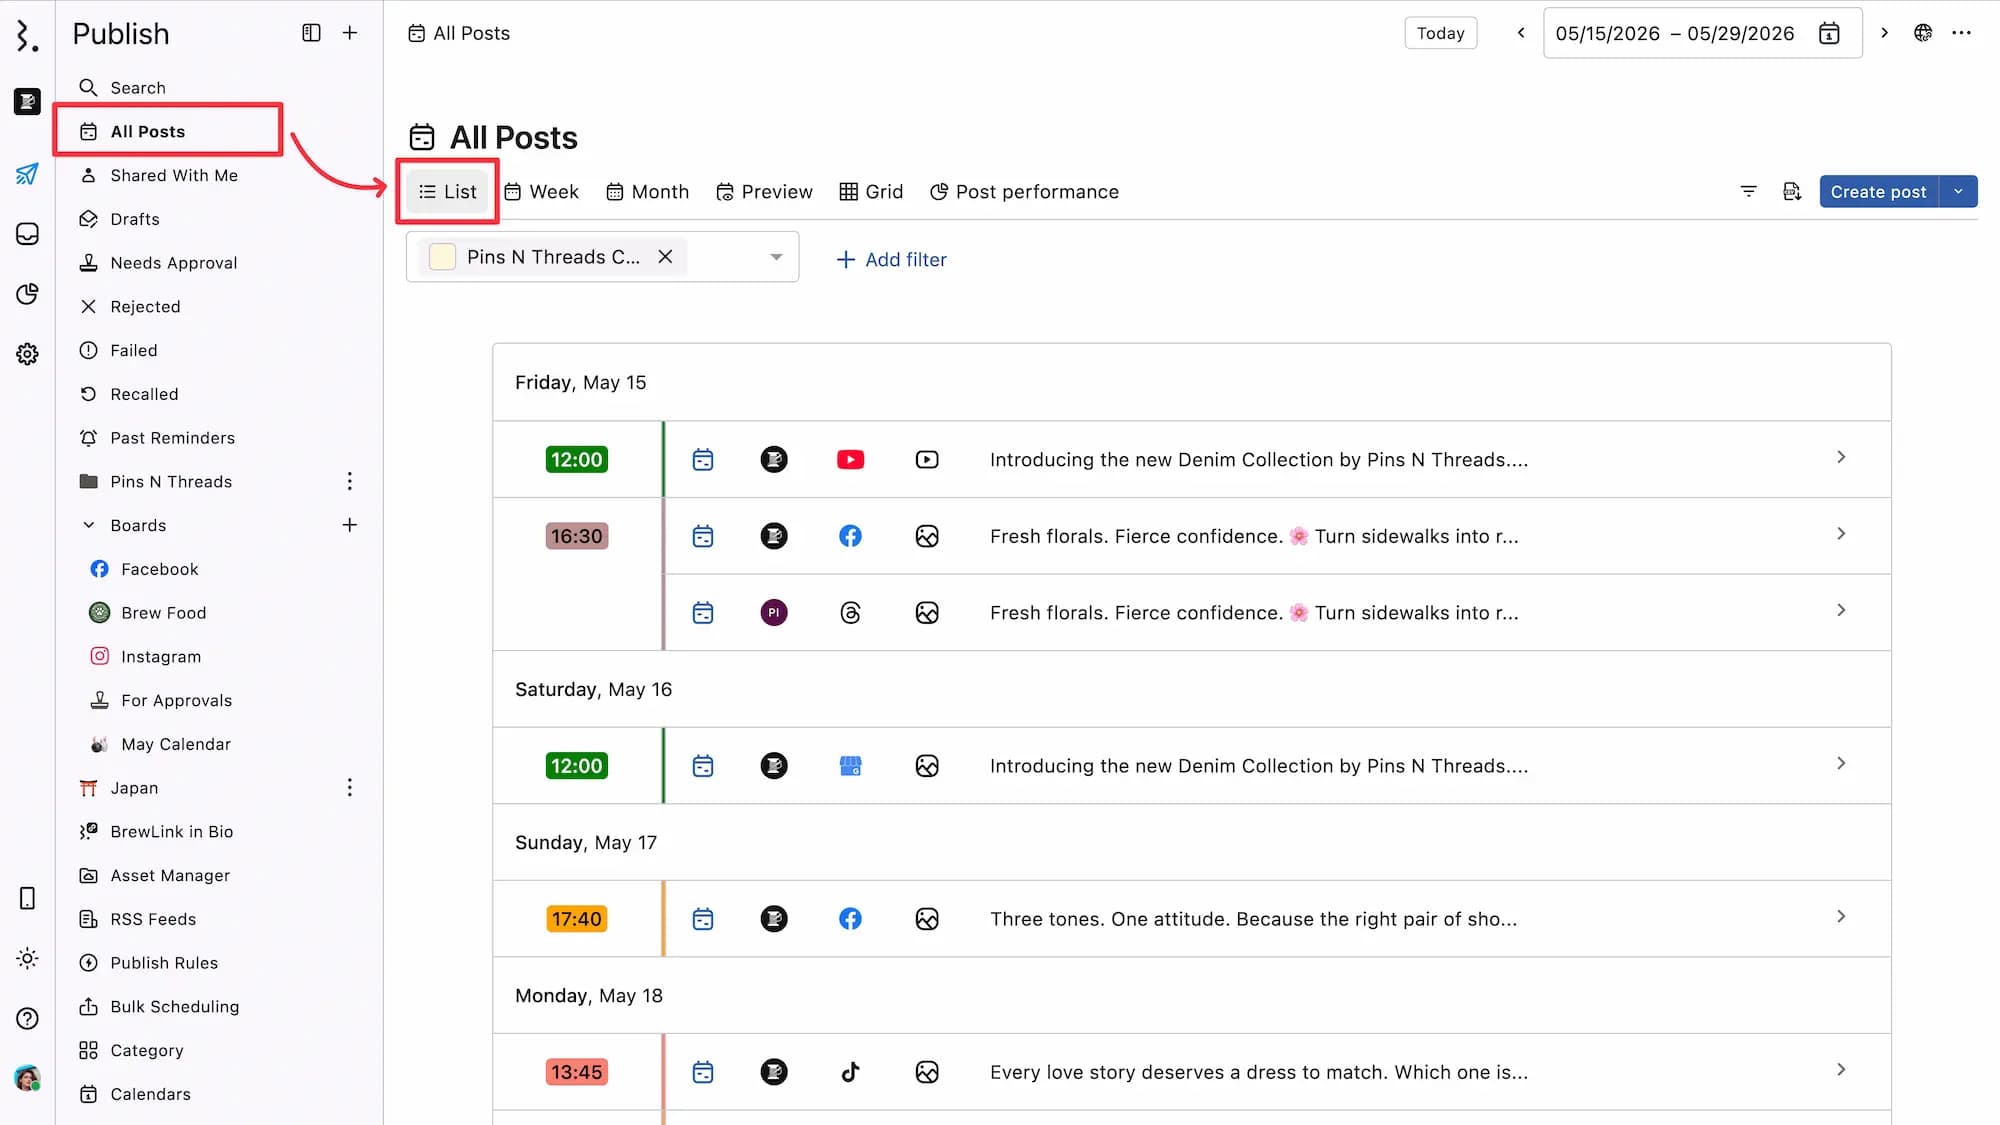
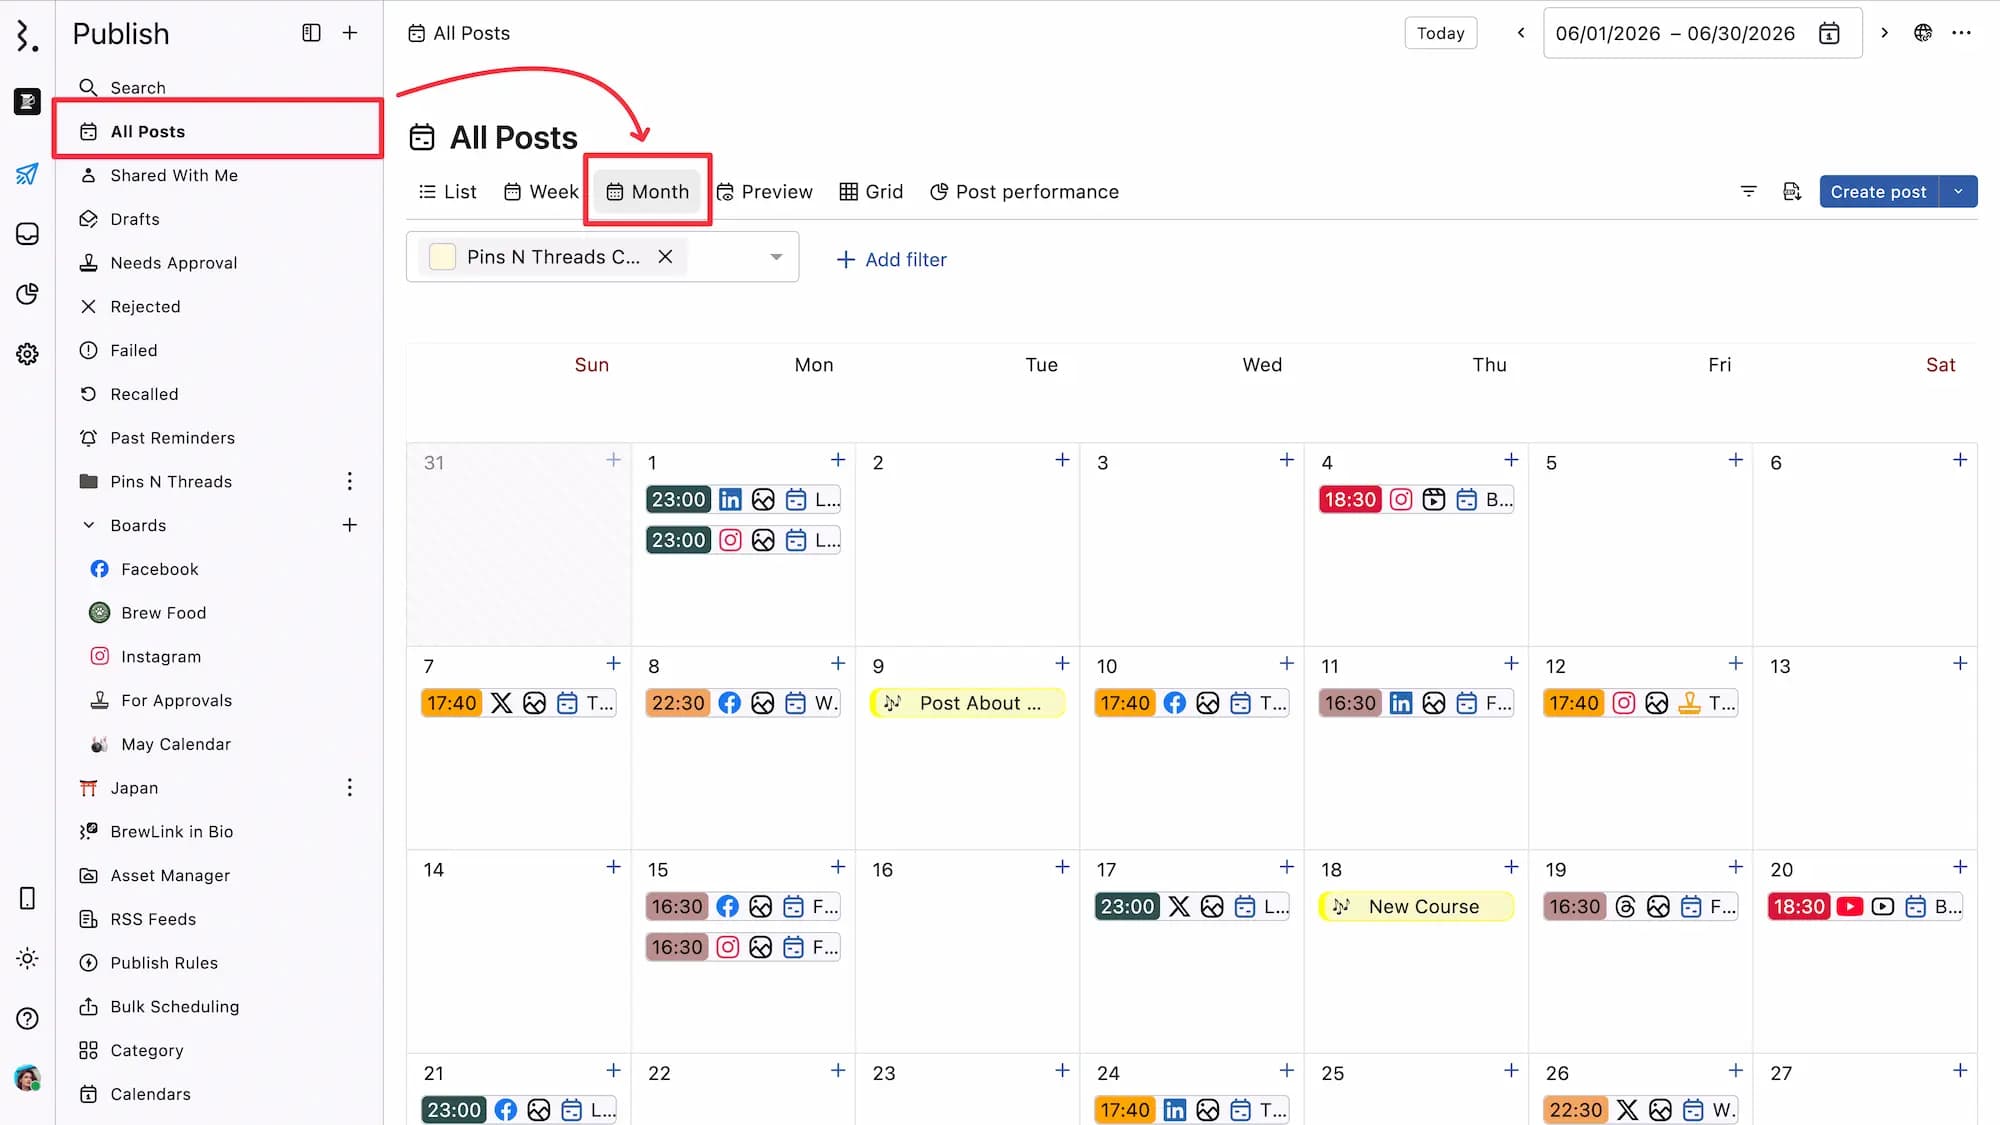
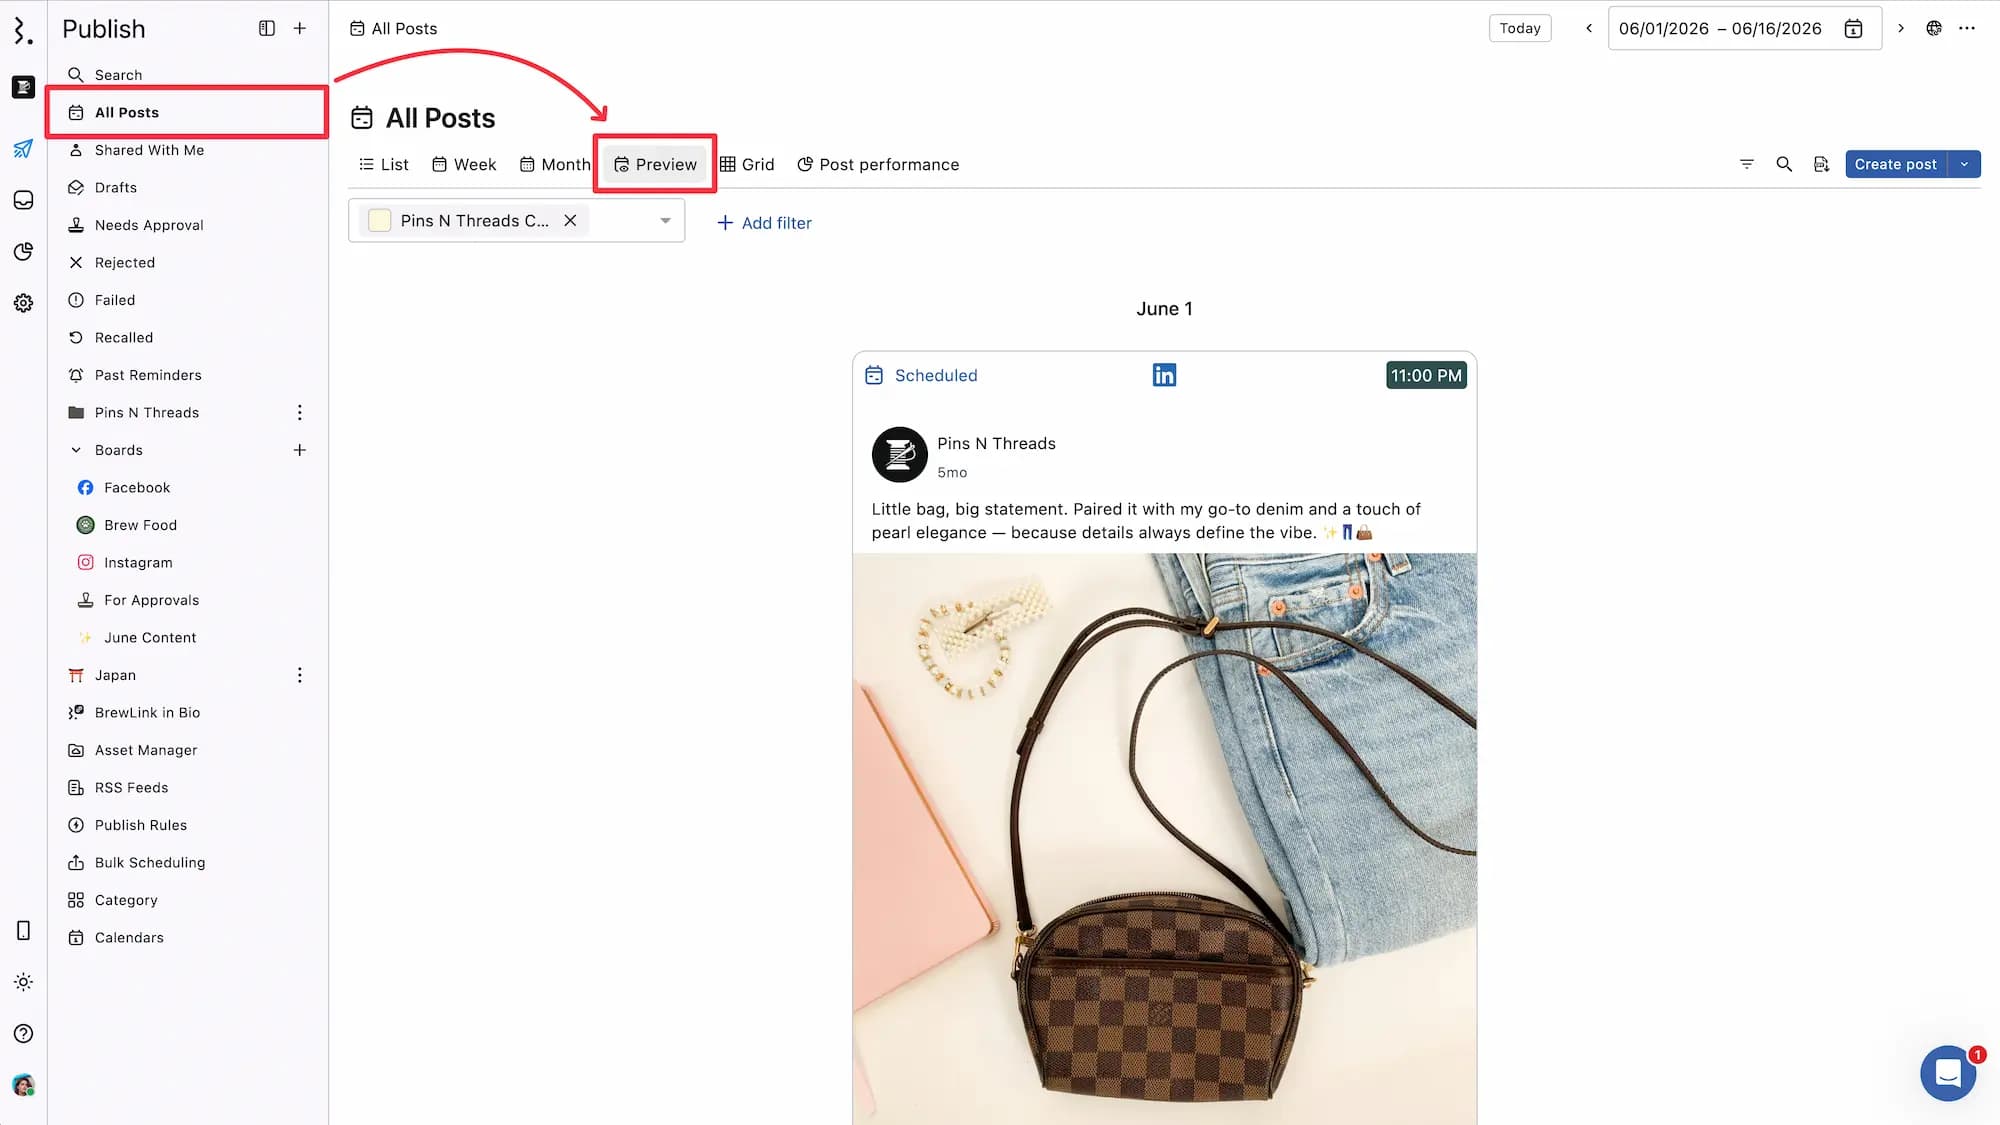
Go to Publish > All Posts from the sidebar.
The Planner offers four views to make it easy for you to visualize and manage posts from one place:
List View: Provides a simple, linear breakdown of all posts and events in chronological order.
Week View: Displays all posts and events for a given week in a calendar layout.

Month View: Shows a complete monthly calendar of all posts and events.
Grid View (Instagram only): Displays your Instagram posts in a grid layout, replicates how your feed will look.
Preview View: Lets you see exactly how your posts will appear on their respective social platforms once they go live.
Every time you open the planner, it will open in the default planner view (from list, week & month) you have set in Your Account settings. You can also set default start of week as Sunday or Monday (for week and month view) from your account settings.
Learn how to change your account settings in our article on Overview Of User Settings.
Calendar & Events
A Calendar gives you a structured view of all posts, drafts, and Events in one place. You can also set up additional calendars to separately plan and manage content for different brands, clients, or campaigns.
Unlike scheduled posts that go live on social networks, Events serve as planning tools. They let you map out campaigns, brainstorm content ideas, and organize themes before locking in your publishing schedule.
Learn more at How To Create & Manage Calendars & Events.
Create Post
The Planner also provides easy access to the Compose window to create and schedule content.
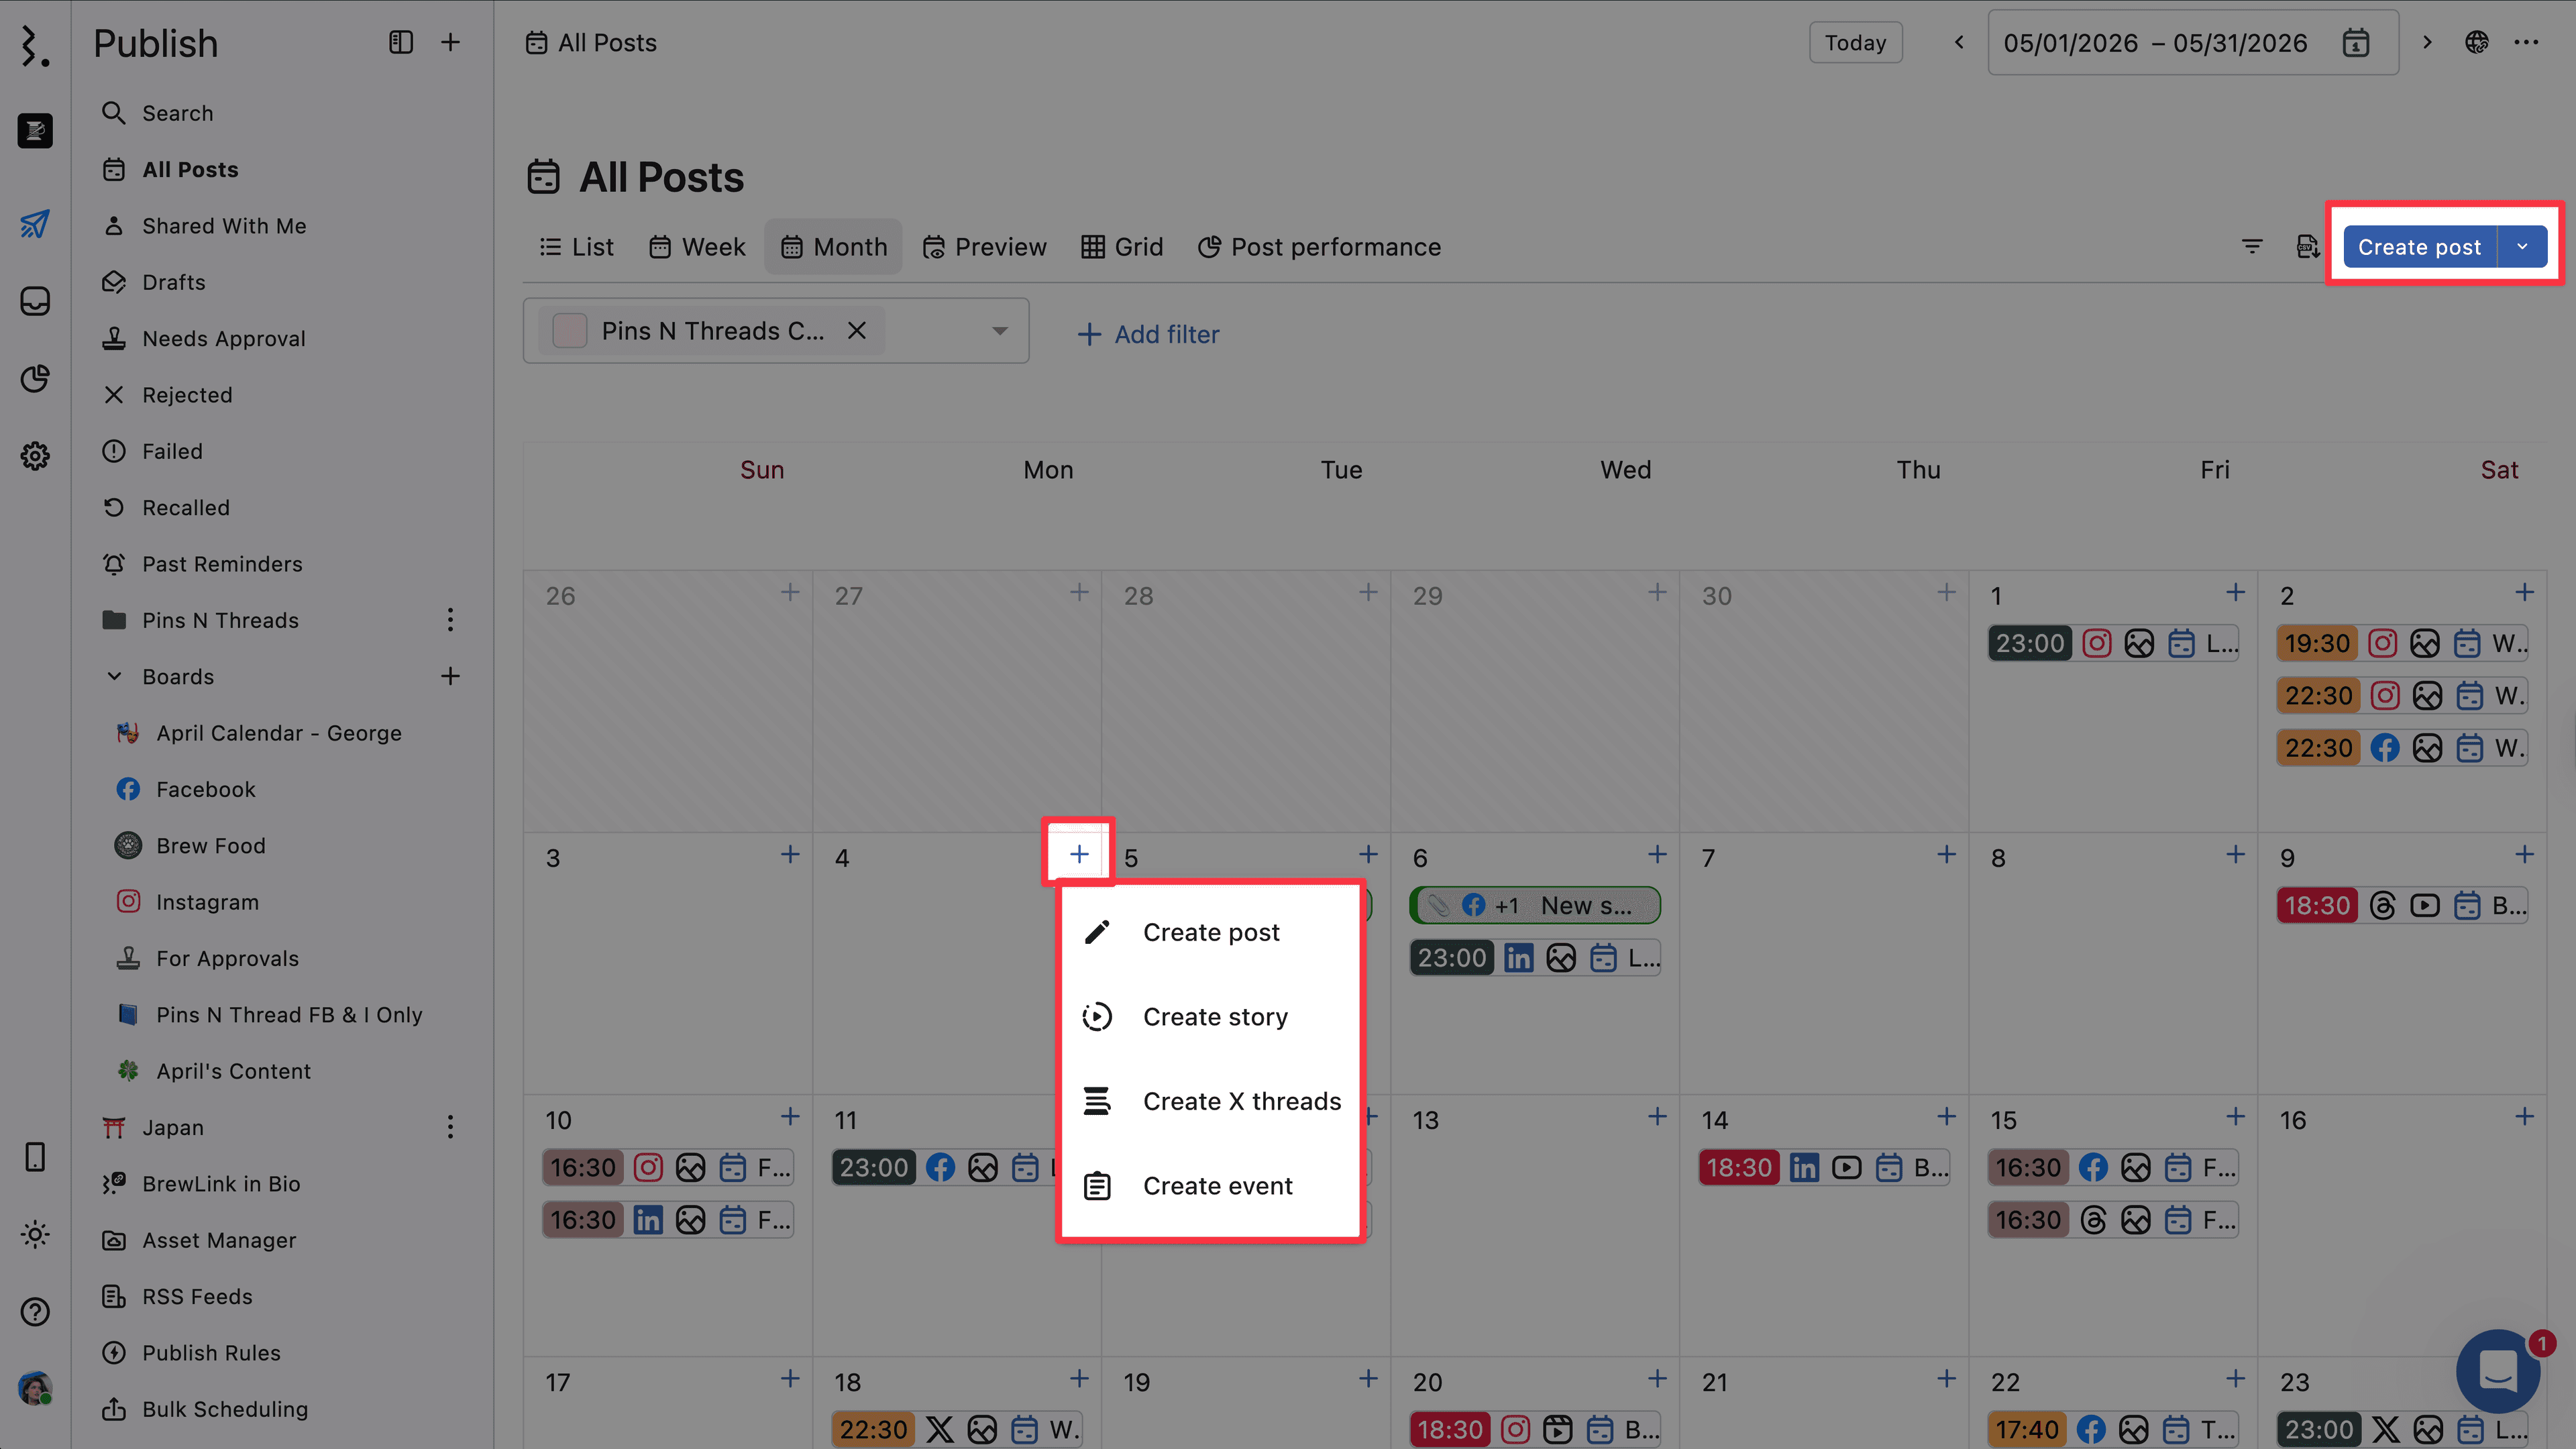
Click the Create post button at the top-right of the Planner to open the Create Post window. From here, you can draft, schedule, or publish posts across your connected profiles.
Once created, these posts will appear in your Planner, where you can easily manage and track them.
Click next to Create post button to access Create post window for other post types:
Create X (Twitter) threads: Craft and schedule threaded conversations on X. See Schedule X (Twitter) Threads
Create story: Compose and schedule Instagram and Facebook Stories. See Schedule Facebook Stories & Schedule Instagram Stories.
Create event: Add events that help your team brainstorm ideas, or mark important milestones without publishing to social networks.
Check out our article on How Can I Schedule Social Network Posts With Statusbrew. to start creating content from scratch.
Planner Filters
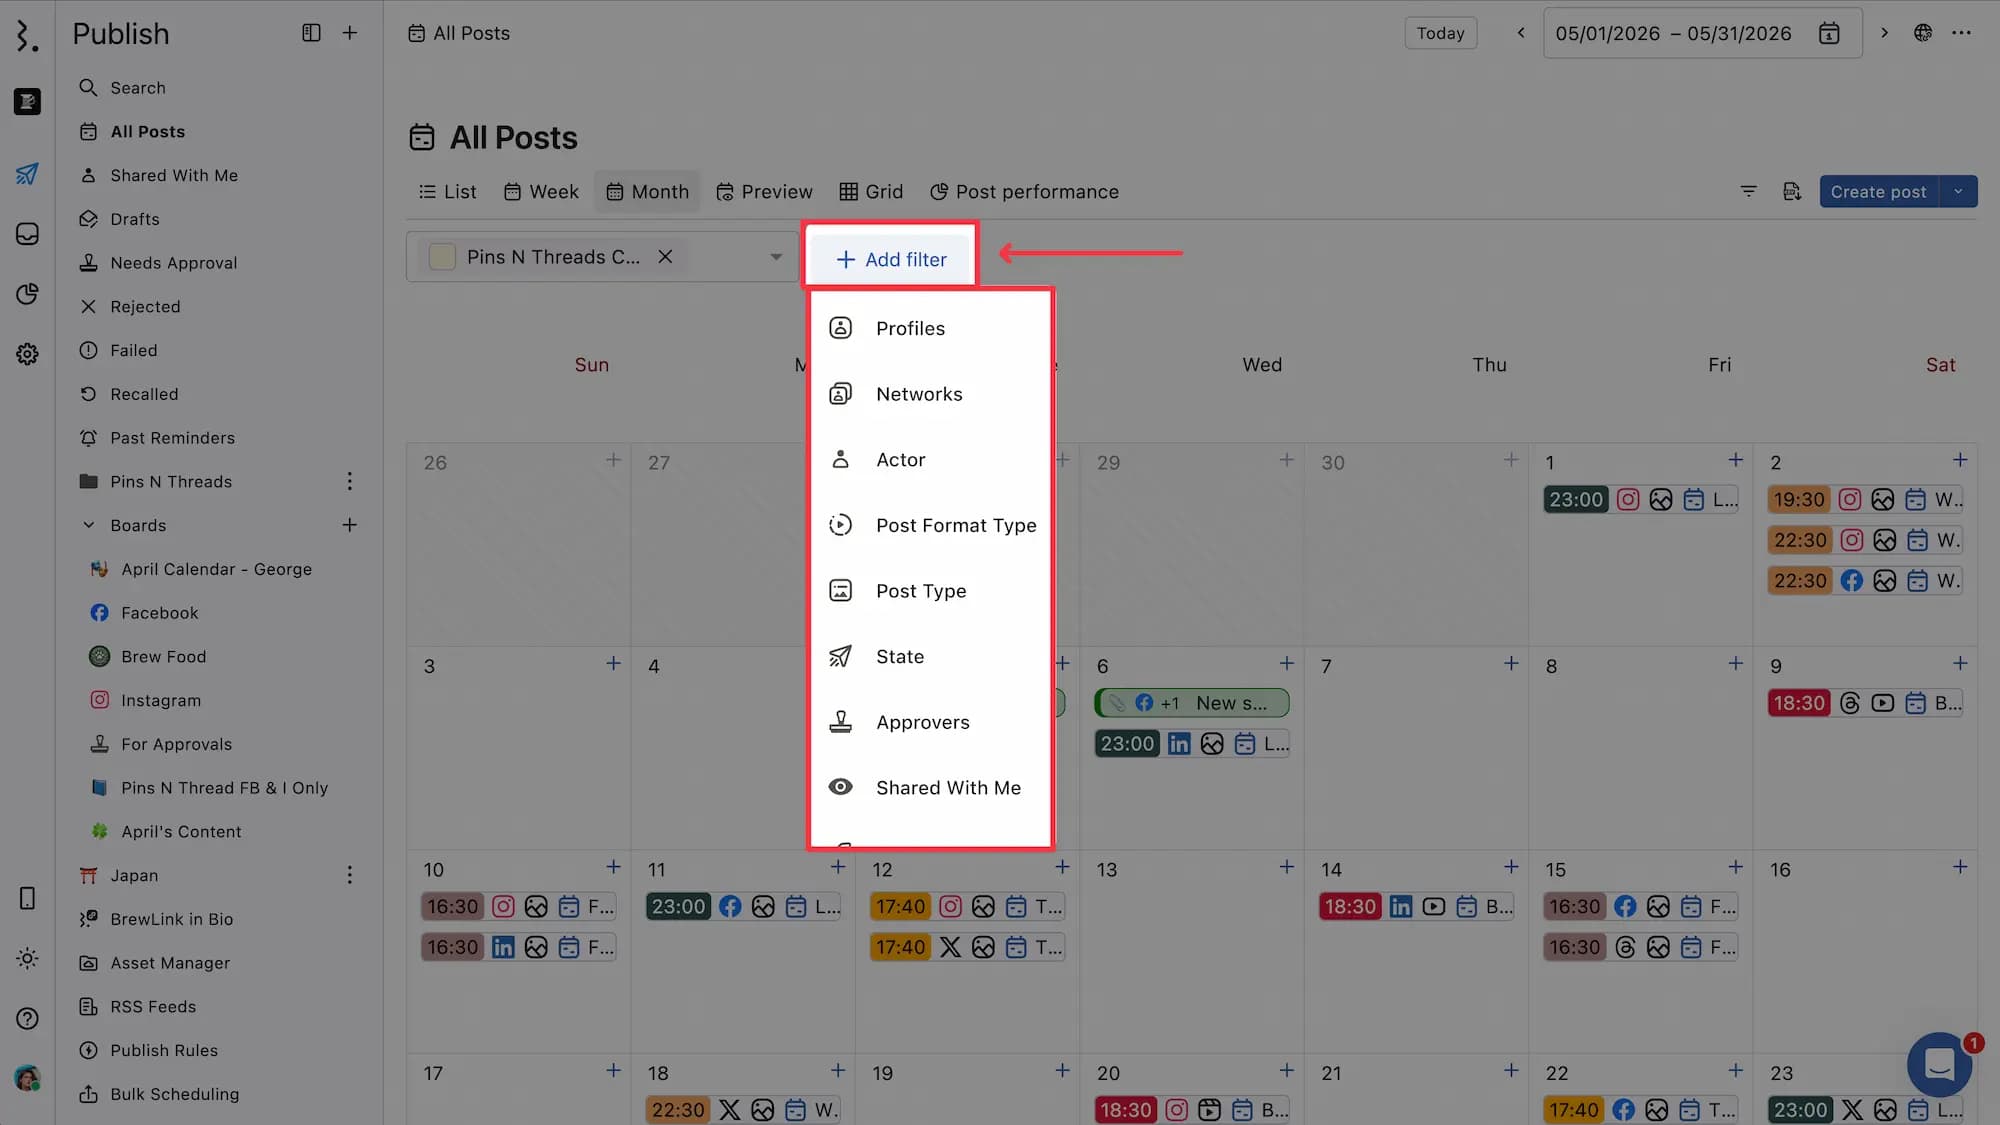
Applying filters in the Planner helps you quickly zero in on the posts that matter most. Instead of scrolling through every piece of content, you can apply filters to focus on specific posts.
Learn about all the available Planner filters in our article on Planner Filters.
Date Range
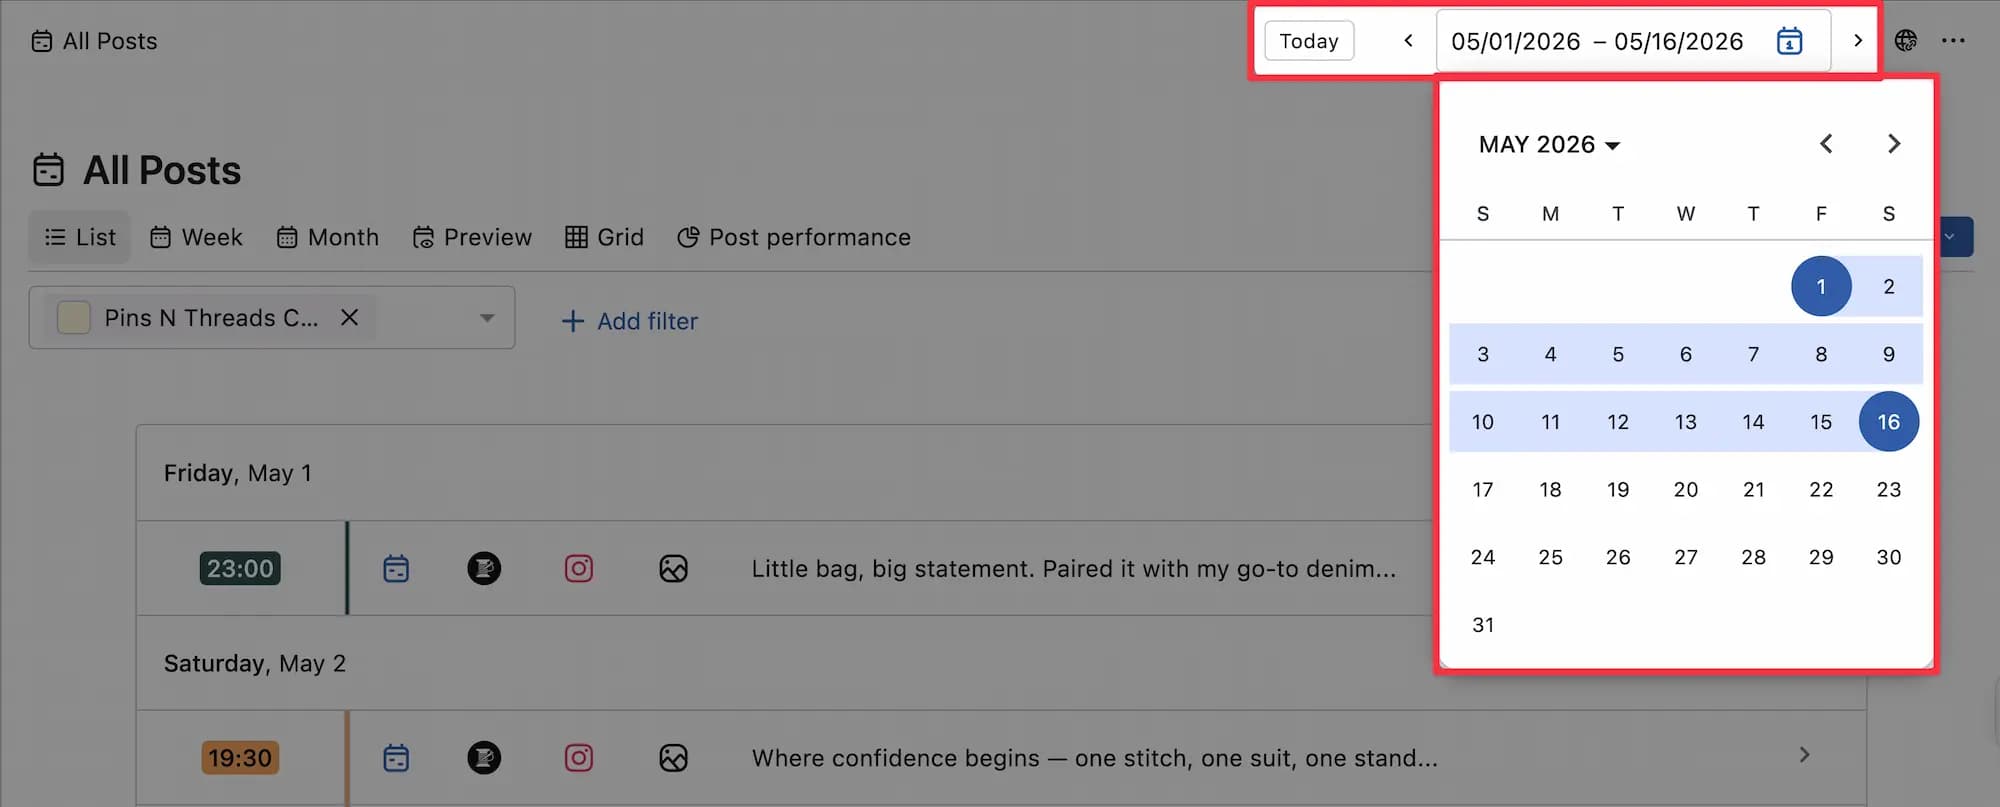
Set a custom date range to view posts and events for a specific time period.
Share Link
Shared links allows you to securely distribute specific Calendar views with clients, stakeholders, and others who do not have access to your Statusbrew account to helps you collaborate easily.
Learn more at Shared Links For Calendars.
Exporting Options
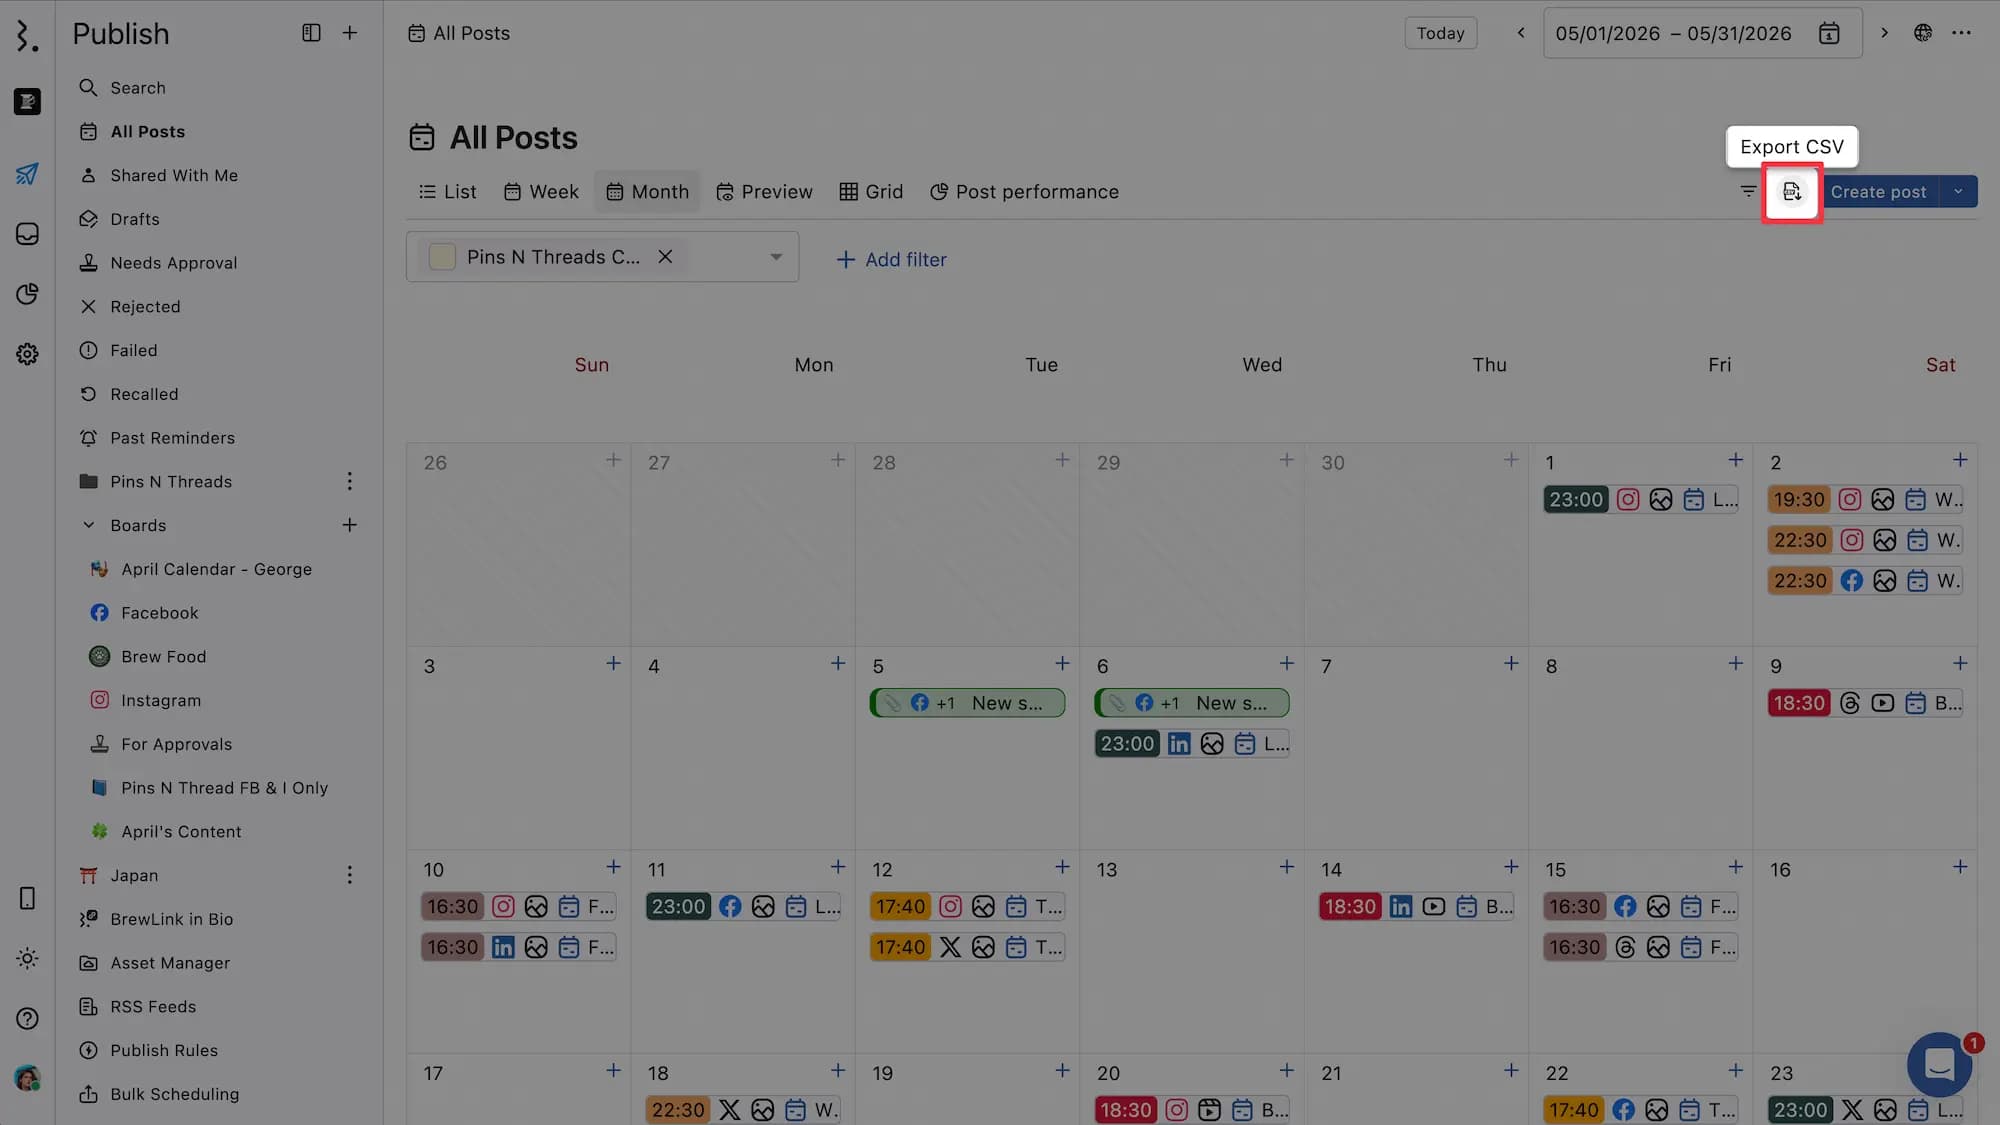
Export posts as a CSV file for sharing your content with others or keeping an offline backup of your content calendar. Only the displayed (filtered) posts is exported, according to the currently selected filters, calendar, and date range.
Select Export CSV from the top right-hand corner
Now, the CSV file will be downloaded to your system.
Asset Manager
The Asset Manager can be accessed from the Planner as well.
Asset Manager allows you to keep a library of pre-approved media assets—like images, videos, GIFs, links, text, or hashtags—so your team can easily publish content that stays on-brand and relevant.
Learn more at Asset Manager.
Post Performance
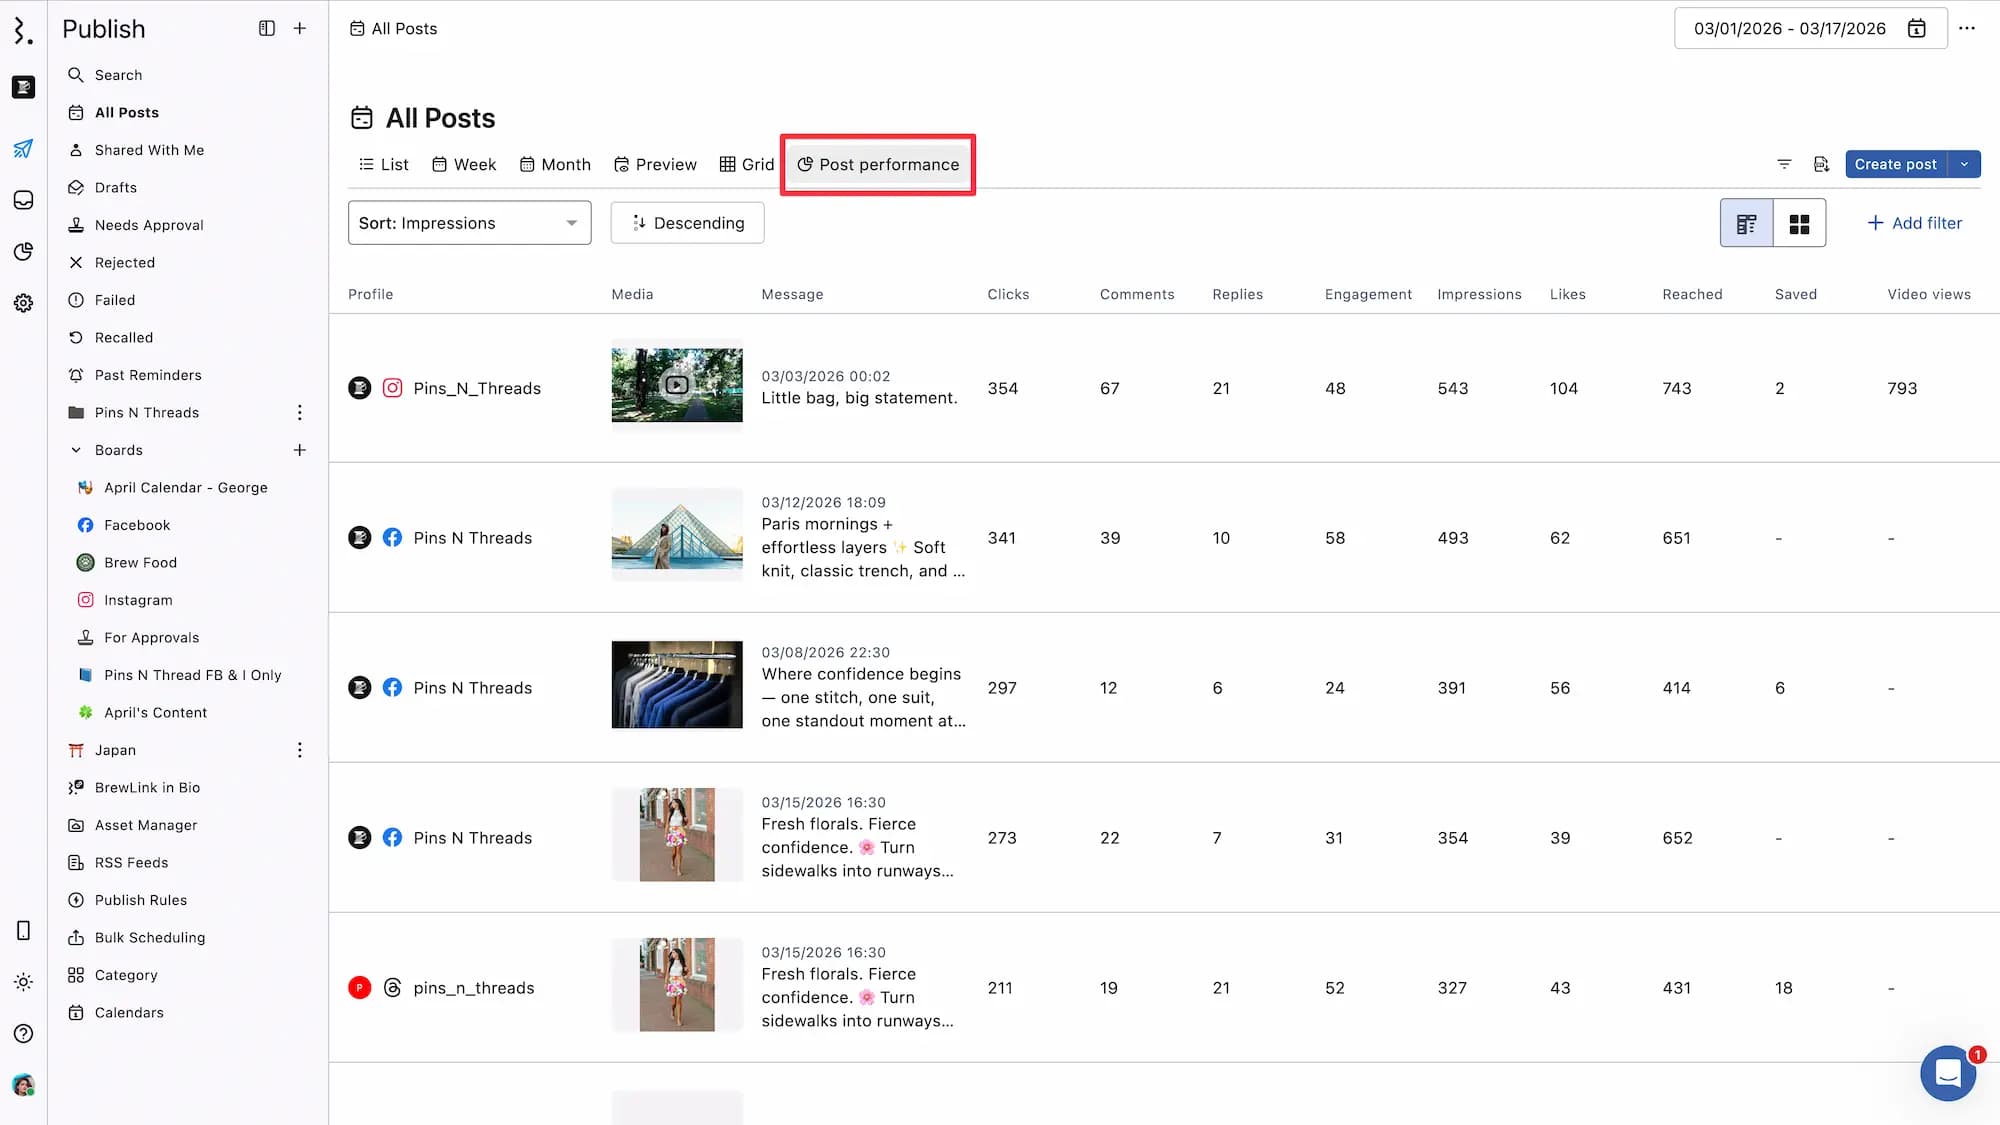
The Post Performance view provides a fast way to check the performance of individual posts, making it easy to spot top-performing content at a glance without needing to dive into Reports.
Lean more at Post Performance.
FAQs
How Do I Export My Calendar Posts?
You can export calendar posts from the Publish or from a specific Board section.
To export from the Planner (Publish):
Go to Publish → All Posts check the selected date range and any applied filters → click Export Options from the top-right corner → select Export CSV.
Only the posts currently visible in the Planner are exported. If a date range or filter is applied, only posts matching that view will be included.
To export from a Board section: If you dont see the "Export CSV" option on the right-hand side, you are in a board. Exporting boards has a slightly different approach.
Open the Board → check the selected date range and any applied filters → click the section name, such as Reels or Published → select Export CSV or Export PDF.
Use this option to export posts from a specific Board section. Make sure the posts you want are visible before exporting.
How Do I Save Frequently Used Filters for Quick Access?
You can create Planner Boards, which are customizable calendar views in Statusbrew to help you organize and visualize your content in a way that fits your workflow.
Is It Possible to Reschedule Posts Directly From the Planner?
Yes, in the Month and Week views, drag and drop posts to reschedule them.
How Do I Resolve Issues With Posts Not Appearing in the Planner?
Check the applied filters and ensure the date range includes the missing posts.
Why Can’t I See the Grid View Option?
Grid View is available only for Instagram profiles. Ensure you have an Instagram profile connected to Statusbrew.
Why Are My Filters Not Applying Correctly?
Double-check the filter criteria and options. If the issue persists, reset and reapply the filters.
My Profiles Show as Active, but My Planner/Calendar Is Empty. What Do I Do?
If your Publish calendar or Planner looks empty:
Make sure you have access to the profiles you're trying to view posts for. If you're a Regular User, contact your Owner or Admin to confirm your Publish permissions are set correctly for those profiles.
Check your date range. Click Today in the Planner toolbar to reset the view to the current date.
Check for active filters. If a profile, tag, or content type filter is applied, posts outside that filter won't show. Clear any active filters and check again.
Check your data sources. Make sure the correct profiles are selected in the calendar or board's data source settings. If a profile isn't selected, its posts won't appear.
Can Statusbrew Import Older Posts Into the Calendar?
Yes. If you connected your social profiles and want to see older posts that were published before you started using Statusbrew, the Statusbrew team can help sync those historical posts.
This is different from importing an external calendar URL. Historical post sync needs to be handled by the Statusbrew support team.
To request this, contact support by saying “human please” or “talk to agent” in the chat. Share the social profile and the approximate date range of posts you want to sync.
Why Is My Post Showing The Wrong Date In Statusbrew?
Sometimes a post may appear in Statusbrew with the date it was originally scheduled rather than the date it was actually published.
For example, if a post was scheduled on May 9 and published on May 20, Statusbrew may show May 9 as the post date.
This usually happens when the post was created or scheduled outside Statusbrew and later synced into Statusbrew. In some cases, the social network’s official APIs do not share the actual published date with Statusbrew. When that information is not available, Statusbrew shows the date received from the network, which may be the scheduled date.
This does not mean the post was published on the wrong date. The post was published correctly on the social network, but the date shown in Statusbrew depends on the information made available through the official API.
Posts created and scheduled directly in Statusbrew should show the date according to the Statusbrew publishing flow.