Post Bulk Actions In Planner
Occasionally, you may want to tag, delete, or approve more than one post at a time. Bulk Actions in Planner make it easy to manage multiple posts at once.
Bulk Actions on posts can be performed only from the List view of Planner.
How To Bulk Tag Posts?
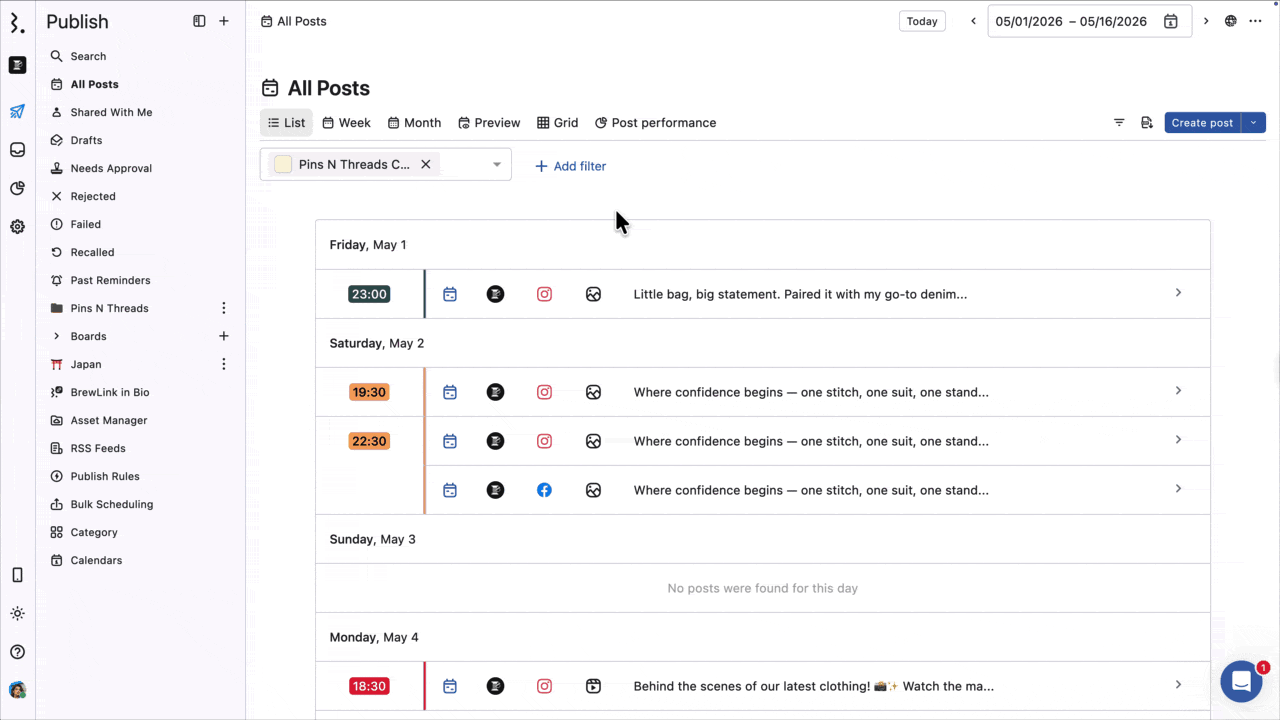
Go to Publish > All Posts > List.
Select all posts you want to tag by hovering over their post state icon and selecting the checkbox. You’ll also see a confirmation on the top right indicating how many posts have been selected (e.g., “You’ve selected 4 posts”).
Select (Tag selected). The Add tags dialog box will open.
Check the box next to one or more tags to apply them. You can also use the Search bar to quickly find the tags or select one from the Frequently used section.
Once you’ve selected the desired tag(s), click Update.
Clicking the select checkbox beside the (Delete) icon will select all posts in the list at once. Clicking the checkbox again will clear your current selection of posts, returning the list to its default state without any posts selected. This is useful when you've to select or deselect all the posts in the list at once without manually checking/unchecking each one.
Learn more about Internal Tags.
How To Bulk Approve Posts?
Go to Publish > All Posts > List.
Select all posts you want to tag by hovering over their post state icon and selecting the checkbox.
Select (Approve selected). A confirmation dialog will appear.
Confirm your action and all the selected post(s) will be approved. If the posts are a part of multi step approval workflow, then they will move to the next step.
Learn more about Approval Workflow.
How To Bulk Delete Posts?

Go to Publish > All Posts > List.
Select all posts you want to tag by hovering over their post state icon and selecting the checkbox.
Select (Delete selected). A confirmation dialog will appear.
Confirm your action and all the selected post(s) will be deleted. If the post(s) are published, they will be deleted from the respective social networks as well except Instagram and TikTok.
Tip: To simplify bulk actions, we recommend using the Planner filters, Date Range Picker, and Calendar selector to narrow down your view. This helps you quickly locate the posts you want to work with.
For instance, you can apply a Planner filter such as State > In (=) > Waiting for Approval to quickly filter down all posts awaiting approval. This makes it easier to find the posts waiting for approval to perform bulk approval actions.
For Instagram and TikTok, published posts cannot be deleted directly from Statusbrew. You will need to delete the content from the native network first, then remove it from Statusbrew to maintain an accurate calendar view.
FAQs
Why Do I See “Failed to Delete the Selected Posts” When Deleting Posts From Statusbrew?
This can happen when posts were already deleted directly from the native social network, but still appear in the Statusbrew calendar.
When you try to delete those posts from Statusbrew, Statusbrew sends a delete request to the network API. If the post no longer exists on the native platform, the API returns an invalid response, so Statusbrew shows the error: “Failed to delete the selected posts.”
In this case, the posts need to be resynced by the Statusbrew team. Once the sync is refreshed, those already-deleted posts will no longer appear in the Statusbrew calendar.
Can I Pause Or Recall Scheduled Posts In Bulk?
There is no bulk action in Planner or Calendar View to select multiple scheduled posts and recall them together.
If you want to stop scheduled posts from publishing, you can use the Pause scheduled posts option instead.
Go to:
Settings → Posts scheduling → Pause scheduled posts
Once enabled, scheduled posts in that space will not publish automatically until the setting is turned off.
Please note that this is a space-level setting. It pauses scheduled publishing, but it does not individually recall selected posts.
In Planner List View, bulk actions are available for options like Delete, Update approval workflow/boundary, Add tag, and Add custom field, but there is no bulk Recall action.