
Are you tired of the chaos that comes with managing social media content approvals? Well, worry no more! In today's blog, we'll dive into the world of social media approval tools and how they can be your secret weapon for hassle-free collaboration.
If you're a social media manager or part of a team handling multiple accounts, you know the struggle of coordinating approvals, getting feedback, and keeping everything organized. That's where a social media approval tool comes in handy!
In this post, we'll unravel the mystery behind social media approval tools and show you how they can simplify your workflow, streamline the approval process, and ensure that your content gets the green light in no time.
So, if you're ready to bid farewell to messy email threads, endless spreadsheets, and the never-ending back-and-forth, let's dig in and discover the power of social media approval tools. Your stress-free content approval process awaits!
Why Does Your Agency Need A Social Media Approval Tool?
Content Approval
A social media approval tool simplifies the content approval process by providing a centralized platform for team members to submit, review, and approve content. It ensures that all content goes through a structured approval workflow, reducing the chances of errors or inconsistencies.
Compliance and Risk Management
In regulated industries like banking, finance, and healthcare, social media approval tools play a crucial role in ensuring compliance with legal, regulatory, and internal policies. The tool helps review content for adherence to guidelines and mitigates the risk of publishing inappropriate or non-compliant material.
Few tools provide Publish rules to monitor and regulate publishing activities. Setting up publishing rules helps mitigate any gaps in the content and ensure compliance with your company’s social media policies.
Collaborative Content Creation
Social media approval tools enable seamless collaboration among team members and stakeholders involved in content creation. They provide a centralized platform for sharing and reviewing content drafts, facilitating a smooth approval process before publishing.
Ensure Brand Consistency
With an approval tool, businesses can maintain brand consistency across their social media channels. The tool allows stakeholders to review and ensure that all content aligns with brand guidelines, messaging, and visual identity before it goes live.
Timely Response Management
In cases where timely responses to social media interactions are crucial, an approval tool helps streamline the process. It allows teams to review and approve responses quickly, ensuring prompt engagement with followers and customers.
Client Reporting
Social media approval tool simplifies the process of gathering and organizing data, enabling users to create professional and detailed reports for clients. It saves time, ensures accuracy, and enhances communication with clients, providing them with valuable insights into their social media campaigns.
5 Use-Cases Of A Social Media Approval Tool
A competitive social media approval tool offers not only content approval features but also provides several other benefits to streamline user engagement and ensure social media compliance. In this section, let’s discuss how can you can get the most out of your social media approval tool.
1. Set up Notifications for Content Approval
Setting up notifications on a social media approval tool helps by providing real-time updates and alerts to users. By doing so, any new posts created on the connected accounts go through a moderation process before being published or displayed publicly.
The user responsible for approval can promptly review and approve or reject them by receiving notifications for these new activities. This helps ensure that the content being published on social media aligns with the desired quality standards and guidelines set by the user or the organization.
Moreover, notifications help identify and address any potentially sensitive or negative comments or posts, allowing for swift action to mitigate the impact of a crisis or manage a reputation issue.
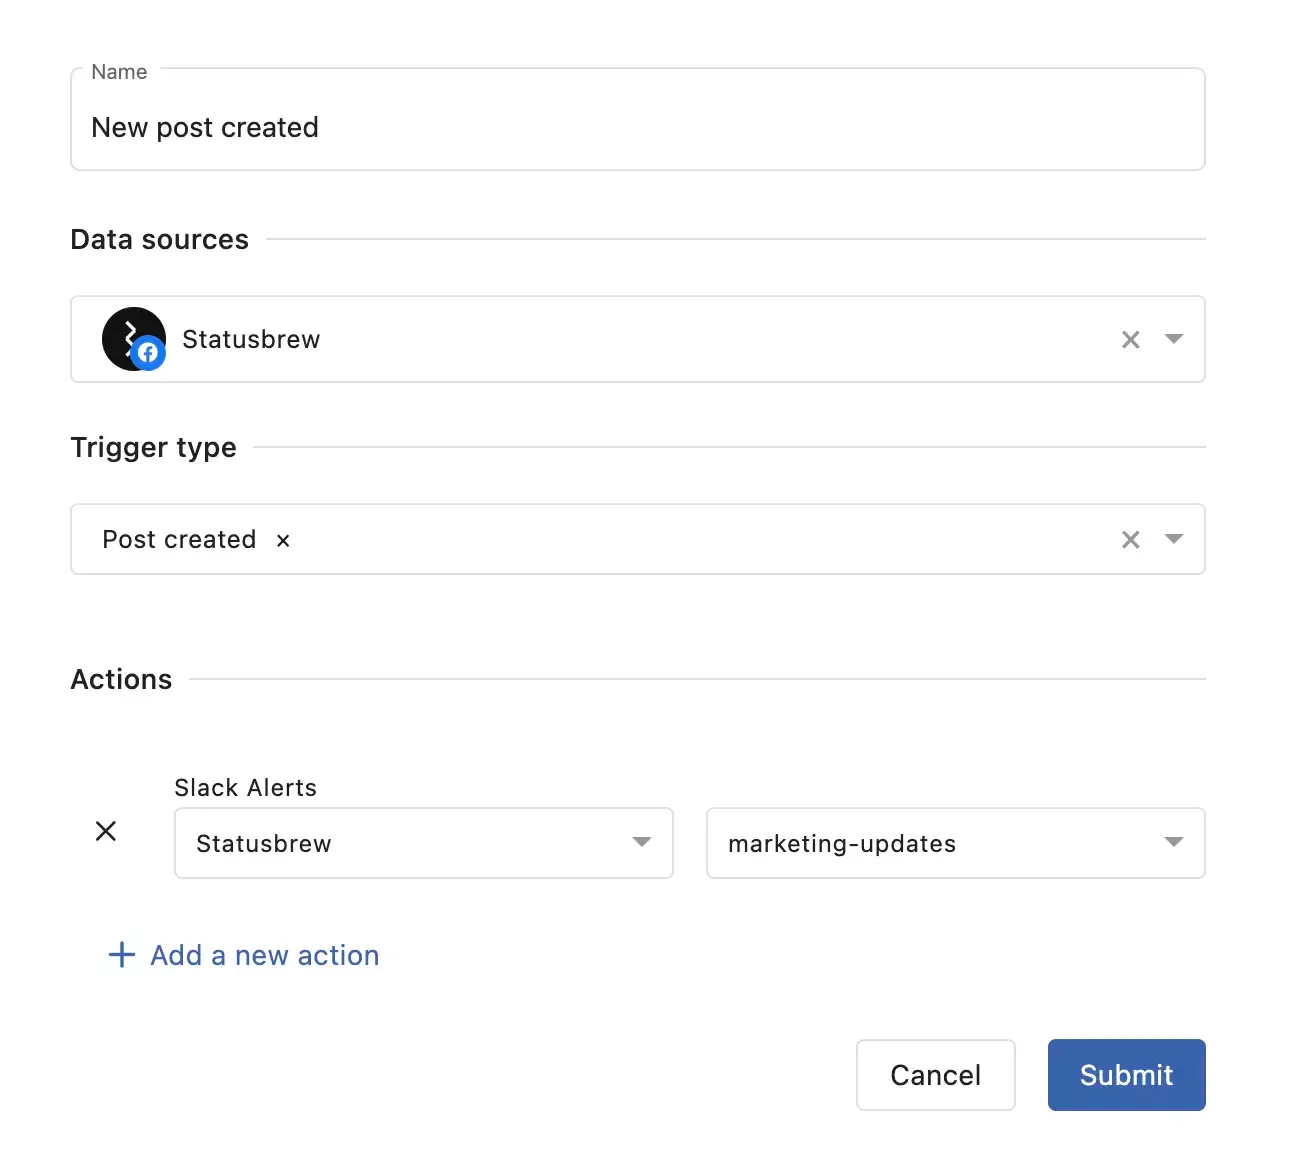
To set up notifications for a new post on Statusbrew, follow these steps:
- Log in to your Statusbrew dashboard and go to Settings.
- Click on the Notification Rules option and hit Add new rule.
- Select the profiles you want to set the notifications for from the Data source dropdown
- Select the appropriate trigger under the Trigger type. For instance, if you want to get notified of the new post created, select Post created.
- Under Action, select the preferred channel to get the notification on (Slack or Microsoft Teams)
- Hit Submit
Several use cases can be imagined for different combinations of filters and actions in the Rule engine.
For instance, if you want to be notified of a new post containing a specific word in the caption, select Post text under Filters and add the keyword. Select the preferred notification channel and create the rule. You’ll now be notified every time a post with chosen keywords is created.
You can even select multiple filters at once, like, a foreign language comment with negative sentiment, to alert you on the team’s Slack channel.
2. Automatically Assign Conversations to High-level Support Members
One of the commonly-asked questions we get is how to assign important conversations or contacts to the customer success team automatically. It helps by ensuring that complex or escalated customer inquiries are promptly handled by experienced and skilled representatives.
This streamlines the support process, reduces response time, improves customer satisfaction, and increases the likelihood of resolving complex issues effectively, leveraging the expertise of high-level support members.
For instance, conversations can be assigned based on specific contact or post tags. If a conversation relates to a specific product or service, it can be assigned to support members who are well-versed in that area. This ensures efficient handling of conversations and personalized assistance.
Conversations can be assigned to team members based on several filters. Here are a few examples:
- Product-specific conversation assignment
- Issue-based conversation assignment
- Priority customer conversation assignment
- Campaign-specific conversation assignment
- Region-based conversation assignment
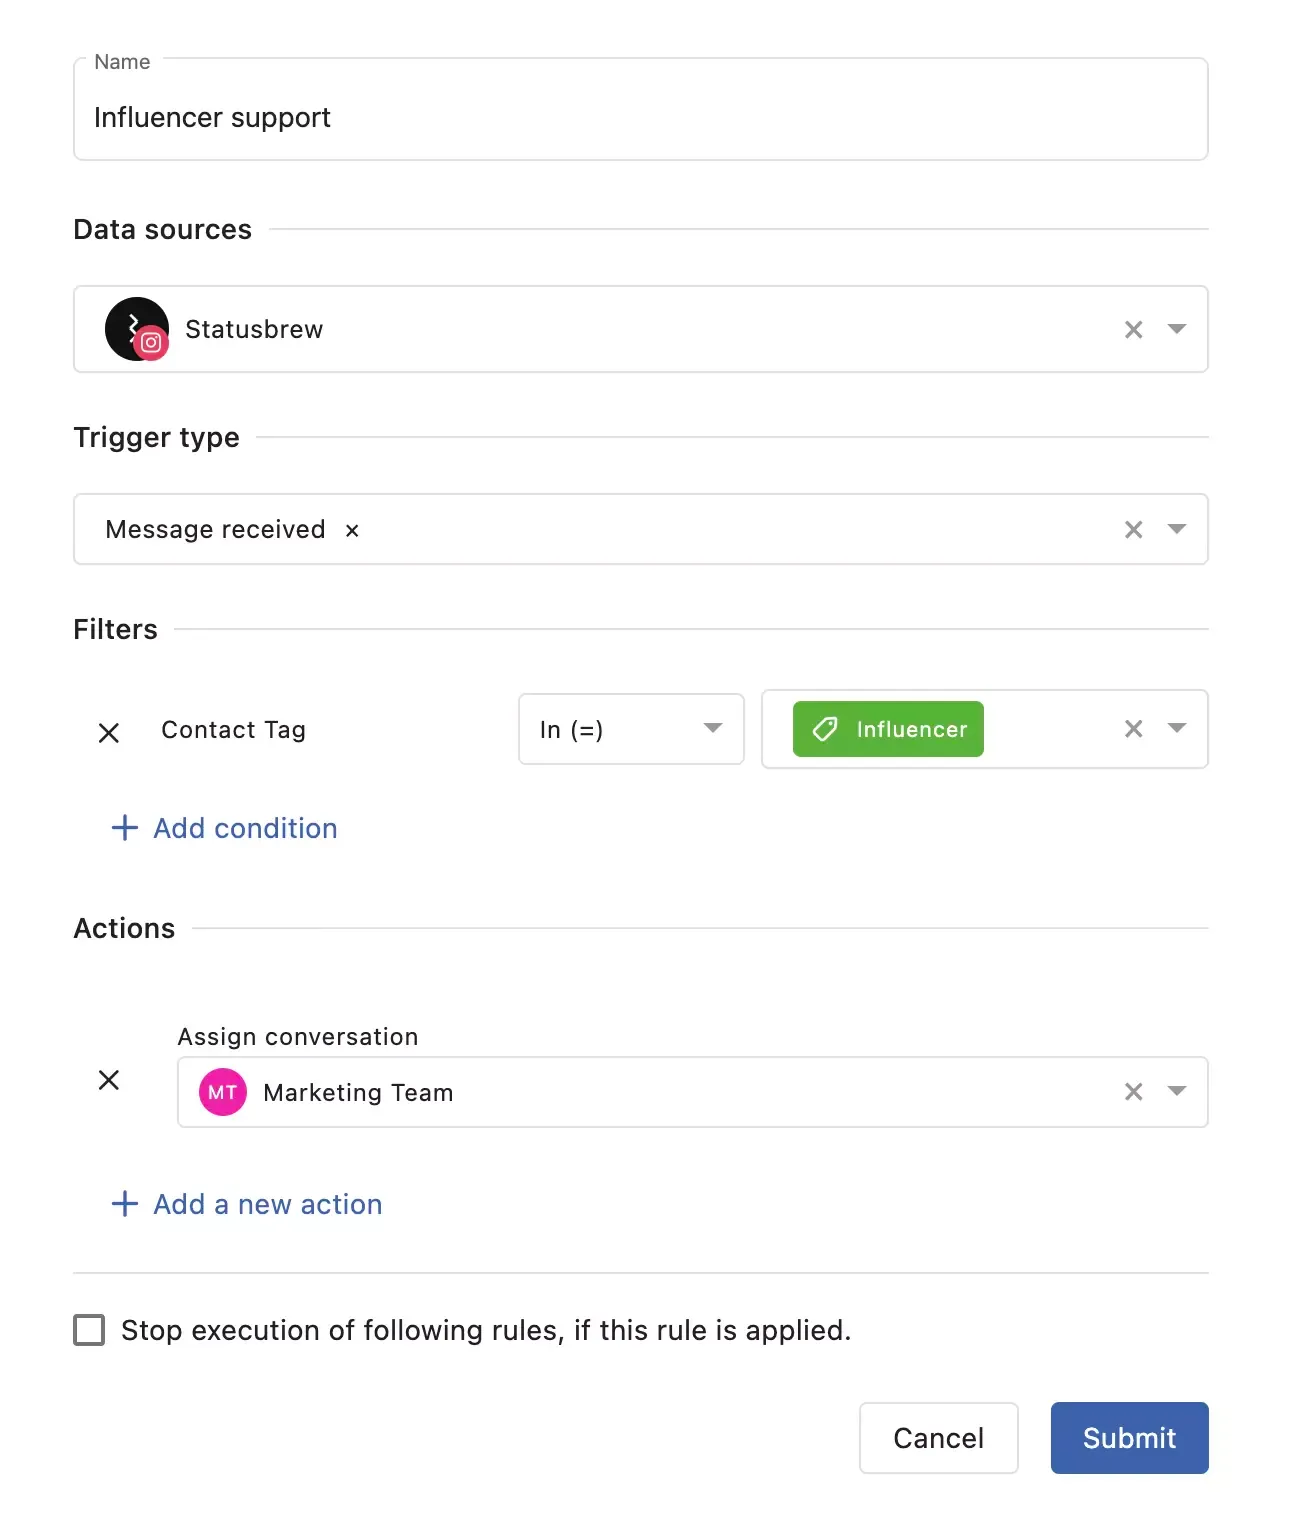
To automatically assign a particular conversation type to high-level support members on Statusbrew, you must first be clear on the content that needs escalation to high-level support. Once you’re sorted on that, follow these steps to set up rules.
- Log in to your Statusbrew account and navigate to the Rule Engine section.
- Click the Add new rule button.
- Define the triggering conditions for the rule. In this case, you'll set Filter conditions based on the tags associated with conversations.
- Specify the action to be taken when the triggering conditions are met. In this case, the action will be to assign the conversation to specific support members who are well-versed in the relevant area. You can choose the Assign Conversation action and select the desired team members or specific individuals who should handle conversations with the specified tag.
- Save the rule and activate it to ensure it becomes active and starts assigning conversations accordingly.
By configuring the Rule Engine in this manner, conversations that have specific contact or post tags will be automatically assigned to the designated support members or teams. This allows for efficient handling of conversations, ensuring that they are directed to the appropriate individuals with expertise in the corresponding area.
3. Set up Custom Approval Workflows
Setting up custom approval workflows improves efficiency by defining the specific steps and order of content approvals. It eliminates confusion, ensures timely reviews, and streamlines the process.
Custom workflows also enable better collaboration among team members, maintain brand consistency, and facilitate compliance with guidelines and regulations.
However, it is not the same use case as simply approving or rejecting the post. Setting up custom approval workflows goes beyond simply notifying an approver about their role. It involves designing a structured process with defined steps, order of approvals, and criteria for content evaluation.
Custom workflows allow you to set up multiple stages, involve different stakeholders, and establish specific rules for each approval step. It provides clarity, ensures consistency, and enables better control over the content approval process.
In contrast, notifying an approver is a basic communication informing them of their involvement without necessarily specifying the broader workflow structure and requirements.
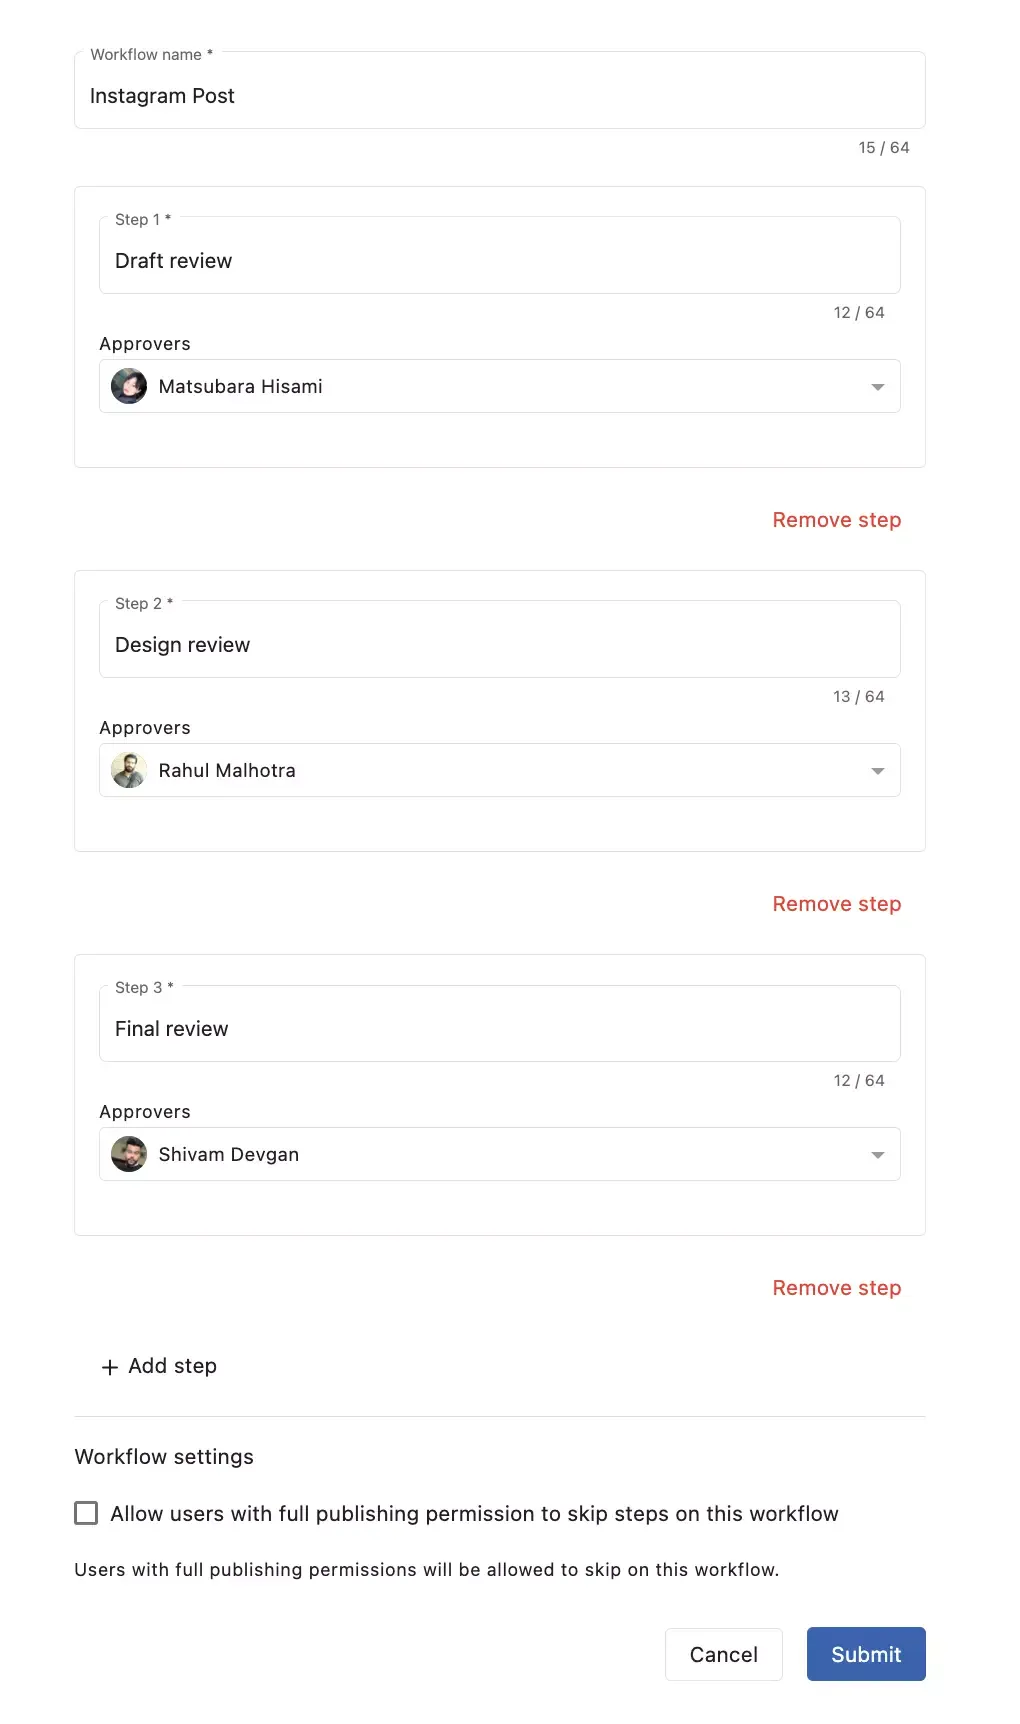
Follow these steps to set up custom approval workflows on Statusbrew:
- Log in to your Statusbrew account.
- Go to Settings and select Approval workflows.
- Click on Create Workflow. You will be prompted to provide a name or label for the workflow to distinguish it from others.
- Specify the different stages or steps involved in your approval process. For example, you may have steps like "Draft Review," "Manager Approval," and "Final Approval." Determine the order in which these steps should occur.
- For each approval step, assign the appropriate individuals or roles responsible for reviewing and approving the content. You can select specific team members or define roles based on your organization's hierarchy.
- Hit Submit, and your new approval workflow will be created.
- When you create a new post, you can choose the newly created approval workflow from the Choose approval option.
Before deploying the workflow, it's recommended to test it with sample content to ensure it functions as intended. Verify that the content progresses through the defined steps correctly and that notifications are triggered appropriately.
Once you are satisfied with the configuration, activate the custom approval workflow. Ensure that relevant team members are aware of the workflow and their roles in the process
4. Use Rejection Reasons for Training and Development
Rejection reasons serve as a valuable communication and feedback mechanism. They allow team members to provide specific reasons for rejecting content, highlighting the areas that need improvement or do not meet the brand's guidelines.
Rejection reasons help facilitate collaboration and understanding between content creators and approvers, ensuring that rejected content can be revised effectively.
Capturing rejection reasons within the tool can help teams maintain a record of feedback, track patterns or recurring issues, and ultimately enhance the quality and compliance of their social media content.
Statusbrew allows social media managers to add rejection reasons to posts that do not meet the quality guidelines. On the create post window, the post creator can add an approver to the post.
When the approver rejects a piece of content, they can select a pre-defined rejection reason or create a new one. This provides context to the content creator on why the content was rejected and how they can improve it in the future.
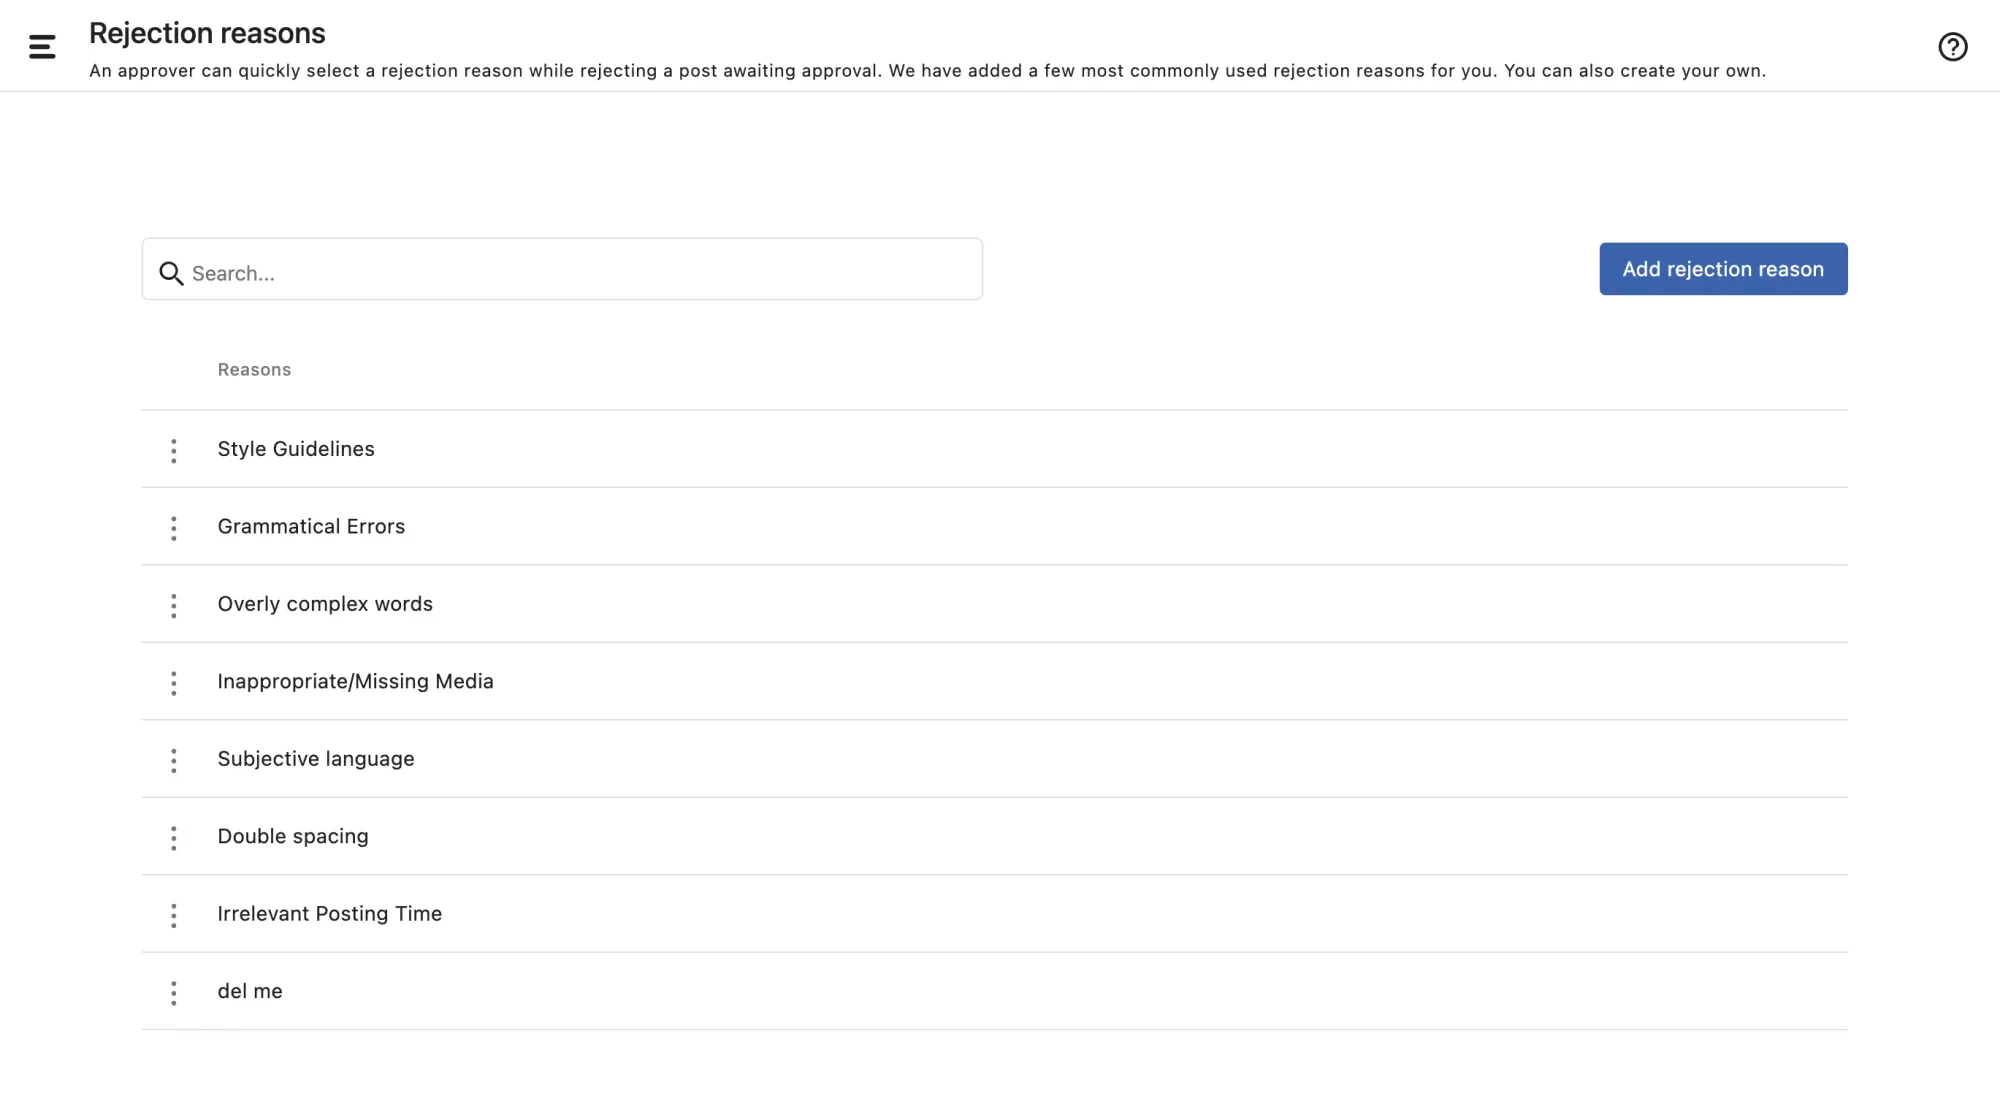
Follow these simple steps to add rejection reasons to your workflow through Statusbrew:
- Log in to your Statusbrew account.
- Go to Settings.
- Select Rejection Reasons from the menu.
- Click on the Add rejection reason button.
- Enter a descriptive name or label for the rejection reason.
- Save the rejection reason by clicking Add.
5. Create Profile Groups for Different Access Permissions
Creating profile groups with different access permissions allows you to segregate team members based on their roles and responsibilities, ensuring that they only have access to the profiles and content relevant to their tasks. This enhances security and reduces the risk of unauthorized changes or errors.
Secondly, it streamlines the content approval process by enabling designated team members to review and approve content for specific profiles, eliminating unnecessary delays and bottlenecks.
Additionally, profile groups facilitate better organization and management of social media accounts, as each group can be assigned specific access rights, permissions, and responsibilities.
To create profile groups on Statusbrew, follow these steps:
- Log in to your Statusbrew account.
- Go to Settings.
- Select Profile groups from the menu.
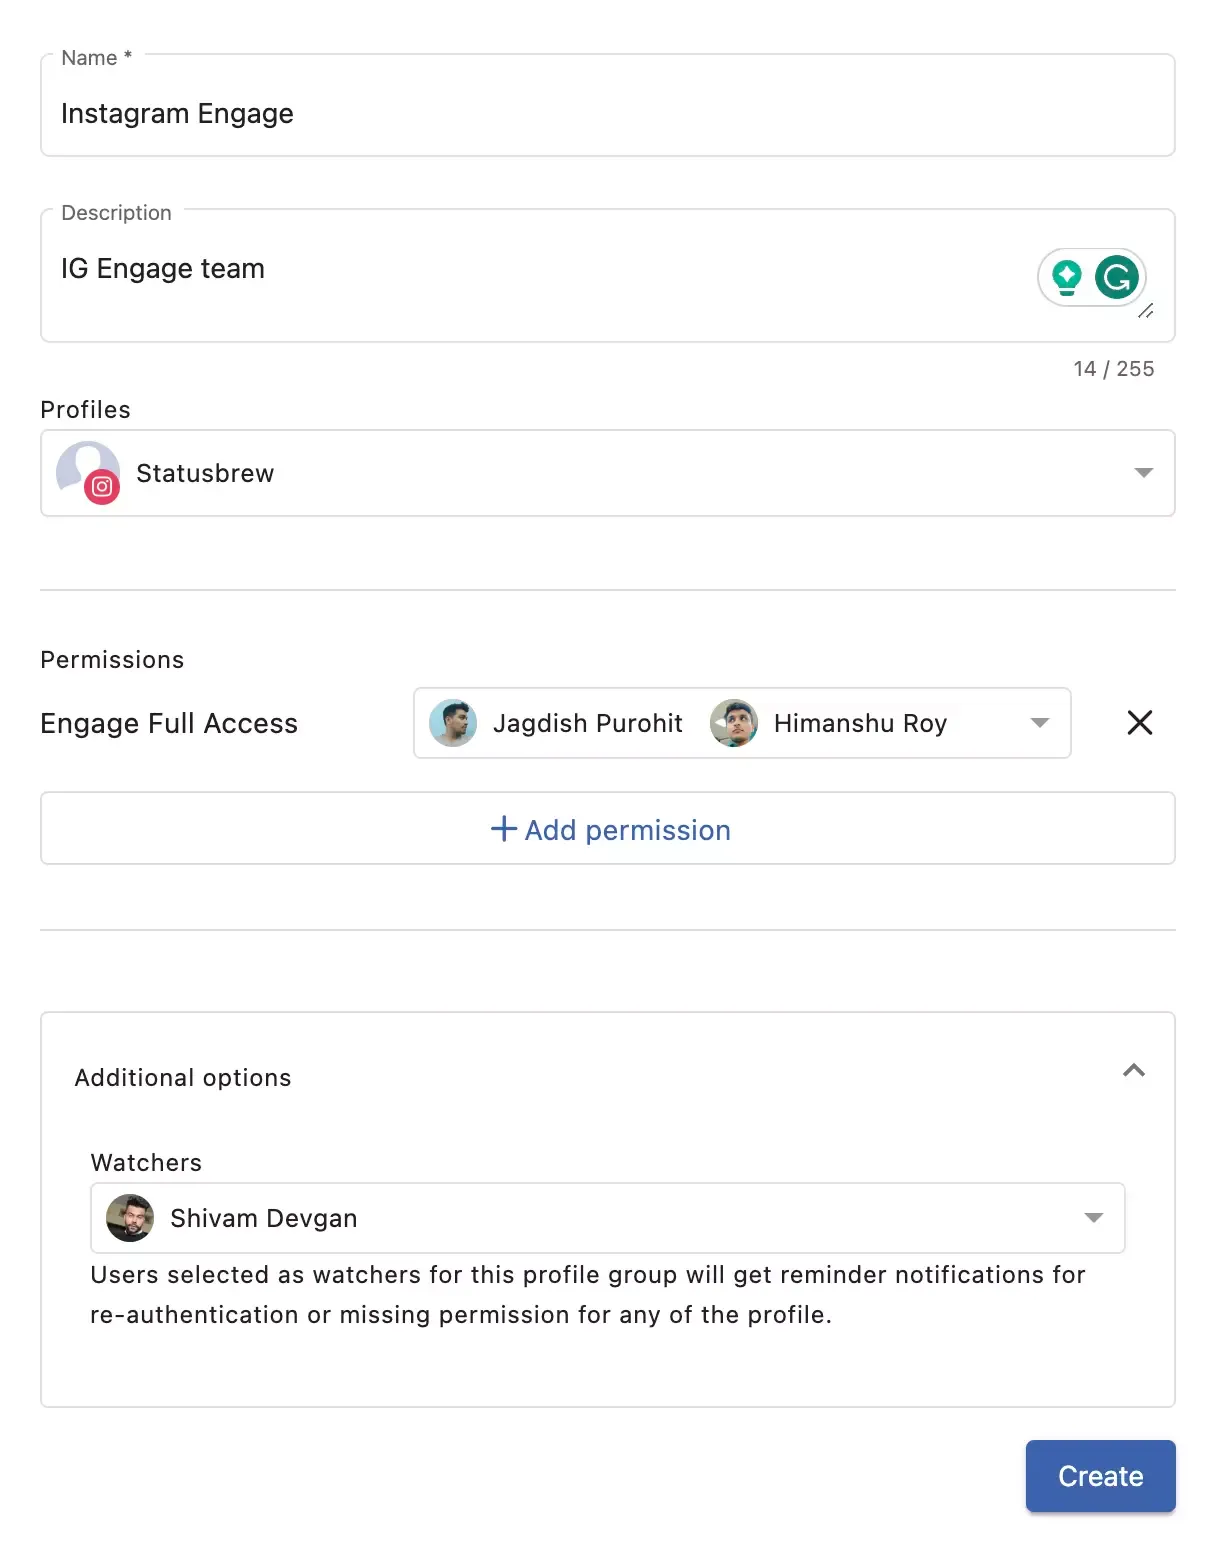
- Click on Create profile group to start creating a new group.
- Give your profile group a name and description that reflects its purpose or the team it represents.
- Choose the social media profiles that you want to include in the group.
- Set the access permissions for the selected profiles based on the team members' roles or responsibilities.
- Optionally, add watchers to the profile group.
- Save the changes and repeat the process for creating additional profile groups as needed.
Streamline Your Workflow!
The benefits of a social media approval tool are untold. When used rightly and smartly, it can help you in more ways than you can imagine in refining your approval workflows.
Whether you're a solo social media manager or part of a larger team, implementing a social media approval tool can make a world of difference.
From centralized collaboration to streamlined feedback and faster approvals, a powerful social media approval tool empowers you to take control of your content and ensure its quality and consistency.
So, don't let the chaos of content approvals slow you down. Take the leap and embrace the power of social media approval tools. Your team, your clients, and your sanity will thank you.
Take control of your social media approval process with Statusbrew. Simplify collaboration, eliminate bottlenecks, and ensure smooth content workflows. Try it today and experience the difference.


Explore the Statusbrew range of social media tools
Cancel anytime!